Copyright © 2017 ConSol Software GmbH - www.sakuli.org
![]()
General
-
Project Homepage: www.sakuli.org
-
Blog Entries: labs.consol.de/sakuli
-
 Twitter: @sakuli_e2e
 -
 Sourcecode: github.com/ConSol/sakuli
 -
Tutorials & Examples: github.com/ConSol/sakuli-examples
v1.1.0The documentation of all former Sakuli versions can be found on consol.github.io/sakuli
-
Stable/Latest version: consol.github.io/sakuli/latest
-
Dev version: latest
vX.X.X-SNAPSHOTversion
last updated: 12.2017

Contributors
At this point we want to thank all contributors, which helped to move this great project by submitting code, writing documentation, or adapting other tools to play well together with Sakuli.
-
Tobias Schneck - Sakuli Team / Project Leader, Core Development
-
Simon Meggle - Sakuli Team / Project Leader, Monitoring Integration
-
Christoph Deppisch - Sakuli Team / Core Development
-
Georgi Todorov - Sakuli Team / Core Development
-
Lukas Höfer - Sakuli Team / Consultant
-
Sven Nierlein
-
Philip Griesbacher - Sakuli Go Starter
-
Thomas Rothenbacher
-
Christopher Kreft
-
Sven Hettwer - OpenShift S2I build
(did we forget you? Please poke us):
Valued supporters
Very special thanks to all customers which always nourish this project with new ideas and impulses and make it possible in the first place to give it back to the community as Open Source Software. Thumbs up!
-
LIDL Stiftung & Co. KG
-
Deutsche Pfandbriefbank AG
-
Siemens AG, Global Services Information Technology
-
Federal Ministry for Economic Affairs and Energy
![]()
Download
Platform independent Java installer: sakuli-v1.1.0-installer.jar
See Maven Execution.
Raw Sakuli installation directory, containing Sakuli, Sahi and examples. Useful if you want to build your own installation routines. The installation scripts and the Sakuli binary can be found in sakuli-v1.1.0/bin/:
This manual as one PDF document: Download PDF
Branches & build status
| branch | build state | docker images state |
|---|---|---|
|
|
|
|
|


Why Sakuli?
There are already a variety of free end2end/automation tools on the market (Sahi, Selenium, WebInject, Sikuli, CasperJS, AutoIT , …), but each of them has at least one of the following drawbacks:
-
Too specifically: pure web testing tools can only deal with pure web content. Applets, Flash, dialogues generated by OS, browser dialogues etc. are invisible and a insurmountable hurdle for such tools.
-
Too generic: screen-based testing tools "see" everything the user sees. They are the best choice for GUI tests, but inappropriate for web tests, because each browser type has its own understanding of how to render and display a web page.
-
Far from reality: There are tools to test web applications on protocol level - but to know whether a web application is working or not requires a test from the user’s perspective.
-
Inflexible: Hardly one of these tools brings the ability to integrate into other systems (like Nagios or Jenkins).
Key Features
-
Platform-independent UI testing tool
-
End-2-End monitoring of application functionality and quality
-
Combines two automation technologies:
-
DOM based web testing
-
Image pattern based UI automation (for non-web content)
-
-
Scalable from single-client up to multi-node container setup for parallel execution
-
Integration of test results into
-
Monitoring systems (e.g. Nagios/Icinga)
-
CI builds (e.g. Jenkins)
-
Concept
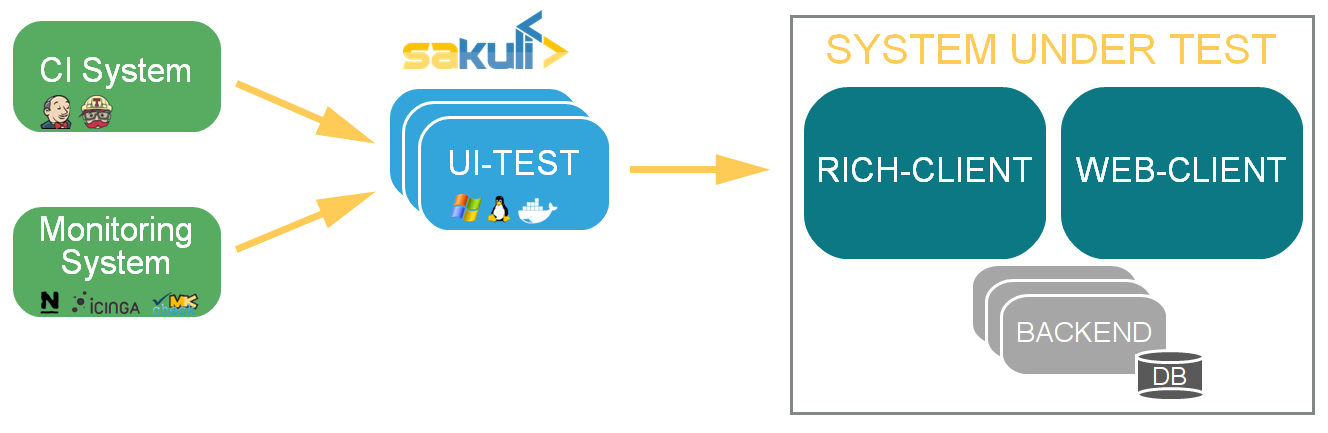
Sakuli simulates user actions on graphical user interfaces (web, fat client, citrix, …), and provides the obtained information (runtime, result, screenshots) to third party (e.g. Nagios compatible monitoring) systems.
Sakuli is written in Java and runs on many platforms:
-
MacOS
The Sakuli project brings together two Open-Source end-to-end testing tools which perfectly fit together: Sahi for web-based tests (by injecting JavaScript code into the browser), as well as the screenshot-based testing tool Sikuli, which allows the execution of keyboard and mouse actions on screen areas that have been defined by previously recorded screenshots and are recognized using the OpenCV engine.
Sakuli accesses both tools via its Java API and makes it possible to use them simultaneously. For example, web tests can be done very performant with Sahi (where a screenshot-based approach would be at best the second choice), whereas "off-DOM"-content can be catched with Sikuli. Whenever a web test comes into a situation which Sahi can’t handle (e.g. a PIN dialogue for a smartcard login), use a Sikuli command. On the other hand, pure tests of fat client applications can be easily be setup by using only the Sikuli functions of Sakuli.
The integration of Sakuli in other tools can be done by different so called forwarder modules:
| Forwarder | Technology | Use cases |
|---|---|---|
default |
- Log-Files and screenshots |
- Continuous Integration server |
- JDBC-SQL |
- Integration in Nagios based monitoring systems as active checks with check_mysql_health |
|
- Gearman |
- Integration in Nagios based monitoring systems as passive checks |
|
- Icinga2 REST API |
- Integration in Icinga2 as passive checks |
|
- Result spool file on check_mk agent |
- Integration in CheckMK through customizable spool file |
| For more information see Integration in other Tools |
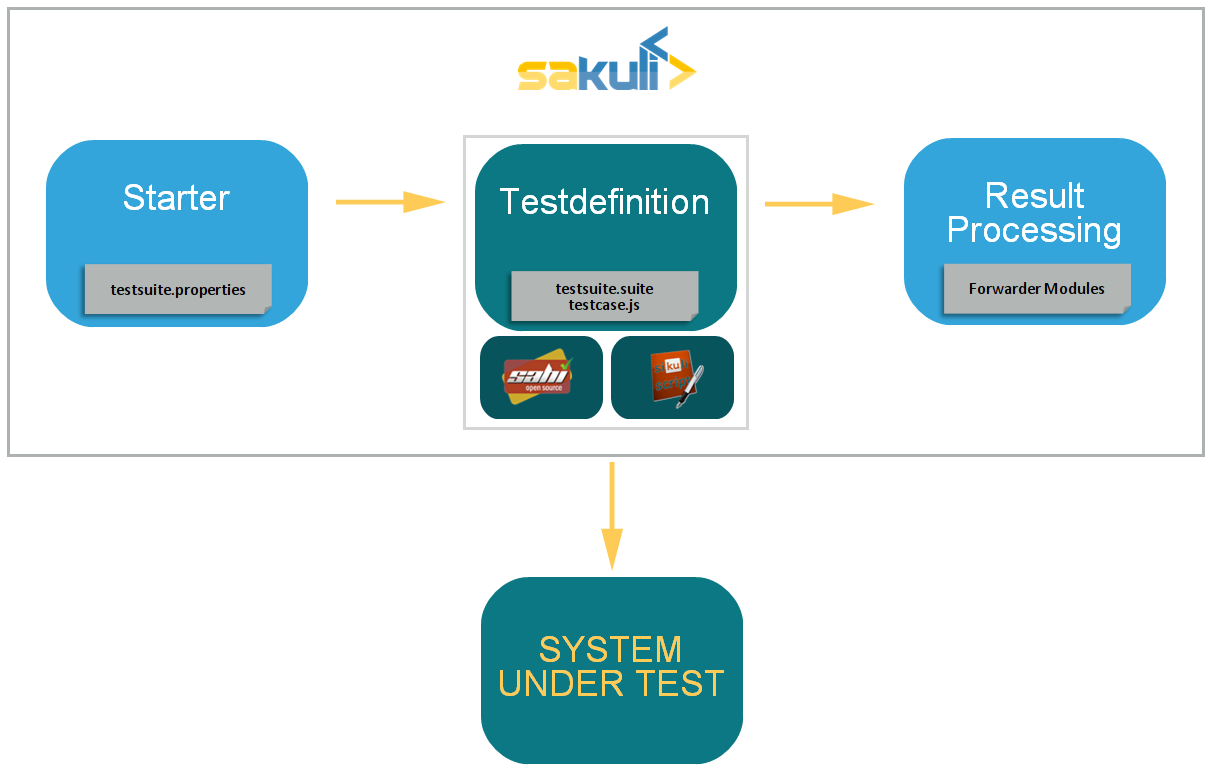
1. Manual
1.2. Execution Types
Sakuli supports different execution types. Each of the types have a special purpose:
Native Execution |
+ Supports all end user platforms |
+ Easy integration in maven build cycle |
|
Containerized Execution |
+ Ready to use E2E environment without installation process |
1.2.1. Native Execution
1.2.1.1. Windows Client
Installation
This page describes the steps to install and test Sakuli on Windows. If you want to update Sakuli, see the Upgrade process documentation.
The default installation path of Sakuli is %SAKULI_ROOT%. The particular Sakuli version is referenced as %SAKULI_HOME% (also called the "version" folder) which is inside of the folder %SAKULI_ROOT%:
> echo %SAKULI_ROOT%
  C:\Program Files (x86)\sakuli
> echo %SAKULI_HOME%
  C:\Program Files (x86)\sakuli\sakuli-v1.1.0
Values surrounded by double underscores are have to be filled individually by you (e.g. IP_ADDRESS).
You can run Sakuli on physical as well as on virtual Linux machines.
-
OS: Microsoft Windows (version 7 and higher)
-
64 Bit (recommended)
-
RAM: 2GB or more
-
CPU: at least two CPU cores
-
Software:
-
Java JRE >= 1.8
-
Set the desktop background to a homogeneous color.
-
disable any screen locking mechanisms
-
Run Sakuli with a dedicated user
-
Sakuli needs a reliable and predictable desktop environment: make sure that there are no pop-up windows of services or applications
-
If Sakuli is running within a VM, change the desktop resolution to a fixed value (e.g. 1024x768) and disable any auto-resizing mechanisms of the guest display. This ensures that the guest’s resolution does not change in case that you resize its window.
-
Ensure that now 3D effects or shadowing break your test. For Window 7 e.g. it’s recommended to use Windos Classic theme.
-
Ensure that the client should have only ONE physical screen.
-
Other optional steps see Troubleshooting.
-
Download the Sakuli Installer from http://labs.consol.de/sakuli/install
-
current development snapshot =
sakuli-vX.X.X-SNAPSHOT-installer.jar -
current stable version =
sakuli-vX.X.X-installer.jar(recommended)
-
Double-click on the downloaded .jar file to start the installer:
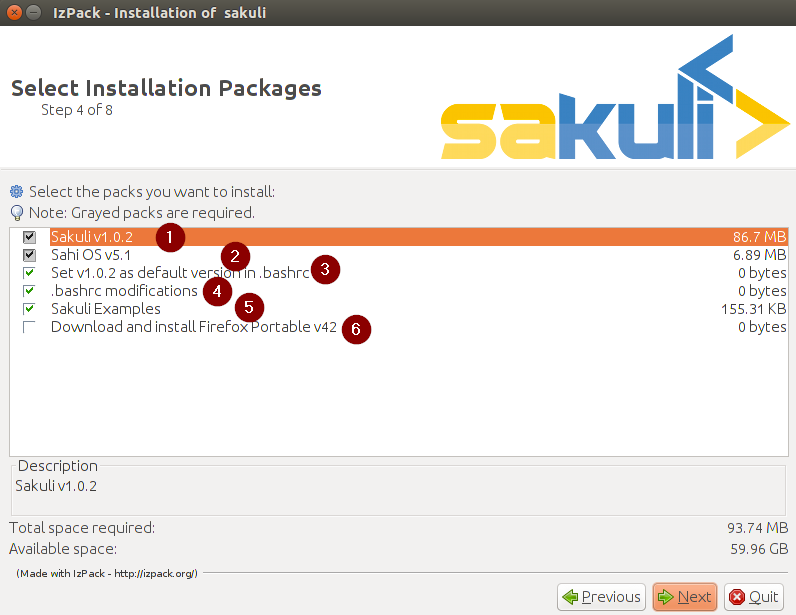
Read and accept the licence, choose the installation folder (any path the current user has rw permissions is ok) and select the packages to install:
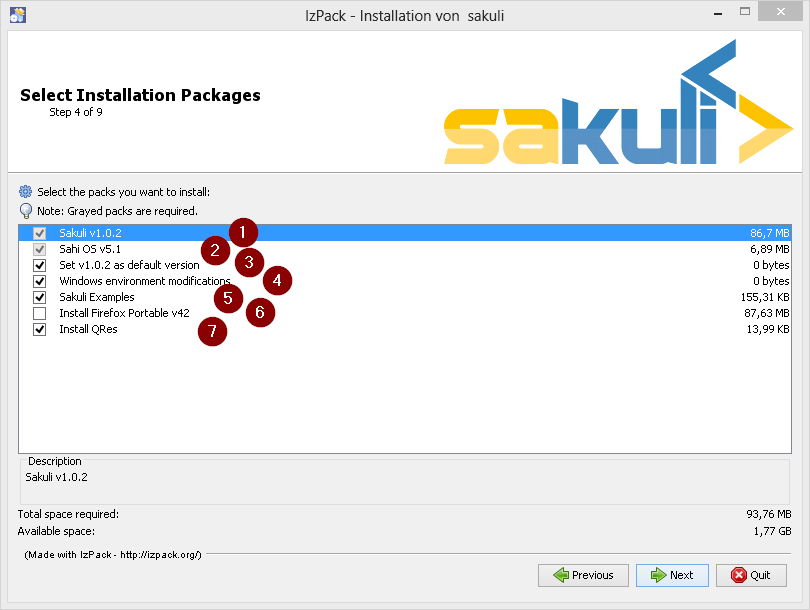
-
install Sakuli
-
install Sahi
-
set/update the environment variable
%SAKULI_HOME%to the new version. -
set/update environment settings which have proved as best practice for UI tests.
-
install one example test suite per OS which help you to test and understand Sakuli.
-
install Firefox Portable, which can be used exclusively for Sakuli Tests.
-
install QRes, a open source screen mode changer (Windows only)
In the end you are offered to generate a headless installation file which can be executed on other hosts with:
java -jar sakuli-vX.X.X-installer.jar auto-config.xmlReboot now to take the registry changes effect.
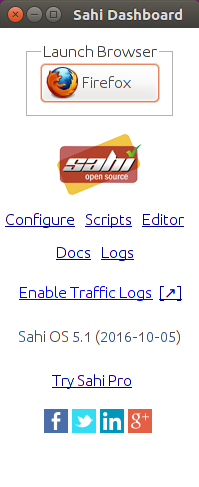
Now test if Sahi can start a Sahi-controlled browser.
Open the Sahi Dashboard, execute in cmd.exe:
cd "%SAKULI_ROOT%\sahi\userdata\bin"
start_dashboard.bat`
It should now list all available browsers on this system.
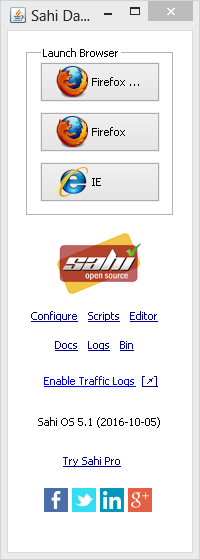
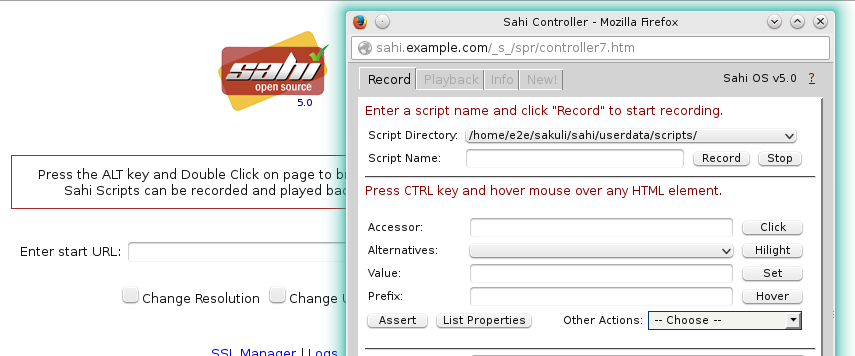
Click on any browser icon: it should start and present you the start page of Sahi:
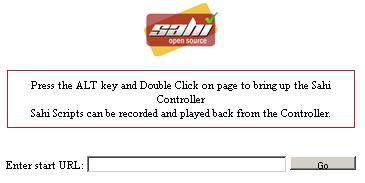
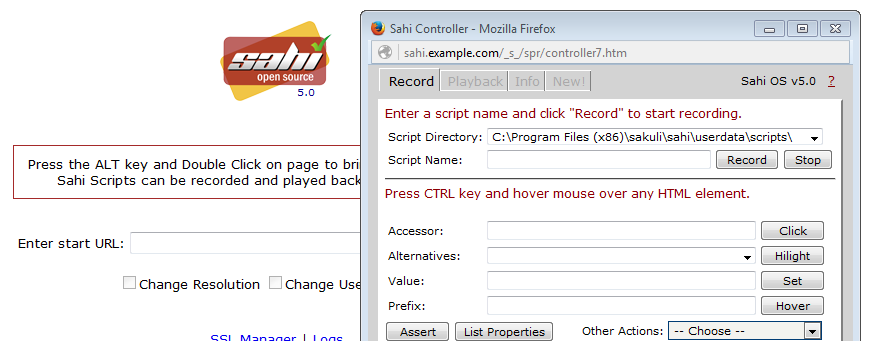
At last, test the Sahi Controller by holding the ALT key and double-clicking on any white space on the page. If you are getting a new window showing the "Sahi Controller", you’re done. Close all browser windows and Sahi.
You are now ready to run the first minimal Sakuli test to see if Sakuli and its components are working well together. Open a new terminal to start a test:
-
Windows 7:
sakuli run "%SAKULI_ROOT%\example_test_suites\example_windows7\" -
Windows 8:
sakuli run "%SAKULI_ROOT%\example_test_suites\example_windows8\"
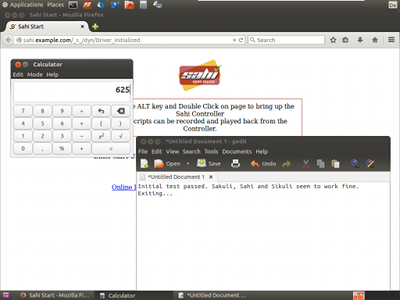
Sakuli should now
-
open Firefox with the Sakuli welcome page, highlight some page elements
-
open the calculator and calculate 525+100=625
-
open an editor and write a status message
Additional documentation:
-
If you are sitting behind a company proxy, refer to Sahi behind a proxy.
-
Refer to Browser configuration for instructions how to register other browsers.
Optional software
Currently, each Sakuli test requires to start a browser, which is not very handy for pure Sikuli GUI tests (=where no browser at all is needed). For that case, use a headless browser like PhantomJS. Refer to Browser configuration for more information.
Attention: PhantomJS 2 is currently unsupported. Use version 1.9.x
Use a screenshot tool which is able to
-
capture areas of the screen
-
delay the creation of screenshots for x seconds (important if Sikuli must navigate through menues)
A good choice is
-
Greenshot on Windows
Always make sure that screenshots are saved without compression. Sikuli uses a default similarity of 0.99, which internally means that "more than 99%" => 100% pixels must coincide. Decreasing similarity should only be neccessary if the pattern images are of poor quality or the region compared to always slightly differs from the pattern image.
Next steps
-
Read our first-steps tutorial and learn to handle Sakuli
-
Integrate Sakuli results in monitoring systems:
-
Sakuli can also be integrated in continuous integration environments like Jenkins
RDP peculiarities
There are four ways to connect to and work on a Sakuli client machine:
-
VNC
-
Console of a virtualization platform (ESX, Virtualbox, etc.)
-
Remote Desktop (Windows)
-
local screen
For case 1. and 2. there is nothing special to watch out for, except that the screen must not be locked (otherwise Sikuli will also see a locked screen). The screen content will be the same as displays on a local screen (4.).
For RDP on Windows there are some special things to know. Connecting to the Sakuli test client via RDP locks any existing local console session of that user and attaches (="moves") it to a RDP session.
Sakuli will just as well run within that RDP session. But closing/disconnecting/logging of that RDP session will not unlock the local console session again. Sakuli will see the same as a regular user: nothing but a locked screen. Read the next paragraph to learn how to avoid this.
LOGOFF.batTo log off a RDP session, right-click %SAKULI_HOME%\bin\helper\LOGOFF.bat and execute the script with administrator privileges. The script then
-
determines the current RDP session ID
-
redirects this session back to the local console
-
terminates the RDP session.
check_logon_session.ps1In %SAKULI_HOME%\setup\nagios you can find check_logon_session.ps1 which can be used as a client-side Nagios check to ensure that the Sakuli user is always logged on, either via RDP or on the local console. Instructions for the implementation of this check can be found in the script header.
Define a service dependency of all Sakuli checks to this logon check; this will ensure that a locked session will not raise false alarms.

Troubleshooting
If you have some errors with your Windows installation, you can check the following points:
Windows 7 comes by default with an "aero" theme, which is quite awkward for Sikuli, because there are many transparency effects which cause window elements to change their appearance dependend on the elements below. For that, change the theme to "Windows Classic".

Furthermore, change the colors of active and inactive title bars to non gradient:

The following steps have only to be done if you are accessing the Sakuli Client via RDP.
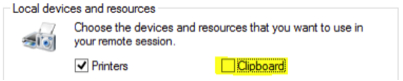
The "paste" function of Sakuli uses the clipboard at runtime to decrypt and paste passwords. For this reason, the clipboard exchange of the Sakuli client and the RDP client should be suppressed in the settings tab of your local Remote Desktop client:
This can be set globally in the registry of your local host:
-
regedit -
[ HKEY_CURRENT_USER\Software\Microsoft\Terminal Server Client ] -
DisableDriveRedirection(DWORD)=>1
If you minimize the Remote Desktop window (the window that display the remote computer’s desktop), the operating system switches the remote session to a "GUI-less mode" which does not transfer any window data anymore. As a result, Sakuli is unable to interact with the tested application’s GUI, as the whole screen is not visible.
To disable the "GUI-less" mode on your local host:
-
regedit -
[ HKEY_CURRENT_USER\Software\Microsoft\Terminal Server Client ] -
RemoteDesktop_SuppressWhenMinimized(DWORD)=>2
1.2.1.2. Linux Client
Installation
This page describes the steps to install and test Sakuli on Ubuntu Linux 16.04 LTS. For other distributions (CentOS, OpenSuSE, …) they be mostly identical. If you want to update Sakuli, see the Upgrade process documentation.
The default installation path of Sakuli is $SAKULI_ROOT. The particular Sakuli version is referenced as $SAKULI_HOME (also called the "version" folder) which is inside of the folder $SAKULI_ROOT:
> echo $SAKULI_ROOT
  /home/user/sakuli/
> echo $SAKULI_HOME
  /home/user/sakuli/sakuli-v1.1.0
Values surrounded by double underscores are have to be filled individually by you (e.g. IP_ADDRESS).
You can run Sakuli on physical as well as on virtual Linux machines.
-
Linux OS (here: Ubuntu 16.04 LTS Desktop)
-
64 Bit (recommended)
-
RAM: 2GB or more
-
CPU: at least two CPU cores
-
Set the desktop background to a homogeneous color.
-
disable any screen locking mechanisms
-
Run Sakuli with a dedicated user
-
Sakuli needs a reliable and predictable desktop environment: make sure that there are no pop-up windows of services or applications
-
If Sakuli is running within a VM, change the desktop resolution to a fixed value (e.g. 1024x768) and disable any auto-resizing mechanisms of the guest display. This ensures that the guest’s resolution does not change in case that you resize its window.
-
Ensure that now 3D effects or shadowing break your test. For Ubuntu e.g. it’s recommended to use
gnome-session-flashbacktheme. -
Ensure that the client should have only ONE physical screen.
-
Other optional steps see Troubleshooting.
-
Download the Sakuli Installer from http://labs.consol.de/sakuli/install
-
current development snapshot =
sakuli-vX.X.X-SNAPSHOT-installer.jar -
current stable version =
sakuli-vX.X.X-installer.jar(recommended)
-
Execute java -jar sakuli-vX.X.X-installer.jar to start the installer:
Read and accept the licence, choose the installation folder (any path the current user has rw permissions is ok) and select the packages to install:
-
install Sakuli
-
install Sahi
-
set/update the environment variable
$SAKULI_HOMEwhich points to the new version. -
set/update
.bashrc -
install one example test suite per OS which help you to test and understand Sakuli.
-
install Firefox Portable, which can be used exclusively for Sakuli Tests
In the end you are offered to generate a headless installation file which can be executed on other hosts with:
java -jar sakuli-vX.X.X-installer.jar auto-config.xmlNow test if Sahi can start a Sahi-controlled browser.
Open the Sahi Dashboard, execute:
cd $SAKULI_ROOT/sahi/userdata/bin
./start_dashboard.sh
It should now list all available browsers on this system.
Click on any browser icon, it should start and present you the start page of Sahi:
At last, test the Sahi Controller by holding the ALT key and double-clicking on any white space on the page. If you are getting a new window showing the "Sahi Controller", you’re done. Close all browser windows and Sahi.
On Linux deskops the ALT key is often predefined to drag windows. In this case, open $SAKULI_HOME/sahi/config/sahi.properties and change the "hotkey" property:
|
controller.hotkey=SHIFTYou are now ready to run the first minimal Sakuli test to see if Sakuli and its components are working well together. Open a new terminal to start a test:
sakuli run $SAKULI_ROOT/example_test_suites/example_ubuntuSakuli should now
-
open Firefox with the Sakuli welcome page, highlight some page elements
-
open the calculator and calculate 525+100=625
-
open an editor and write a status message
Additional documentation
-
If you are sitting behind a company proxy, refer to Sahi behind a proxy.
-
Refer to Browser configuration for instructions how to register other browsers.
Optional software
Currently, each Sakuli test requires to start a browser, which is not very handy for pure Sikuli GUI tests (=where no browser at all is needed). For that case, use a headless browser like PhantomJS. Refer to Browser configuration for more information.
Attention: PhantomJS 2 is currently unsupported. Use version 1.9.x
Use a screenshot tool which is able to
-
capture areas of the screen
-
delay the creation of screenshots for x seconds (important if Sikuli must navigate through menues)
A good choice is
Always make sure that screenshots are saved without compression. Sikuli uses a default similarity of 0.99, which internally means that "more than 99%" => 100% pixels must coincide. Decreasing similarity should only be neccessary if the pattern images are of poor quality or the region compared to always slightly differs from the pattern image.
Next steps
-
Read our first-steps tutorial and learn to handle Sakuli
-
Integrate Sakuli results in monitoring systems:
-
Sakuli can also be integrated in continuous integration environments like Jenkins
Headless checks
Running Sakuli on the user desktop is nice, but has the drawback that the session gets highjacked on each Sakuli run. Moving the mouse e.g. can have negative effects on the test execution.
For that reason we advise to run Linux based Sakuli checks in in one of the following modes:
-
in a virtual display (="headless"), which is straightforward in Linux (documented on this page)
-
in Docker containers (more scalable)
On Ubuntu, first install vnc4server:
sudo apt-get install vnc4serverStart vncserver for the first time to create a session password:
~$ vncserver

You will require a password to access your desktops.
Password:
Verify:

New 'sakulidemo:1 (sakuli)' desktop is sakulidemo:1

Creating default startup script __HOME__/.vnc/xstartup
Starting applications specified in __HOME__/.vnc/xstartup
Log file is __HOME__/.vnc/sakulidemo:1.log
.vnc/xstartup controls what to start within a xvnc session. Do not touch this file on OpenSUSE; on Ubuntu you have to replace its content with the following lines (because you are using Install GNOME session flashback theme, aren’t you…?):
~$ vim .vnc/xstartup

#!/bin/sh
export XKL_XMODMAP_DISABLE=1
unset SESSION_MANAGER
unset DBUS_SESSION_BUS_ADDRESS

gnome-panel &
gnome-settings-daemon &
metacity &
Restart the current vnc sesssion:
~$ vncserver -kill :1 && vncserverNow open a RDP client (on Ubuntu: Applications - Internet - Remmina Remote Desktop Client) and enter the connection data:
-
Protocol: VNC
-
Server: localhost:5901
-
Password:
VNC_SESSION_PASSWORD
You should see now an empty GNOME/KDE desktop - started headless!
You are now ready to run the minimal Sakuli check in headless (=VNC) mode. Sakuli provides for this task a pre- and postHook script, which can be used like follow:
On the Ubuntu desktop, open a terminal window and execute
-
on Ubuntu:
sakuli run INST_DIR/example_test_suites/example_ubuntu/ --vnc -
on openSUSE:
SAKULI_HOME/bin/sakuli.sh --run INST_DIR/example_test_suites/example_opensuse/ --vnc
You should see that Sakuli
-
opens Firefox
-
opens the calculator and calculates 525+100=625
-
opens an editor and writes a status message
Troubleshooting
If you have some errors with your Linux installation, you can check the following points:
Before Ubuntu 16.04 the package name was gnome-session-fallback
|
Sakuli can test on Unity, of course - but gnome-session-flashback is more than sufficient and has the advantage that 3D effects and shadowing won’t break your test.
Install and set gnome-seesion-flashback as default:
apt-get update
apt-get install -y gnome-session-flashback
echo "[SeatDefaults]" >> /etc/lightdm/lightdm.conf
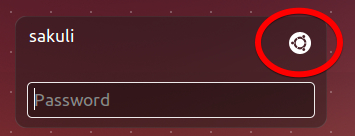
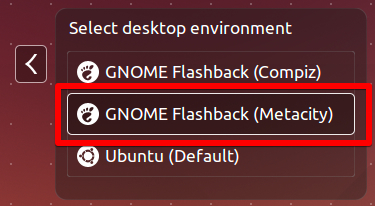
echo "user-session=gnome-flashback-metacity" >> /etc/lightdm/lightdm.confAfter the installation, relogin/restart and ensure that the desktop environment GNOME Flashback (Metacity) is selected:
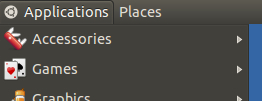
The Ubuntu menu bar should have changed now to the "classical" one:
In headless checks you will encounter problems using the TAB key as well as s:
-
The TAB key will switch applications (like
ALT + TAB) -
swill open the applications menu
For some reason (?), gsettings binds s and TAB to the Super key by default. Open a terminal as the Sakuli user and execute the following commands to restore that to the default:
gsettings set org.gnome.desktop.wm.keybindings switch-applications "['<Alt>Tab']"
gsettings set org.gnome.desktop.wm.keybindings panel-main-menu "['<Alt>F1']"
1.2.1.3. Upgrade process
Before you upgrade your current Sakuli installation, please ensure that you have read the Change Log.
Execute SAKULI_HOME/../Uninstaller/uninstaller.jar to remove the current installed version. This will only affect the files in SAKULI_HOME. The uninstaller removes all installed files, and resets the environment configuration.
After that just install the new version.
1.2.2. Maven Execution
1.2.2.1. Sakuli Java DSL
Sakuli provides a Java DSL for writing test cases in pure Java. The DSL is designed as fluent API and provides the exact same capabilities as the Javascript API. The Sakuli Java API enables users to write Sakuli tests in pure Java unit tests using JUnit or TestNG. The good news about that is that you are able to access any native application UI with screen related actions as easy as in JavaScript API.
Installation
-
Ensure that all installation packages for target OS are installed:
-
Install Java Development Kit version 8.
-
Install Maven (Version 3.2.5 or higher).
-
Download
java-exampledirectory from github.com/ConSol/sakuli-examples.
-
Import
java-exampleto IDE (IntelliJ or Eclipse…) as Maven project: Example for IntelliJ: -
Choose
Project from Existing Sources…in File menu. -
Choose
pom.xmland clicknextbutton till the project is imported.
Try to compile the new Sakuli Maven project. If an ERROR is reported please check your pom.xml first. The following section has to be present in your Maven POM:
<repository>
    <id>labs-consol-snapshots</id>
    <name>ConSol* Labs Repository</name>
    <url>http://labs.consol.de/maven/snapshots-repository</url>
    <snapshots>
        <enabled>true</enabled>
    </snapshots>
    <releases>
        <enabled>false</enabled>
    </releases>
</repository>
The ConSol labs Maven repository should be placed to the repositories section in your POM.
Usage
The Sakuli Java DSL comes to you as Maven module JAR file. You can add the module to your Sakuli project as Maven dependency. Currently the Java tests have to be written with the TestNG unit framework, so also provide the TestNG Maven dependency in your project POM:
    <dependencies>
        <dependency>
            <groupId>org.sakuli</groupId>
            <artifactId>java-dsl</artifactId>
            <version>${sakuli.version}</version>
            <scope>test</scope>
        </dependency>
        <!-- needed for AbstractSakuliTest class -->
        <dependency>
            <groupId>org.sakuli</groupId>
            <artifactId>java-dsl</artifactId>
            <version>${sakuli.version}</version>
            <type>test-jar</type>
            <scope>test</scope>
        </dependency>
        <dependency>
            <groupId>org.testng</groupId>
            <artifactId>testng</artifactId>
            <version>${testng.version}</version>
            <scope>test</scope>
        </dependency>
    </dependencies>
In the last step, we have to provide also some local resources for our Sakuli test setup. Therefore we use the maven-dependency-plugin to unpack all needed Sakuli resources to our local project.build.outputDirectory:
    <build>
        <plugins>
            <plugin>
                <groupId>org.apache.maven.plugins</groupId>
                <artifactId>maven-dependency-plugin</artifactId>
                <executions>
                    <execution>
                        <id>unpack</id>
                        <phase>generate-resources</phase>
                        <goals>
                            <goal>unpack</goal>
                        </goals>
                        <configuration>
                            <artifactItems>
                                <artifactItem>
                                    <groupId>org.sakuli</groupId>
                                    <artifactId>java-dsl</artifactId>
                                    <version>${sakuli.version}</version>
                                    <type>jar</type>
                                    <overWrite>true</overWrite>
                                </artifactItem>
                            </artifactItems>
                            <outputDirectory>${project.build.outputDirectory}</outputDirectory>
                        </configuration>
                    </execution>
                </executions>
            </plugin>
        </plugins>
    </build>
Now we are ready to write Java tests. See the following sample test which uses TestNG unit testing library in combination with Sakuli Java DSL:
        public class FirstExampleTest extends AbstractSakuliTest {

            Environment env;

            @BeforeClass
            @Override
            public void initTC() throws Exception {
                super.initTC();
                env = new Environment();
            }

            @Override
            protected TestCaseInitParameter getTestCaseInitParameter() throws Exception {
                return new TestCaseInitParameter("test1");
            }

            @Test
            public void testCitrus() throws Exception {
                browser.open();
                browser.navigateTo("http://www.citrusframework.org/");

                ElementStub heading1 = browser.paragraph("Citrus Integration Testing");
                heading1.highlight();
                assertTrue(heading1.isVisible());

                ElementStub download = browser.link("/Download v.*/");
                download.highlight();
                assertTrue(download.isVisible());
                download.click();

                ElementStub downloadLink = browser.cell("2.6.1");
                downloadLink.highlight();
                assertTrue(downloadLink.isVisible());
            }
        }
All people that are familiar with TestNG unit testing will notice that a Sakuli Java test is nothing but a normal TestNG
unit test. Sakuli just adds the end-to-end testing capabilities. The test class extends an abstract class coming from Sakuli.
This AbstractSakuliTest provides convenient access to the Sakuli Java DSL API.
These are methods such as initTC() and getTestCaseInitParameter() that are customizable in test classes. Just
overwrite the methods and add custom logic. In addition to that the abstract super class in Sakuli provides access to the
browser field that represents the Sahi web browser capabilities. This browser object is used in the test cases to trigger
Sahi related actions such as opening a website and highlighting links or buttons.
In the example above we open a website http://www.citrusframework.org/ and assert the content on that page. In the example above we open a website http://www.citrusframework.org/ and assert the content on that page.
Now lets add some testing logic that works with content other than HTML dom related content. We add a test step that puts focus to the web browser task bar. In detail we click into the browser search input field, fill in a word and perform the search.
        new Region().find("search").click().type("Citrus");
        env.sleep(1);
        new Region().takeScreenshot("test.png");
The region object provides access to Sakuli screen related actions such as finding a component on the screen. We can click that region
and fill in some characters (e.g. in the search input field). After that we sleep some time to give the search operation some
time to perform its actions. As a last step we take a screenshot of the result page and the test is finished.
This little example demonstrates the basic usage of the Sakuli Java API. We write normal Java unit tests with TestNG and add Sakuli specific actions on HTML dom content in a browser or any native application operations by screen related access.
Next we will setup a complete sample project for Sakuli Java.
Sakuli Java Example
The next section describes how to get started with the Sakuli Java DSL by example. The Java example is a fully runnable Java sample test case. So at the end of this chapter you should be able to start writing Sakuli test in pure Java.
An example how to use Java DSL and setup Maven you will find at: github.com/ConSol/sakuli-examples
After this is done please execute the Maven compile phase.
For customized browser detection create your own browser_types.xml file. This file should be located in main/resources/sahi/userdata/config package in src folder.
The content of this file looks like follows:
    <browserTypes>
        <browserType>
            <name>firefox</name>
            <displayName>Firefox</displayName>
            <icon>firefox.png</icon>
            <path>$ProgramFiles (x86)\Mozilla Firefox\firefox.exe</path>
            <options>-profile "$userDir/browser/ff/profiles/sahi$threadNo" -no-remote</options>
            <processName>firefox.exe</processName>
            <capacity>5</capacity>
        </browserType>

        <browserType>
            <name>ie</name>
            <displayName>IE</displayName>
            <icon>ie.png</icon>
            <path>$ProgramFiles\Internet Explorer\iexplore.exe</path>
            <options>-noframemerging</options>
            <processName>iexplore.exe</processName>
            <useSystemProxy>true</useSystemProxy>
            <capacity>5</capacity>
        </browserType>

        <browserType>
            <name>chrome</name>
            <displayName>Chrome</displayName>
            <icon>chrome.png</icon>
            <path>C:\Program Files (x86)\Google\Chrome\Application\chrome.exe</path>
            <options>--incognito --user-data-dir=$userDir\browser\chrome\profiles\sahi$threadNo --proxy-server=localhost:9999 --disable-popup-blocking</options>
            <processName>chrome.exe</processName>
            <capacity>5</capacity>
        </browserType>

        <browserType>
            <name>safari</name>
            <displayName>Safari</displayName>
            <icon>safari.png</icon>
            <path>$ProgramFiles (x86)\Safari\Safari.exe</path>
            <options> </options>
            <processName>safari.exe</processName>
            <useSystemProxy>true</useSystemProxy>
            <capacity>1</capacity>
        </browserType>

        <browserType>
            <name>opera</name>
            <displayName>Opera</displayName>
            <icon>opera.png</icon>
            <path>$ProgramFiles (x86)\Opera\opera.exe</path>
            <options> </options>
            <processName>opera.exe</processName>
            <useSystemProxy>true</useSystemProxy>
            <capacity>1</capacity>
        </browserType>

</browserTypes>| If needed change the <path> for your own locations of each browser! |
Now you can execute test phase and enjoy the successful execution of the test.
HTTPS-Sites
As workaround for issue #131 you can follow the instructions of HTTPS support in Sahi and copy afterwards the files from java-example/target/classes/sahi/userdata/certs to java-example/src/main/resources/sahi/userdata/certs. This will copy the trusted certificates when building the project and allows a clean run. Also see Automatic HTTPS Certificate Usage which files have to been copied for running the tests on different host.
1.2.3. Containerized Execution
1.2.3.1. Sakuli Docker Images
Docker allows you to run a Sakuli test in an isolated environment, called "container", which is always started off from the same base image. This ensures that tests always run under equal conditions.
Image OS types
The repository’s subfolder ./docker contains all source files Sakuli docker images are made of. Currently we provide images on DockerHub - Sakuli Images for:
| Docker image | OS | UI | Test execution |
|---|---|---|---|
|
CentOS 7 |
Xfce4 |
Tests in JavaScript (Rhino Engine) |
|
CentOS 7 |
Xfce4 |
Java 8, Maven, TestNG-Test |
|
Ubuntu 16.04 |
Xfce4 |
Tests in JavaScript (Rhino Engine) |
|
Ubuntu 16.04 |
Xfce4 |
Java 8, Maven, TestNG-Test |
|
CentOS 7 |
IceWM |
Tests in JavaScript (Rhino Engine) |
|
CentOS 7 |
IceWM |
Java 8, Maven, TestNG-Test |
|
Ubuntu 16.04 |
IceWM |
Tests in JavaScript (Rhino Engine) |
|
Ubuntu 16.04 |
IceWm |
Java 8, Maven, TestNG-Test |
Image tags
The build process on DockerHub is triggered by Github hooks; that means that you are always getting the current version for the two branches
-
master -> image tag "latest": contains the latest stable release of Sakuli
-
dev -> image tag "dev": contains the latest snapshot version of Sakuli
Architecture of Sakuli Containers
Each Sakuli docker image is installed with the following components:
Since version 1.1.0 all containers run as non-root user.
The running containers are accessible with VNC (default password: sakuli) by:
-
VNC viewer:
DOCKER_HOST:5901 -
noVNC HTML5 client: link: http://localhost:6901/vnc_auto.html?password=sakuli
Get Sakuli Docker Images
The following example command pulls the CentOS7 image from DockerHub:
~$ docker pull consol/sakuli-centos-xfceAlternatively, you can build this image from the sources:
~$ git clone https://github.com/ConSol/sakuli.git
~$ docker build -t consol/sakuli-centos-xfce docker/sakuli-centos-xfce .Once you have pulled/built the image, you can start a container on top of it which binds port 5901/tcp and 6901/tcp to localhost (on native docker installations; $DOCKER_IP on boot2docker):
# default tag "latest" = Sakuli stable
~$ docker run -it -p 5901:5901 -p 6901:6901 consol/sakuli-centos-xfce
# tag "dev" = Sakuli Snapshot version of dev branch
~$ docker run -it -p 5901:5901 -p 6901:6901 consol/sakuli-centos-xfce:dev
The container will execute a small headless self-test and exit afterwards. Read on to learn how to execute your own JavaScript or Java based tests within this containers.
Run JavaScript based Test
There are three important lines in the Dockerfile of each Sakuli image which define what has to be done on a container start:
ENV SAKULI_TEST_SUITE $SAKULI_ROOT/test
ENTRYPOINT ["/dockerstartup/startup.sh"]-
ENTRYPOINTis the command which is executed once the container is started withdocker run. -
ENV SAKULI_TEST_SUITEis set to the path of a test suite which has to run when the container starts. By default, this is set to the built-in folder/headless/sakuli/testwhich contains already a small example.
There is more than one way to integrate a custom testsuite in a container, discussed in the following.
Assume you want to run a suite called suite_1 located on your host at the path /home/myuser/my-sakuli-testsuites - use one of the following ways:
Mount the suite folder on your host into the container and override CMD from Dockerfile (=argument for ENTRYPOINT) with custom parameters for the Sakuli starter sakuli. In this way you can also give further parameters to Sakuli e.g. to use another browser (-browser chrome).
# running tests in chrome
~$ docker run -it -p 5901:5901 -p 6901:6901 consol/sakuli-centos-xfce run /headless/sakuli/test -browser chrome
To get all possible command line parameters call docker run consol/sakuli-ubuntu-xfce -help.
CMD can be overwritten in two ways:
~$ docker run -it -p 5901:5901 -p 6901:6901 -v "/home/myuser/my-sakuli-testsuites:/my-sakuli-testsuites" consol/sakuli-centos-xfce 'run /my-sakuli-testsuites/suite_1'This command will
-
mount the test suites folder to
/my-sakuli-testsuiteswithin the container -
execute the suite
suite_1
See docker run command.
SAKULI_TEST_SUITEMount a folder on your host into the container and overwrite the environment variable SAKULI_TEST_SUITE.
~$ docker run -it -p 5901:5901 -p 6901:6901   \\
     -v "/home/myuser/my-sakuli-testsuites:/my-sakuli-testsuites"   \\
     -e "SAKULI_TEST_SUITE=/my-sakuli-testsuites/suite_1"   \\
consol/sakuli-ubuntu-xfceRun Java based test
Also for Sakuli test writen in Java and executed through Maven, we provide to preconfigured docker images: consol/sakuli-xxx-xxx-java. For more information about how to write a Java based Sakuli test see Sakuli Java DSL. Now take a look at the important lines in the Dockerfile which define how the container will start:
ENV SAKULI_TEST_SUITE /opt/maven
WORKDIR $SAKULI_TEST_SUITE
ENTRYPOINT ["/root/scripts/start_hook.sh"]-
ENV SAKULI_TEST_SUITEis set to the path of a test suite which has to run when the container starts. By default, this is set to/opt/mavenwhich contains already a small example. -
WORKDIRis set to the path, where the maven build will be executed. By default, this is set to the built-in example folder/opt/maven. -
ENTRYPOINTis the script which is executed once the container is started withdocker run. It starts the vnc environment and executes by defaultmvn clean test.
Assume you want to run the Sakuli end-2-end test from your Maven project located at the path /home/myuser/my-sakuli-maven-project you can executed the Maven build in the inside of the Sakuli container like follow:
~$ docker run -it -p 5901:5901 -p 6901:6901 -v /home/myuser/my-sakuli-maven-project:/opt/maven consol/sakuli-ubuntu-xfce-javaThis command will
-
mount the test suites folder to
/home/myuser/my-sakuli-maven-projectwithin the container -
execute the maven build with default command
mvn clean test
If you want to for example also build youre maven artifacts over mvn install overwrite the default command like follow:
~$ docker run -it -p 5901:5901 -p 6901:6901 -v /home/myuser/my-sakuli-maven-project:/opt/maven consol/sakuli-ubuntu-xfce-java mvn clean installSee Run Java based test.
Extend a Sakuli Image with your own software
Since 1.1.0 the Sakuli image run as non-root user per default, so that mean, if you want to extend the image and install software, you have to switch in the Dockerfile back to the root user:
## Custom Dockerfile
FROM consol/sakuli-centos-xfce:v1.1.0

MAINTAINER Tobias Schneck "tobias.schneck@consol.de"
ENV REFRESHED_AT 2017-03-17
ENV TZ=Europe/Berlin

## Install a PDF viewer
USER 0
RUN yum install -y libsane-hpaio http://get.code-industry.net/public/master-pdf-editor-4.0.30_qt5.x86_64.rpm \
    && yum clean all
## switch back to default user
USER 1984
Change User of running Sakuli Container
Per default, since version 1.1.0 all container processes will executed with user id 1984. You can chnage the user id like follow:
0)Add the --user flag to your docker run command:
~$ docker run -it --user 0 -p 6911:6901 consol/sakuli-ubuntu-xfceAdd the --user flag to your docker run command:
~$ docker run -it -p 6911:6901 --user $(id -u):$(id -g) consol/sakuli-ubuntu-xfceOverride VNC environment variables
The following VNC environment variables can be overwritten at the docker run phase to customize your desktop environment inside the container:
-
VNC_COL_DEPTH, default:24 -
VNC_RESOLUTION, default:1280x1024 -
VNC_PW, default:sakuli
For example, the password for VNC could be set like this:
~$ docker run -it -p 5901:5901 -p 6901:6901 -e "VNC_PW=my-new-password"  \\
     consol/sakuli-ubuntu-xfce
Create Screenhots for Sakuli tests
Due to the fact, that your application under test is running in the container specific UI environment, it’s also recommend to create the screenhot snippets for the Sakuli Testdefinition in the inside of the container. This prevent some issues with recognizing images because of bad image compression, see Sikuli does not recognize images.
takeScreenshot methodTo get a new screenshot of some application window, you can modify you current test case and add for example the bellow code snippets of the method Region.takeScreenshot(filename):
//entire screen:
env.takeScreenshot("/tmp/my-screenshot.png");

//specific region
new RegionRectangle(0,0,100,100).takeScreenshot("/tmp/my-screenshot.png");

//extended region of an existing one
new Region().find("calculator-logo.png").grow(200,200).takeScreenshot("/tmp/my-screenshot.png");
After the test suite run, you can copy out the created screenshot from docker container, if needed crop it with some image manipulating tool, and add it to our test suite.
~$ docker cp <containter-id>:/tmp/my-scrot-screenshot.png $(pwd)/my-testsuite/
~$ ls -la my-testsuite/
scrot toolBefore using Scrot prepare your container UI like you will needed for the screenshot via VNC http://<dockerhost>:<mapped-port>/vnc_auto.html?password=sakuli. If you wan’t to stop the sakuli test execution on a particular point, just use the Environment.sleep(seconds) method:
    new Application("/usr/bin/gnome-calculator").open();
    env.sleep(Number.MAX_VALUE);
The test case will stop at the above defined position. Then you can login to the container via docker exec and create a new screenshot with the scrot <filename> command. If you use the scrot -s flag you can select a rectangle, over the VNC control page http://<docker-host>:<mapped-port>/vnc_auto.html?password=sakuli.
~$ docker exec -it <container-id> bash
~$ scrot -s /tmp/my-scrot-screenshot.png
~$ ls -la /tmp/*.png
-rw-rw-rw- 1 default root 35329 Aug 29 15:28 /tmp/my-scrot-screenshot.png
Now you can copy out the created screenshot from docker container and add it to our test suite.
~$ docker cp <containter-id>:/tmp/my-scrot-screenshot.png $(pwd)/my-testsuite/
View only VNC
To prevent unwanted control over the VNC connection, it’s possible to set environment variable VNC_VIEW_ONLY=true. If set the docker startup script will create a random cryptic password for the control connection and use the value of VNC_PW for the view only connection.
~$ docker run -it -p 6901:6901 -e VNC_VIEW_ONLY=true consol/sakuli-ubuntu-xfce
Writing HTTPS Sahi web tests
Depending on the Sahi proxy, Sakuli will break the HTTPS connections between the website and test engine. Due to that case it is necessary to import the URL specific self-signed certificates like described at HTTPS support in Sahi. In a containerized environment we need to prepare the browser before the tests starts with the expected certificates like described at Automatic HTTPS Certificate Usage. For example if you use the Firefox browser you can do the following steps:
-
Start your preferred Sakuli docker image with
docker run -it -p 6901:6901 consol/sakuli-ubuntu-xfce bashto enter the container and connect into it by VNC http://localhost:6901/vnc_auto.html?password=sakuli -
Start Sahi dashboard:
~$ cd $SAKULI_ROOT/sahi/userdata/bin && ./start_dashboard.sh
-
Create the firefox certificates for https://labs.consol.de like described at Sahi HTTPS - Accept self-signed certificates
-
Now copy the following created files to a folder at your dockerhost:
-
Sahi fake certificates
~$ mkdir -p ssl_files
~$ export CONTAINER_ID=<your-docker-container-id>
~$ docker cp $CONTAINER_ID:/headless/sakuli/sahi/userdata/certs ssl_files/sahi_certs
-
Firefox certificate store
~$ mkdir -p ssl_files/ff_profile
~$ docker cp $CONTAINER_ID:/headless/sakuli/sahi/userdata/browser/ff/profiles/sahi0/cert8.db ssl_files/ff_profile/
~$ docker cp $CONTAINER_ID:/headless/sakuli/sahi/userdata/browser/ff/profiles/sahi0/key3.db  ssl_files/ff_profile/
~$ docker cp $CONTAINER_ID:/headless/sakuli/sahi/userdata/browser/ff/profiles/sahi0/cert_override.txt ssl_files/ff_profile/
-
-
After this you should have the following structure:
~$ tree ssl_files ssl_files ├── ff_profile │ ├── cert8.db │ ├── cert_override.txt │ └── key3.db └── sahi_certs ├── labs_consol_de ├── sahi_example_com ├── shavar_services_mozilla_com └── tiles_services_mozilla_com 2 directories, 7 files -
Update the permissions to ensure that the files can be read by container user:
~$ chmod a+rw ssl_files/
-
At least you have just to add the files to the correct place in Docker image
Dockerfile:FROM consol/sakuli-ubuntu-xfce ### INSTALL sahi https certificats COPY ssl_files/ff_profile $SAKULI_ROOT/sahi/config/ff_profile_template COPY ssl_files/sahi_certs $SAKULI_ROOT/sahi/userdata/certs
Known Issues
According to ConSol/docker-headless-vnc-container issue Chromium crashes with high VNC_RESOLUTION #53 there is a problem when you use some graphic/work intensive websites in the Docker container (especially with high resolutions e.g. 1920x1080). It can happen that Chromium crashes without any specific reason. The problem there is the too small /dev/shm size in the container. Currently there is no other way, as define this size on startup via --shm-size option, see ConSol/docker-headless-vnc-container #53 - Solution:
docker run --shm-size=256m -it -p 6901:6901 -e VNC_RESOLUTION=1920x1080 consol/sakuli-centos-xfce run <your-test-suite>
1.2.3.2. Docker Compose
Assume you want to run a suite called suite_1 located on your host at the path /home/myuser/my-sakuli-testsuites.
|
Like in all docker containers you can overwrite all environment variables in a docker-compose.yml like for example the VNC_PW (Override VNC environment variables).
|
A more elegant way as using the docker run command to parameterize your container startup, is to pack all into a Docker Compose file. You can create docker-compose.yml to integrate a custom testsuite in a container in the following ways:
Run JavaScript based test
To have the correct working directory, place the docker-compose.yml under /home/myuser/my-sakuli-testsuites
|
sakuli-example-ubuntu:
  image: consol/sakuli-centos-xfce
  ports:
  - 5901:5901
  - 6901:6901
  volumes:
  - .:/my-sakuli-testsuites
  command: run /my-sakuli-testsuites/suite_1
When executed in the same directory as docker-compose.yml, a simple docker-compose up will bring up all containers.
Intentionally, docker-compose is made to bring up environments with multiple containers which are linked together, but even with one container it eases the parameter handling.
|
docker-compose up --force-recreate removes all currently stopped and running containers before it starts the containers, which defined in the docker-compose.yml. Otherwise, if a normal docker-compose up will called again, the test execution will reattach the instance and the start the test execution again in the same container instance.
|
Similar to docker run command, the file docker-compose.yml would look like this:
sakuli-example-ubuntu:
  image: consol/sakuli-ubuntu-xfce
  ports:
  - 5901:5901
  - 6901:6901
  volumes:
  - .:/my-sakuli-testsuites
  environment:
  - SAKULI_TEST_SUITE=/my-sakuli-testsuites/suite_1
Run Java based test
Similar to the usage of Run Java based test, you can to pack all parameters into a Docker Compose file. Create docker-compose.yml:
sakuli-example-ubuntu:
  image: consol/sakuli-ubuntu-xfce-java
  ports:
  - 5901:5901
  - 6901:6901
  volumes:
  - .:/opt/maven
When executed in the same directory as docker-compose.yml, a simple docker-compose up will bring up all containers.
Intentionally, docker-compose is made to bring up environments with multiple containers which are linked together, but even with one container it eases the parameter handling.
|
docker-compose up --force-recreate removes all currently stopped and running containers before it starts the containers, which defined in the docker-compose.yml. Otherwise, if a normal docker-compose up will called again, the test execution will reattach the instance and the start the test execution again in the same container instance.
|
Like above you can for example also override the default mvn command and use a additional persistent volume for caching the maven dependencies:
version: '2'

services:
  sakuli_java_test:
    image: consol/sakuli-ubuntu-xfce-java
    volumes:
    - /home/myuser/my-sakuli-maven-project:/opt/maven
    - data:/root/.m2
    network_mode: "bridge"
    ports:
    - 5911:5901
    - 6911:6901
    command: mvn clean install
    # to keep container running and login via `docker exec -it javaexample_sakuli_java_test_1 bash`
    # command: --tail-log

volumes:
  data:
    driver: local
1.2.3.3. Kubernetes
The following section describes how to use Kubernetes for Sakuli E2E tests and monitoring. First go the folder of the Kubernetes configuration:
cd <project-path>/docker/kubernetesYou will find the kubernetes config example in:
docker/kubernetes/kubernetes.sakuli.example.pod.run.yaml
Start execution pod
To execute a Sakuli E2E testing container in the kubernetes cluster create a pod:
kubectl create -f kubernetes.sakuli.example.pod.run.yamlThis creates the following components in the Kubernetes cluster:
-
a new namespace
sakuli -
a pod with the Sakuli container running
-
a service to make the container ports
6901and5901accessible
Now view the running pods on the Kubernetes dashboard:
http://<kubernets-cluster-ip>:30000/#!/pod?namespace=sakuli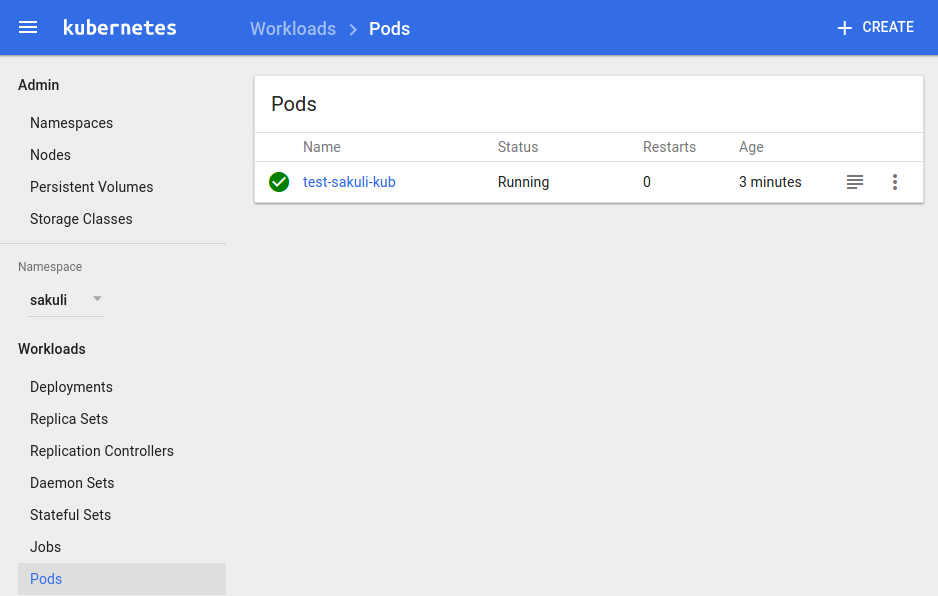
or get a list of all running pods in the sakuli namespace:
kubectl get pod --namespace=sakuli --show-allYou can also take a look at the log output:
kubectl logs --namespace=sakuli test-sakuli-kubIf you want to watch the test execution you can connect to the container on the external HTTP port 32001 of the service test-sakuli-kub:
http://<kubernetes-cluster-ip>:32001/vnc_auto.html?password=sakuli&view_only=true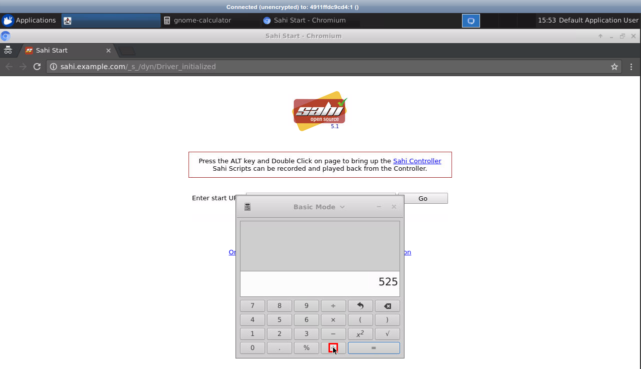
Job Config
The Kubernetes Job object checks exit code of executed job. By default, the Sakuli container will return the value of the sakuli test execution (0 ok, 1-6 warning to critical state codes). To prevent that the job will be rescheduled you can set the environment variable KUBERNETES_RUN_MODE to job and the container will return 0 for all "normal" sakuli executions. Like in this example:
        # ...
        containers:
        - name: sakuli-job-pod
          image: consol/sakuli-ubuntu-xfce
          imagePullPolicy: Always
          env:
            - name: KUBERNETES_RUN_MODE
              value: job
          args:
       # ...
As indicator that the environment variable is set, the output will contain:
===========  SAKULI Testsuite "example_xfce" execution FINISHED - ERRORS ======================

ERROR [2017-06-12 17:21:56.959] - ERROR:
CASE "case1": Can't find "[id=not-valid, path=/headless/sakuli/test/case1/not-valid.png ]" inR[0,0 1280x1024]@S(0)waitFor function in 5 sec.

SAKULI_RETURN_VAL: 6
KUBERNETES_RUN_MODE=job => return exit code 0
EXIT_CODE: 01.2.3.4. OpenShift
The following section describes how to use OpenShift for Sakuli E2E testing and monitoring.
The following content uses as example the image consol/sakuli-ubuntu-xfce of the Dockerfile Dockerfile.sakuli.ubuntu.xfce.
First you have to create your OpenShift project on the command line:
cd openshift
oc new-project my-project
Then you can use the provided templates from docker/openshift.
Run image from Dockerhub
cd openshift
oc new-project my-project
As soon as you are logged in to OpenShift and have selected your project, you can simply run the image by using the configuration openshift.sakuli.example.pod.run.yaml:
oc process -f openshift.sakuli.example.pod.run.yaml -v E2E_TEST_NAME=single-pod | oc create -f -After the deployment you will see the new deployed service on the OpenShift management UI :
https://__YOUR-OS-MANAGEMENT-URL__/console/project/my-project/overview`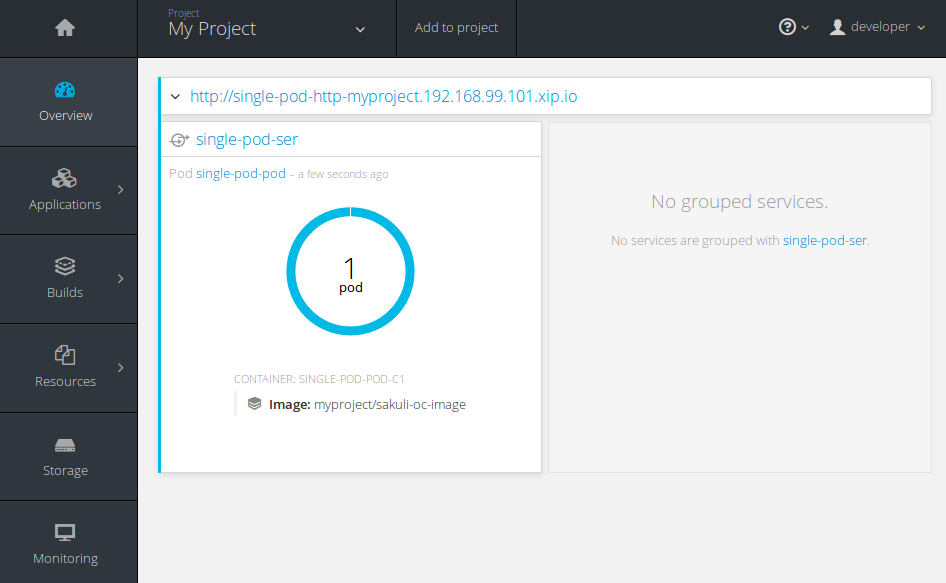
Watch the test execution within the container with this URL:
http://my-run-only-pod-my-project.__YOUR-OS-URL__/?password=sakuli`
If you want to use another Sakuli image (here: Ubuntu) just use the IMAGE var:
oc process -f openshift.sakuli.example.pod.run.yaml -v E2E_TEST_NAME=single-pod -v IMAGE=consol/sakuli-ubuntu-icewm | oc create -f -Build & run your own image
If you want to build the image in your own infrastructure just use the configuration openshift.sakuli.example.image.build.yaml:
oc process -f openshift.sakuli.example.image.build.yaml -v IMAGE=sakuli-oc-image | oc create -f -Alternatively you can build a custom Docker image in a specific branch:
oc process -f openshift.sakuli.example.image.build.yaml \
    -v IMAGE=sakuli-oc-image-icewm \
    -v SOURCE_REPOSITORY_REF=dev \
    -v SOURCE_DOCKERFILE=Dockerfile.sakuli.ubuntu.icewm \
| oc create -f -To use an already builded image from the internal OpenShift registry you have to specify the image in the pattern <registry-ip>/<your-project>/<image-name>[:<tag>]:
oc process -f openshift.sakuli.example.pod.run.yaml -v IMAGE=10.0.0.X:5000/my-project/sakuli-oc-image,E2E_TEST_NAME=oc-image-test-2 | oc create -f -Run git based tests
An effective way to execute your own Sakuli tests is that you mount the testsuite into the container. For this you can use the template openshift.sakuli.gitvolume.pod.run.yaml. The template will checkout the git repository and mount it as a read-only volume into the container where Sakuli will execute it:
oc process -f openshift.sakuli.gitvolume.pod.run.yaml \
    -v GIT_TEST_SUITE_REPO=https://github.com/ConSol/sakuli-examples \
    -v GIT_TEST_SUITE_PATH=docker-xfce/part_01/example_xfce \
| oc create -f -| If something went wrong, you maybe have to enable this volume type in the cluster - see next section. |
Job Config
Currently OpenShift (Version 3.5) have no different behaviour as Kubernetes itself, so take a look at Job Config.
OpenShift source to image (S2I)
It’s possible to use all the features of Sakuli combined with the power of OpenShift S2I. This empowers you to create S2I base images configured as you desire. The only thing you have to do is to add your test suite to the runnable sakuli test environment by configuration. Please find an example S2I build config template openshift.sakuli.s2i.image.build.yaml in our template section. This template will provide you a build config and a image stream containing the Sakuli S2I image, so that you can easily build up the Sakuli test container for your suites. In addition, we provide a Sakuli test container template openshift.sakuli.s2i.build.yaml to create ready to run Sakuli container, based on Sakuli S2I, using the previously defined S2I image stream, running the configured suite.
Beside the general advantages of OpenShift S2I, Sakuli S2I adds additional ones in terms of test automation.
-
Keep the test suites close to your applications code and reference the test suits in the build config.
-
If the tests change, you just have to start a new build of your Sakuli test container.
-
Reduces CI/CD pipeline processing time by just updating the suite in the sakuli container environment.
The Sakuli test container template provides the possibility to exchange the base image of your Sakuli test environment, so that all available Image OS types can be used.
oc process -f openshift.sakuli.s2i.build.yaml -p "BASE_IMAGE=consol/sakuli-ubuntu-xfce"In terms that you have designed your own Sakuli base image, you’re also able to define the Source where the image should be taken from.
oc process -f openshift.sakuli.s2i.build.yaml -p "BASE_IMAGE=my-sakuli-ubuntu-openbox" -p "BASE_IMAGE_KIND=ImageStream"The values available in the BASE_IMAGE_KIND correlate to the values of the dockerStrategy.from.kind definition.
Setup your Sakuli-S2I image.
oc process -f openshift.sakuli.s2i.image.build.yaml -p "IMAGE=sakuli-ubuntu-xfce-s2i" -p "BASE_IMAGE=consol/sakuli-ubuntu-xfce:dev" | oc apply -f -Add the test suite of your choice to the S2I image
oc process -f openshift.sakuli.s2i.build.yaml -p "IMAGE=test-xfce" -p "BASE_IMAGE=sakuli-ubuntu-xfce-s2i" -p "TESTSUITE_REPOSITORY_URL=https://github.com/ConSol/sakuli.git" -p "TESTSUITE_CONTEXT_DIR=example_test_suites/example_xfce" | oc apply -f -Run your test container test-xfce
oc run test-xfce --image=<your-docker-registry-ip>:5000/<your-project>/test-xfce --restart=OnFailure1.3. Sakuli Testdefinition
1.3.1. Sakuli API
Sakuli provides methods of three different types:
-
JS/Java methods of Sahi, which can be used 100% natively
-
JS/Java methods which encapsulate a subset of the Sikuli Java API
-
JS/Java methods of Sakuli framework itself (testcase stuff, exception handling, …)
| All classes and methods are implemented identical for Java and JavaScript |
For the detailed documentation see:
Index
Namespaces
1.3.1.2. Sahi-API
All Sahi-API functions are natively usable in Sakuli. For a complete documentation, see Sahi-API.
Members
1.3.1.3. TestCase
TestCase - initializes the Sakuli object and sets the warning and critical time for this test case.
Params
-
warningTime
number- threshold in seconds. If the threshold is set to 0, the execution time will never exceed, so the state will be always OK! -
criticalTime
number- threshold in seconds. If the threshold is set to 0, the execution time will never exceed, so the state will be always OK! -
optImagePathArray
Array.<String>- (optional) Path or Array of Paths to the folder containing the image patterns for these test cases.
Returns: - an initialized Sakuli object. Example
var testCase = new TestCase(20,30, "path-to/image-folder-name");Members
Adds the additional paths to the current image library of the TestCase. If a relative path is assigned, the current testcase folder will be used as current directory.
Params
-
imagePaths
string- one or more path strings
A step allows to sub-divide a case to measure logical units, such as "login", "load report" etc. in its
particular runtime. When a case starts, Sakuli starts a "step" timer. It gets read out, stored with the
step name, and the timer will set to 0 each time endOfStep() is called.
If the step runtime exceeds the step threshold (second parameter, optional), the step is saved with state
"WARNING" (there is no CRITICAL state).
Params
-
stepName
String -
optWarningTime
number- (optional) threshold in seconds, default = 0. If the threshold is set to 0, the execution time will never exceed, so the state will be always OK!
Handles any Exception or Error. The handleException function calls the Java backend and stores the Exception for further processing.
Use it at the end of a catch-block.
Params
-
e
Error- any Exception or Error
Example
try {
  ... do something
} catch (e) {
    sakuli.handleException(e);
}Saves the results of the current test case for further processing.
Should be called in finally-block of the test case:
Example
try {
    ... do something
} catch (e) {
    sakuli.handleException(e);
} finally {
    sakuli.saveResult();
}Returns the current id of this test case.
Returns: String - id
Updates and returns the URL of the last visited URL
Returns: String - last visited URL
Returns: String - the folder path of the current testcase.
Returns: String - the folder path of the current testcase.
Creates a new test case based exception with an optional screenshot at the calling time. Will be called from sakuli.js or in side of 'org.sakuli.javaDSL.AbstractSakuliTest'.
Params
-
message
String- error message -
screenshot
Boolean- enable / disable screenshot functionality
1.3.1.4. Application
Application Class - Represents an application.
Params
-
applicationNameOrPath
String- Path to the application file. Example:C:\Windows\system32\notepad.exe -
optResumeOnException
Boolean- Determines whether to ignore exceptions from this class. If this parameter is undefined, it will be false.
Returns: Application - an initialized object.
Example
//windows
var editor = new Application("notepad.exe");
//linux
var editor = new Application("gedit");
Members
Opens the created application. For application with a long load time you may need to change the default sleep time with setSleepTime(…).
Returns: - this Application object.
Focuses the current application, if the application is in the background.
Returns: - this Application object.
Focuses a specific window of the application.
Params
-
windowNumber
number- identifies the window
Returns: - this Application object.
Closes the already existing application.
Params
-
optSilent
boolean- (optional) if true, no exception will be thrown on errors and stop the test execution.
Returns: - this Application object.
Kill the already existing application hardly.
Params
-
optSilent
boolean- (optional) if true, no exception will be thrown on errors.
Returns: - this Application object.
Sets the sleep time in seconds of the application actions to handle with long loading times. The default sleep time is set to 1 seconds.
Params
-
seconds
number- sleep time in seconds
Returns: - this Application object.
Creates and returns a Region object from the application.
Returns: - a Region object.
Creates and returns a Region object from a specific window of the application.
Params
-
windowNumber
number- identifies the window
Returns: - a Region object.
Returns: - the name of the current application.
1.3.1.5. Environment
Environment - Represents the environment of the current test host.
Params
-
optResumeOnException
Boolean- (optional) if this parameter is undefined, it will be false.
Members
Set a new default similarity for the screen capturing methods.
Params
-
similarity
number- value between 0 and 1, default = 0.8
Returns: - this Environment or NULL on errors.
Resets the current similarity of the screen capturing methods to the original default value of 0.8.
Returns: - this Environment or NULL on errors.
Get a Region object from the current focused window
Returns: - a Region object from the current focused window or NULL on errors.
Takes a screenshot of the current screen and saves it to the assigned path. If there ist just a file name, the
screenshot will be saved in your current testcase folder.
Supported formats: jpg and png
Params
-
filename
String-pathname/filename.formator justfilename.formatfor exampletest.png.
Returns: Path - to the created screenshot OR null on errors
Example
environment.takeScreenshot("test.png");Takes a screenshot of the current screen and add the current timestamp in the file name like e.g.:
Params
-
filenamePostfix
String- postfix for the final filename Default: screenshot -
optFolderPath
String- optional FolderPath, where to save the screenshot. If null or empty: testcase folder will be used -
optFormat
string- optional format, for the screenshot (currently supported: jpg and png) If null or empty use propertysakuli.screenshot.format
Returns: String - file path to the created screenshot OR null on errors
Example
env.takeScreenshotWithTimestamp("my-screenshot");saved under: mytestsuite/testcase1/2017_08_03_14_06_13_255_my_screenshot.png
Blocks the current testcase execution for x seconds
Params
-
seconds
number- to sleep
Returns: - this Environment or NULL on errors.
Blocks the current testcase execution for x milliseconds
Params
-
milliseconds
number- to sleep
Returns: - this Environment or NULL on errors.
Returns: - the current content of the clipboard as String or NULL on errors
sets the String parameter to the system clipboard
Params
-
text
String- text as string
Returns: - this Environment.
pastes the current clipboard content into the focused area. Will do the same as "CTRL + V".
Returns: - this Environment.
copy the current selected item or text to the clipboard. Will do the same as "CTRL + C".
Returns: - this Environment.
Clean the content of the clipboard.
pastes the text at the current position of the focus/carret <br/>using the clipboard and ctrl/cmd-v (paste keyboard shortcut)
Params
-
text
String- a string, which might contain unicode characters
Returns: - this Environment or NULL on errors.
makes a masked paste(String) without any logging.
Params
-
text
String- a string, which might contain unicode characters
Returns: - this Environment or NULL on errors.
combines pasteMasked(String) and decryptSecret(String).
Params
-
text
String- encrypted secret
Returns: - this Environment or NULL on errors.
Enters the given text one character/key after another using keyDown/keyUp. <p/> About the usable Key constants see documentation of Key. The function could also type UTF-8 unicode characters, if the OS supports it. The text is entered at the current position of the focus.
Params
-
text
String- containing characters and/or Key constants -
optModifiers
String- (optional) an String with only Key constants.
Returns: - this Environment or NULL on errors.
Enters the given text one character/key after another using keyDown/keyUp. The entered text will be masked at the logging. <p/> About the usable Key constants see documentation of Key. The function could also type UTF-8 unicode characters, if the OS supports it. The text is entered at the current position of the focus.
Params
-
text
String- containing characters and/or Key constants -
optModifiers
String- (optional) an String with only Key constants.
Returns: - this Environment or NULL on errors.
Decrypt and enters the given text one character/key after another using keyDown/keyUp. The entered text will be masked at the logging. For the details of the decryption see decryptSecret(String). <p/> About the usable Key constants see documentation of Key. The function could also type UTF-8 unicode characters, if the OS supports it. The text is entered at the current position of the focus.
Params
-
text
String- containing characters and/or Key constants -
optModifiers
String- (optional) an String with only Key constants.
Returns: - this Environment or NULL on errors.
Decrypt a encrypted secret and returns the value at runtime. The decryption will only work like described at https://github.com/ConSol/sakuli/blob/master/docs/manual/testdefinition/advanced-topics/sakuli-encryption.adoc . There will be no logging with the decrypted secret during this step. <p/> To create a encrypted secret see "sakuli-manual.md".
Params
-
secret
String- encrypted secret as String
Returns: - decrypted String
Press and hold the given keys including modifier keys <br/> use the key constants defined in class Key, <br/> which only provides a subset of a US-QWERTY PC keyboard layout <br/> might be mixed with simple characters<br/> use + to concatenate Key constants
Params
-
keys
String- valid keys
Returns: - this Environment or NULL on errors.
release the given keys (see Environment.keyDown(…)).
Params
-
keys
String- valid keys
Returns: - this Environment or NULL on errors.
Compact alternative for type() with more options
-
special keys and options are coded as #XN. or #X+ or #X- where X is a reference for a special key and N is an optional repeat factor
A modifier key as #X. modifies the next following key the trailing . ends the special key, the + (press and hold) or - (release) does the same, but signals press-and-hold or release additionally.
except #W / #w all special keys are not case-sensitive
a #wn. inserts a wait of n millisecs or n secs if n less than 60
a #Wn. sets the type delay for the following keys (must be > 60 and denotes millisecs) -
otherwise taken as normal wait
Example: wait 2 secs then type CMD/CTRL - N then wait 1 sec then type DOWN 3 times
Windows/Linux: write("#w2.#C.n#W1.#d3.")
Mac: write("#w2.#M.n#W1.#D3.")
for more details about the special key codes and examples consult the sikuliX docs.
Params
-
text
String- a coded text interpreted as a series of key actions (press/hold/release)
Returns: - this Environment or NULL on errors.
move the mouse pointer to the given target location and move the wheel the given steps down.
Params
-
steps
number- the number of steps
move the mouse pointer to the given target location and move the wheel the given steps up.
Params
-
steps
number- the number of steps
Returns: boolean - true, if the OS is any instance of an Windows based OS
Returns: boolean - true, if the OS is any instance of an Linux based OS
Returns: string - identifier of the current OS
Runs the assigned command on the host and returns the result. Attention: this is OS depended feature! So be
aware which os you are running, maybe us to check Environment#isLinux() or Environment#isWindows().
Params
-
command
string- OS depended command asString -
optThrowException
boolean- defines if an exception should be thrown, if the exit code != 0
Returns: - the result as CommandLineResult object, you can use the methods result.getOutput() and result.getExitCode()
Example:
var app;
if(environmen.runCommand('uname --machine') == 'x86_64'){
    //open app from other path
    app = new Application('/lib64/appname');
} else {
    app = new Application('/lib/appname');
}Reads out the environment variable with the assigned key
Params
-
key
string- of environment variable
Returns: string - value or null
Reads out the property value with the assigned key
Params
-
key
string- of property
Returns: string - value or null
1.3.1.6. Key
All non-character keys are represented by Key constants which can be used in type functions.
The following Key values are available:
SPACE, ENTER, BACKSPACE, TAB, ESC, UP, RIGHT, DOWN, LEFT, PAGE_UP, PAGE_DOWN, DELETE, END,
HOME, INSERT, F1, F2, F3, F4, F5, F6, F7, F8, F9, F10, F11, F12, F13, F14, F15,
SHIFT, CTRL, ALT, ALTGR, META, CMD, WIN, PRINTSCREEN, SCROLL_LOCK, PAUSE, CAPS_LOCK, NUM0,
NUM1, NUM2, NUM3, NUM4, NUM5, NUM6, NUM7, NUM8, NUM9, SEPARATOR, NUM_LOCK, ADD, MINUS,
MULTIPLY, DIVIDE, DECIMAL, CONTEXT
Example
Press F1:
env.type(Key.F1);Close a window by typing the shortcut ALT + F4
// the second parameter is the held (="modifier") key
env.type(Key.F4, Key.ALT);
Open the file manager on Windows with shortcut WIN + e:
env.type("e", Key.META)Do something application specific with shortcut CTRL + ALT + b (CTRL + ALT = ALTGR):
env.type("b", Key.ALTGR)Closing an window over typing the short cut ALT + F4:
env.type(Key.F4, Key.ALT);Using Key.ALTGR on Unix:
To enable the key command ALTGR on unix systems please bind it to CTRL + ALT. For more information
see stackexchange.com - how-to-bind-altgr-to-ctrl-alt.
|
Members
1.3.1.7. Logger
Logger - Logging functions to do 'debug, 'info', 'warning' and 'error' log entries.
Members
make a error-log over Java backend into the log file. This won’t stop the execution of the test case.
Params
-
message
String- as a String
make a debug-log over Java backend into the log file.
Params
-
message
String- as a String
make a info-log over Java backend into the log file.
Params
-
message
String- as a String
make a debug-log over Java backend into the log file.
Params
-
message
String- as a String
1.3.1.8. MouseButton
MouseButton - representing the possible mouse action button.
The following MouseButton values are possible:
LEFT, RIGHT, MIDDLE
Example Press and release the right mouse button for 3 seconds on a specified region:
var region = new Region().find("your-pattern.png");
region.mouseDown(MouseButton.RIGHT).sleep(3).mouseUp(MouseButton.RIGHT);
Members
1.3.1.9. Region
Region - Represents a region as a part of or the hole screen.
Params
-
optResumeOnException
Boolean- if true, the test execution won’t stop on an occurring error. Default: false.
Example
var screen = new Region(); //represents the hole screen`Members
Finds an image inside this region immediately.
Params
-
imageName
String- name of the preloaded picture (if not set, the find operation will take place on the predefined region object.)
Returns: - the found Region or if the target can’t be found null.
Finds a target in this Region immediately;
Returns: - the found Region or if the target can’t be found null.
Check whether the give pattern is visible on the screen.
Params
-
imageName
String- if set, the function search inside the given region for the image -
optWaitSeconds
number- if set, the function search for x seconds for the pattern.
Returns: - this Region or null
makes a mouse click on the center of the Region.
Returns: - the Region or NULL on errors.
makes a double click on the center of the Region.
Returns: - the Region or NULL on errors.
makes a right click on the center of the Region.
Returns: - the Region or NULL on errors.
Move the mouse pointer to the center of the Region and "hovers" it.
Returns: - the Region or NULL on errors.
Low-level mouse action to press the assigned MouseButton on the current position.
Params
-
mouseButton - on of MouseButton values
Returns: - the Region or NULL on errors.
Example Press and release the right mouse button for 3 seconds on a specified region:
var region = new Region().find("your-pattern.png");
region.mouseDown(MouseButton.RIGHT).sleep(3).mouseUp(MouseButton.RIGHT);Low-level mouse action to release the assigned MouseButton.
Params
-
mouseButton - on of MouseButton values
Returns: - the Region or NULL on errors.
Example
Press and release the right mouse button for 3 seconds on a specified region:
var region = new Region().find("your-pattern.png");
region.mouseDown(MouseButton.RIGHT).sleep(3).mouseUp(MouseButton.RIGHT);Drag from region’s current position and drop at given targetRegion and using the left mouse.
Params
-
targetRegion <code>Region</code> - target where to drop
Returns: - the Region or NULL on failure
Example move the bubble button 20px to the right:
var bubble = screen.find("bubble.png");
bubble.dragAndDropTo(bubble.right(20));Blocks and waits until a target which is specified by the optImageName is found in the hole Screen within a given time period in seconds.
Params
-
imageName
String- name of the image pattern -
seconds
number- the maximum time to waitFor in seconds
Returns: - a Region object representing the region occupied by the found target, or null if the target can not be found within the given time.
pastes the text at the current position of the focus/carret <br/>using the clipboard and ctrl/cmd-v (paste keyboard shortcut)
Params
-
text
String- as a string, which might contain unicode characters
Returns: - this Region or NULL on errors.
makes a masked paste(String) without any logging.
Params
-
text
String- a string, which might contain unicode characters
Returns: - this Region or NULL on errors.
combines pasteMasked(String) and decryptSecret(String).
Params
-
text
String- encrypted secret
Returns: - this Region or NULL on errors.
Enters the given text one character/key after another using keyDown/keyUp. <p/> About the usable Key constants see documentation of Key. The function could also type UTF-8 unicode characters, if the OS supports it. The text is entered at the current position of the focus.
Params
-
text
String- containing characters and/or Key constants -
optModifiers
String- (optional) an String with only Key constants.
Returns: - this Region or NULL on errors.
Enters the given text one character/key after another using keyDown/keyUp. The entered text will be masked at the logging. <p/> About the usable Key constants see documentation of Key. The function could also type UTF-8 unicode characters, if the OS supports it. The text is entered at the current position of the focus.
Params
-
text
String- containing characters and/or Key constants -
optModifiers
String- (optional) an String with only Key constants.
Returns: - this Region or NULL on errors.
Decrypt and enters the given text one character/key after another using keyDown/keyUp. The entered text will be masked at the logging. For the details of the decryption see decryptSecret(String). <p/> About the usable Key constants see documentation of Key. The function could also type UTF-8 unicode characters, if the OS supports it. The text is entered at the current position of the focus.
Params
-
text
String- containing characters and/or Key constants -
optModifiers
String- (optional) an String with only Key constants.
Returns: - this Region or NULL on errors.
Press and hold the given keys including modifier keys <br/> use the key constants defined in class Key, <br/> which only provides a subset of a US-QWERTY PC keyboard layout <br/> might be mixed with simple characters<br/> use + to concatenate Key constants
Params
-
keys
String- valid keys
Returns: - this Region or NULL on errors.
release the given keys (see Region.keyDown(…)).
Params
-
keys
String- valid keys
Returns: - this Region or NULL on errors.
Compact alternative for type() with more options
-
special keys and options are coded as #XN. or #X+ or #X- where X is a reference for a special key and N is an optional repeat factor
A modifier key as #X. modifies the next following key the trailing . ends the special key, the + (press and hold) or - (release) does the same, but signals press-and-hold or release additionally.
except #W / #w all special keys are not case-sensitive
a #wn. inserts a wait of n millisecs or n secs if n less than 60
a #Wn. sets the type delay for the following keys (must be > 60 and denotes millisecs) -
otherwise taken as normal wait
Example: wait 2 secs then type CMD/CTRL - N then wait 1 sec then type DOWN 3 times
Windows/Linux: write("#w2.#C.n#W1.#d3.")
Mac: write("#w2.#M.n#W1.#D3.")
for more details about the special key codes and examples consult the sikuliX docs.
Params
-
text
String- a coded text interpreted as a series of key actions (press/hold/release)
Returns: - this Region or NULL on errors.
delete a amount of chars in a field
Params
-
amountOfChars
number- number of chars to delete
Returns: - this Region or null on errors
move the mouse pointer to the given target location and move the wheel the given steps down.
Params
-
steps
number- the number of steps
move the mouse pointer to the given target location and move the wheel the given steps up.
Params
-
steps
number- the number of steps
Set a offset to a specific Region and returns the new Region object. The offset function will move the Region’s rectangle x pixels to the right and y pixels down. The size of the rectangle will be the same.
Params
-
offsetX
number- x-value for the offset action -
offsetY
number- y-value for the offset action
Returns: - a Region with the new coordinates
create a region enlarged range pixels on each side
Params
-
range
number- of pixels
Returns: - a new Region
create a region with enlarged range pixels
Params
-
width
number- in pixels to grow in both directions -
height
number- in pixels to grow in both directions
Returns: - a new Region
Params
-
range
number- of pixels
Returns: - a new Region that is defined above the current region’s top border with a height of range number of pixels.
Params
-
range
number- of pixels
Returns: - a new Region that is defined below the current region’s bottom border with a height of range number of pixels.
Params
-
range
number- of pixels
Returns: - a new Region that is defined on the left the current region’s left border with a width of range number of pixels.
Params
-
range
number- of pixels
Returns: - a new Region that is defined on the right the current region’s right border with a width of range number of pixels.
set the height, based form the upper left corner downsides
Params
-
height
number- in pixels
Returns: - height as int value
set the width, based form the upper left corner to the right
Params
-
width
number
Returns: - width as int value
set the X coordinate of the upper left corner.
Params
-
x
number
Returns: - width as int value
set the Y coordinate of the upper left corner.
Params
-
y
number
Returns: - Y coordinate of the upper left corner
Params
-
seconds
number- highlights this Region for x seconds or the default time
Takes a screenshot of this Region and saves it to the assigned path. If there ist just a file name, the
screenshot will be saved in your current testcase folder.
Supported formats: jpg and png
Params
-
filename
String-pathname/filename.formator justfilename.formatfor exampletest.png.
Returns: Path - to the created screenshot OR null on errors
Example
region.takeScreenshot("test.png");Takes a screenshot of this Region and add the current timestamp in the file name like e.g.:
Params
-
filenamePostfix
String- postfix for the final filename Default: screenshot -
optFolderPath
String- optional FolderPath, where to save the screenshot. If null or empty: testcase folder will be used -
optFormat
string- optional format, for the screenshot (currently supported: jpg and png) If null or empty use propertysakuli.screenshot.format
Returns: Path - to the created screenshot OR null on errors
Example
region.takeScreenshotWithTimestamp("my-screenshot");saved under: mytestsuite/testcase1/2017_08_03_14_06_13_255_my_screenshot.png
Blocks the current testcase execution for x seconds
Params
-
seconds
number- to sleep
Returns: - this Region or NULL on errors.
Blocks the current testcase execution for x milliseconds
Params
-
milliseconds
number- to sleep
Returns: - this Region or NULL on errors.
Returns: - from this region a extracted Text as String
RegionRectangle
RegionRectangle (extends Region) - Represents a region specified by the x and y coordinates, width and height as a part of the screen.
Params
-
x
number- – x position of a rectangle on the screen. -
y
number- – y position of a rectangle on the screen. -
w
number- – width of a rectangle in pixel. -
h
number- – height of a rectangle in pixel. -
optResumeOnException
Boolean- (optional) if true, the test execution won’t stop on an occurring error. Default: false.
Example
var notepadRegion = new RegionRectangle(0,0,100,100);
//represents a region which start at x=0, y=o (left upper corner) and have a size of 100px * 100px.
Members
1.3.2. Additional Topics
This page contains different topics regarding the configuration of both Sakuli and its components: Sahi and Sikuli.
1.3.2.1. Property loading mechanism
Sakuli properties are predefined in SAKULI_HOME/config/sakuli-default.properties; these values should/can be overwritten in the following order (last match wins):
-
as a global testsuite property in
test-suites-folder/sakuli.properties-> valid for all test suites within this folder -
as a testsuite property in
test-suites-folder/test-suite/testsuite.properties-> valid for the test suite itself and all test cases within it -
as a Java VM option as option of the Sakuli starter, like
sakuli run -D log.level.sakuli=DEBUG, -> valid for only one test run -
as a environment variable matching the property key in dashed uppercase writing, e.g.
LOG_LEVEL_SAKULI=DEBUG-> overwrites propertylog.level.sakulias long as environment variable is defined -
as a explicit starter option (if present) of the Sakuli CLI, e.g.
sakuli run test -browser chrome-> valid for only one test run
We do not recommend to change any values in SAKULI_HOME/config/sakuli-default.properties as a new version of Sakuli will have its own default property file and would overwrite the existing one; your changes would not be preserved.
Property Reference
The file sakuli-default.properties contains all possible configuration possibilities and default values:
#
# Sakuli - Testing and Monitoring-Tool for Websites and common UIs.
#
# Copyright 2013 - 2015 the original author or authors.
#
# Licensed under the Apache License, Version 2.0 (the "License");
# you may not use this file except in compliance with the License.
# You may obtain a copy of the License at
#
#     http://www.apache.org/licenses/LICENSE-2.0
#
# Unless required by applicable law or agreed to in writing, software
# distributed under the License is distributed on an "AS IS" BASIS,
# WITHOUT WARRANTIES OR CONDITIONS OF ANY KIND, either express or implied.
# See the License for the specific language governing permissions and
# limitations under the License.
#
# @formatter:off

#####################################################################################
#######################################################################################
# All properties defined here are DEFAULT and should NOT be CHANGED.
#
# To define a specific behaviour to your test, it is possible to overwrite all properties of the Sakuli default
# properties 'sakuli-default.properties'.
# For a short guideline how the property replacement mechanism in Sakuli works and how properties should be
# overwritten, please refer to https://github.com/ConSol/sakuli/blob/master/docs/manual/testdefinition/advanced-topics/sakuli-property-loading.adoc
#######################################################################################
#######################################################################################


#######################################################################################
# TEST-SUITE-META-PROPERTIES
#
# These properties describes the set of configuration for a test suite.
#######################################################################################

# The test suite ID is an unique ID, which identifies the same test suite
# over all executions and configuration changes.
# The 'testsuite.id' MUST be defined in the 'testsuite.properties'
testsuite.id=

#######################################################################################
# OPTIONAL-PROPERTIES for the test suite
#
# If this properties haven NOT been set, the test suite will be configured with the
# default values.
#######################################################################################

# Descriptive name for the current test suite
# DEFAULT: value of 'testsuite.id'
testsuite.name=

# The warning runtime threshold (seconds) estimates the execution time of the complete
# test suite. If the warning time is exceeded, the test suite will get the state
# 'WARNING'.
# If the threshold is set to 0, the execution time will never exceed, so the state will be always OK!
# DEFAULT:0
testsuite.warningTime=0

# The critical runtime threshold (seconds) estimates the execution time of the complete
# test suite. If the critical time is exceeded, the test suite will get the state
# 'CRITICAL'.
# If the threshold is set to 0, the execution time will never exceed, so the state will be always OK!
# DEFAULT:0
testsuite.criticalTime=0

# Defines the browser in witch the test suite should be executed
# values are corresponding to the file
# <sahi-installtion-folder>/userdata/config/browser_types.
#
# DEFAULT: firefox
testsuite.browser=firefox


#######################################################################################
# SAKULI-ACTION-PROPERTIES
#
# Common settings
#######################################################################################


# Similarity is taken as a "higher-than" value, that means for a match candidate region that more than
#'sakuli.region.similarity.default' percent of the region's pixels must coincide. Decreasing this value should only be
# necessary if the pattern images are of poor quality or the screen always differs slightly from the pattern images
# (e.g. compression of remote sessions like vnc).
#
# DEFAULT: true
sakuli.environment.similarity.default=0.99

# If true, the test suite takes screenshots when an error occurs during the execution.
#
# DEFAULT: true
sakuli.screenshot.onError=true

### If true, every region gets highlighted automatically
# en-/disable
#
# DEFAULT: false
sakuli.autoHighlight.enabled=false

# Auto highlight duration (float)
#
# DEFAULT: 1.1f
sakuli.highlight.seconds=1.1f

### Sikuli Action Delays
#
#set the default type and click delay in seconds;
sikuli.typeDelay=0.00
sikuli.clickDelay=0.2
#######################################################################################
# ENCRYPTION-PROPERTIES
#
# Defines the properties how to en-/decrypt secrets
# For more information see:
# https://github.com/ConSol/sakuli/blob/master/docs/manual/testdefinition/advanced-topics/sakuli-encryption.adoc
#######################################################################################
### Encryption Mode
# Available modes are currently:
# * "environment" using the environment variable `SAKULI_ENCRYPTION_KEY` (or if not present the property
#   `sakuli.encryption.key`) as master key for encryption (default)
# * "interface" using the host ethernet interface MAC address to encrypt a secret.
#
sakuli.encryption.mode=environment
### Encryption environment Settings (sakuli.encryption.mode=environment)
# Overwrite this property or us the environment var `SAKULI_ENCRYPTION_KEY` as master key for en- and decryption
#
### Encryption environment Settings (sakuli.encryption.mode=environment_key)
# Overwrite this property or us the environment var `SAKULI_ENCRYPTION_KEY` as master key for en- and decryption
#
sakuli.encryption.key=
#
#
### Encryption Interface Settings (sakuli.encryption.mode=interface)
# If this property is enabled, Sakuli will choose automatically the first ethernet interface for encryption.
# To use a specific interface set it to 'false'
#
# DEFAULT:true
sakuli.encryption.interface.autodetect=true
#
# Defines a specific network interface which should be used for the encryption functions.
# Therefore set the property 'sakuli.encryption.interface.autodetect=false'.
#
# Example: sakuli.encryption.interface=eth0
sakuli.encryption.interface=

#######################################################################################
# FORWARDER-PROPERTIES
#
# Defines the properties for all forwarders. Currently supported: JDBC, Gearman/mod-gearman, Icinga, CheckMK.
#######################################################################################

# Set the default folder, where the Twig templates for the different forwarders are placed
# (e.g. the Check_MK templates are placed in a subdirectory check_mk).
# For more information about twig templates, please refer to http://jtwig.org/
sakuli.forwarder.template.folder=${sakuli.home.folder}/config/templates

##### GEARMAN - FORWARDER
# Send results to a gearman-enabled monitoring system, using the parameters below in your 'sakuli.properties' to activate the forwarder.
# For more information see https://github.com/ConSol/sakuli/blob/master/docs/forwarder-gearman.md
#
## Gearman server settings:
# DEFAULT: false
sakuli.forwarder.gearman.enabled=false
sakuli.forwarder.gearman.server.host=changeme
# DEFAULT: 4730
sakuli.forwarder.gearman.server.port=4730
# Nagios host where all Sakuli services are defined on. If necessary, overwrite this value per test suite.
sakuli.forwarder.gearman.nagios.hostname=changeme
#
#
### OPTIONAL GEARMAN PROPERTIES:
# DEFAULT: check_results
sakuli.forwarder.gearman.server.queue=check_results
#
## Encryption:
# For serverside configuration see https://labs.consol.de/de/nagios/mod-gearman/index.html.
sakuli.forwarder.gearman.encryption=true
# ATTENTION: change the secret for production use!!!
sakuli.forwarder.gearman.secret.key=sakuli_secret
#
## Result caching:
# Caches results when gearman server is temporarily not available.
sakuli.forwarder.gearman.cache.enabled=true
# Time in milliseconds to wait between result job submit (used when processing cached results)
sakuli.forwarder.gearman.job.interval=1000
#
## Nagios service options:
# check_command gets appended to the perfdata string and will be used as PNP template name (check_sakuli = default)
sakuli.forwarder.gearman.nagios.check_command=check_sakuli
# optional service description forwarded to nagios check result. DEFAULT: testsuite.id
sakuli.forwarder.gearman.nagios.service_description=${testsuite.id}
#
## Result template:
# Output message template strings. Change only if needed.
sakuli.forwarder.gearman.nagios.template.suite.summary={{state_short}} Sakuli suite "{{id}}" {{suite_summary}}. (Last suite run: {{stop_date}})
sakuli.forwarder.gearman.nagios.template.suite.summary.maxLength=200
sakuli.forwarder.gearman.nagios.template.suite.table={{state_short}} Sakuli suite "{{id}}" {{suite_summary}}. (Last suite run: {{stop_date}}){{error_screenshot}}
sakuli.forwarder.gearman.nagios.template.case.ok={{state_short}} case "{{id}}" ran in {{duration}}s - {{state_description}}
sakuli.forwarder.gearman.nagios.template.case.warning={{state_short}} case "{{id}}" over runtime ({{duration}}s/warn at {{warning_threshold}}s){{step_information}}
sakuli.forwarder.gearman.nagios.template.case.warningInStep={{state_short}} case "{{id}}" over runtime ({{duration}}s/warn at {{warning_threshold}}s){{step_information}}
sakuli.forwarder.gearman.nagios.template.case.critical={{state_short}} case "{{id}}" over runtime ({{duration}}s/crit at {{critical_threshold}}s){{step_information}}
sakuli.forwarder.gearman.nagios.template.case.error={{state_short}} case "{{id}}" {{state_description}}: {{error_message}}{{error_screenshot}}
## Screenshot dimensions in Gearman output
sakuli.forwarder.gearman.nagios.template.screenshotDivWidth=640px


##### ICINGA2 - FORWARDER
# Send results to a Icinga2 monitoring system, using the parameters below in your 'sakuli.properties' to activate the forwarder.
# For more information see https://github.com/ConSol/sakuli/blob/master/docs/forwarder/icinga2.md
#
# DEFAULT: false
sakuli.forwarder.icinga2.enabled=false
## Icinga API settings
sakuli.forwarder.icinga2.api.host=changeme
sakuli.forwarder.icinga2.api.port=5665
sakuli.forwarder.icinga2.api.username=icinga-api-user
sakuli.forwarder.icinga2.api.password=icinga-api-password
# Icinga host with sakuli services
sakuli.forwarder.icinga2.hostname=changeme
#
### OPTIONAL ICINGA2 PROPERTIES:
# Icinga service description. DEFAULT: testsuite.id
sakuli.forwarder.icinga2.service_description=${testsuite.id}
# REST-URL where to send the Icinga2 results
sakuli.forwarder.icinga2.api.url=https://${sakuli.forwarder.icinga2.api.host}:${sakuli.forwarder.icinga2.api.port}/v1/actions/process-check-result?service=${sakuli.forwarder.icinga2.hostname}!${sakuli.forwarder.icinga2.service_description}
#
## Result template:
#Icinga 'plugin_output' template strings. Change only if needed.
sakuli.forwarder.icinga2.template.suite.summary={{state_short}} Sakuli suite "{{id}}" {{suite_summary}}. (Last suite run: {{stop_date}})
sakuli.forwarder.icinga2.template.suite.summary.maxLength=200
sakuli.forwarder.icinga2.template.case.ok={{state_short}} case "{{id}}" ran in {{duration}}s - {{state_description}}
sakuli.forwarder.icinga2.template.case.warning={{state_short}} case "{{id}}" over runtime ({{duration}}s/warn at {{warning_threshold}}s){{step_information}}
sakuli.forwarder.icinga2.template.case.warningInStep={{state_short}} case "{{id}}" over runtime ({{duration}}s/warn at {{warning_threshold}}s){{step_information}}
sakuli.forwarder.icinga2.template.case.critical={{state_short}} case "{{id}}" over runtime ({{duration}}s/crit at {{critical_threshold}}s){{step_information}}
sakuli.forwarder.icinga2.template.case.error={{state_short}} case "{{id}}" {{state_description}}: {{error_message}}


##### DATABASE - FORWARDER
# Save results into database, using the DB connection parameters below (must be uncommented).
# For more information see https://github.com/ConSol/sakuli/blob/master/docs/receivers/database.md

# DEFAULT: false
sakuli.forwarder.database.enabled=false
## database host
sakuli.forwarder.database.host=changeme
## database port:
sakuli.forwarder.database.port=3306
## database name
sakuli.forwarder.database=sakuli
## database username
sakuli.forwarder.database.user=sakuli
## database password
sakuli.forwarder.database.password=sakuli
## JDBC-Driver
sakuli.forwarder.database.jdbc.driverClass=com.mysql.jdbc.Driver
## pattern for JDBC database connection URL
sakuli.forwarder.database.jdbc.url=jdbc:mysql://${sakuli.forwarder.database.host}:${sakuli.forwarder.database.port}/${sakuli.forwarder.database}


##### CheckMK - FORWARDER
# Send results to a CheckMK-enabled monitoring system, using the parameters below in your 'sakuli.properties' to activate the forwarder.
# For more information see https://github.com/ConSol/sakuli/blob/master/docs/forwarder-checkmk.md
#
## DEFAULT: false
sakuli.forwarder.check_mk.enabled=false
#
### OPTIONAL CheckMK PROPERTIES:
#
# spool dir, default /var/lib/check_mk_agent/spool (Linux) / (installation_path)\spool (Windows)
sakuli.forwarder.check_mk.spooldir=/var/lib/check_mk_agent/spool
#  Max result age. Prepend this number on the file name, e.g. 600_sakuli_suite_XYZ
sakuli.forwarder.check_mk.freshness=600
# Prefix of the file name for CheckMK
sakuli.forwarder.check_mk.spoolfile_prefix=sakuli_suite_
# optional service description forwarded to the output check result, when not set, testsuite.id is used
sakuli.forwarder.check_mk.service_description=${testsuite.id}

###############################
# LOGGING & ERROR-SCREENSHOT PROPERTIES
# Common logging settings for Sakuli.
# (log verbosity can be set in 'sakuli-log-config.xml')
###############################

### Specific Logging properties for different logging levels
#
### log levels for the different components - levels `DEBUG - INFO - WARN - ERROR`
#logging level for Sakuli output
log.level.sakuli=INFO
#logging level for Sikuli output
log.level.sikuli=WARN
#logging level for Sahi output
log.level.sahi=WARN
#logging level for the Spring framework (only used internally)
log.level.spring=WARN
#logging level for all other **Java classes and libraries**
log.level.root=INFO

# If you use the argument 'resumeOnException=true' in methods like `new Region("username",true)`
# to continue the test even the method fails, you can control how Sakuli treats such exceptions by
# settings the property `suppressResumedExceptions`:
#   true  = the exception will be logged and appear in the test result
#   false = the exception will NEITHER be logged NOR appear in the test result.
#
# Example:
#              // create region "foo"
#              var foo = new Region("bar.png",true);
#              // if "image" is not found, the script will resume
#              var baz = foo.find("image");
#              // throw your "own" exception.
#              // If you do not, and suppressResumedExceptions=true, the exception will be suppressed.
#              if (baz == null){
#                  throw "Sorry, I could not find image 'image'.";
#              }
#
# DEFAULT: false
sakuli.exception.suppressResumedExceptions=false

# Log pattern
#
# Log pattern for development with java classes:
# sakuli.log.pattern=%-5level %d{YYYY-MM-dd HH:mm:ss.SSS} [%thread]  %logger{36} - %msg%n

# default log pattern
sakuli.log.pattern= %-5level [%d{YYYY-MM-dd HH:mm:ss.SSS}] - %msg%n

# log file folder
sakuli.log.folder=${sakuli.testsuite.folder}/_logs

# Deletes all files that are older than the defined days in the folder `sakuli.log.folder`
#
# DEFAULT: 14 days
sakuli.log.maxAge=14

# folder for screenshot files (if activated)
sakuli.screenshot.dir=${sakuli.log.folder}/_screenshots

# screenshot file format (Possible values: jpg, png)
sakuli.screenshot.format=png


#######################################################################################
# SAHI-SCRIPT-RUNNER-PROPERTIES
#
# Defines properties of the application component "Sahi".
#######################################################################################
### Internal Sahi-Proxy configuration
# sahi proxy port
#(internal proxy for the test execution)
sahi.proxy.port=9999
# Sahi installation folder
sahi.proxy.homePath=${sakuli.home.folder}/../sahi
# Sahi config folder
sahi.proxy.configurationPath=${sahi.proxy.homePath}/userdata

# number of max. attempts to connect to a site before aborting
sahi.proxy.maxConnectTries=25
# wait time in seconds between retry attempts
sahi.proxy.reconnectSeconds=1


# Sahi delays on Sikuli input (put on helmet!)
#
# Sikuli keyboard events (type/paste) on a Sahi-controlled browser instance can get lost if
# they are executed at the same time when Sahi internal status requests are sent from the
# browser JS to the Sahi proxy (default: 100ms = 10x per sec.).
# For this reason, Sakuli can temporarily stop the browser JS with the Sahi proxy when a Sikuli
# keyboard action has to be executed on the browser window.
#
# "delayPerKey" is the amount of time the browser JS keeps silent for one key event; for e.g. a
# word with 8 characters, this is "8 x delayPerKey" (in ms).
#
# "delayBeforeInput" is the time Sakuli must wait before starting the keystrokes. Within this time
# the browser JS updates its sync interval from default (100ms) to e.g. "8 x delayPerKey".
#
# After the key events are done, Sakuli resets Sahi's sync interval back to the default value.
# This setting is not needed if key events are executed on a Window which is not contolled by Sahi.
#
# (gets only enabled if delayPerKey is set)
sahi.proxy.onSikuliInput.delayBeforeInput=500
sahi.proxy.onSikuliInput.delayPerKey=

### HTTP/HTTPS proxy Settings
### Set a company proxy Sahi should use
# external HTTP proxy
ext.http.proxy.enable=false
ext.http.proxy.host=proxy.server.com
ext.http.proxy.port=8080
ext.http.proxy.auth.enable=false
ext.http.proxy.auth.name=user
ext.http.proxy.auth.password=password
# external HTTPS proxy
ext.https.proxy.enable=false
ext.https.proxy.host=proxy.server.com
ext.https.proxy.port=8080
ext.https.proxy.auth.enable=false
ext.https.proxy.auth.name=user
ext.https.proxy.auth.password=password
# There is only one bypass list for both secure and insecure.
ext.http.both.proxy.bypass_hosts=localhost|127.0.0.1|*.internaldomain.com|www.verisign.com


### SSL-Certficate settings (experimental)
# Uncomment the following lines to use a client certificate.
# If there is no password, do not uncomment the password line.
# keystore type can be JKS, PKCS12 etc.
# For more information see http://community.sahipro.com/forums/discussion/1167/sahi-allowing-certificates
#
#ssl.client.keystore.type=JKS
#ssl.client.cert.path=${sakuli.testsuite.folder}/sakuli_keystore
#ssl.client.cert.password=sakuli

#
# log folder for sahi hmtl report
logs.dir=${sakuli.log.folder}
# handlers to create in the root logger
# (all loggers are children of the root logger)
handlers = java.util.logging.ConsoleHandler, java.util.logging.FileHandler

# default logging level for new ConsoleHandler instances
java.util.logging.ConsoleHandler.level = ALL

# default logging level for new FileHandler instances
java.util.logging.FileHandler.level = ALL

# default formatter for new ConsoleHandler instances
java.util.logging.ConsoleHandler.formatter = java.util.logging.SimpleFormatter
java.util.logging.FileHandler.formatter = java.util.logging.SimpleFormatter

java.util.logging.FileHandler.limit=102400
java.util.logging.FileHandler.count=10
java.util.logging.FileHandler.pattern=%t/sahi%g.log
1.3.2.2. Exception handling
Some objects (Region, Application, Environment) allow on their creation to specify the optional boolean argument resumeOnException, which controls whether the script should resume on an exception which is related to the object or one of its method (default: false).
Setting this to true can be useful if you want to raise a custom exception or no exception at all.
| Value | Impact |
|---|---|
|
the exception will be logged and appear in the test result |
|
the exception will NEITHER be logged NOR appear in the test result. |
// create region "foo"
var foo = new Region("bar.png",true);
// if "image" is not found, the script will resume
var baz = foo.find("image");
// throw your "own" exception.
// If you do not, and suppressResumedExceptions=true, the exception will be suppressed.
if (baz == null){
    throw "Sorry, I could not find image 'image'.";
}
1.3.2.3. Logging
The logging verbosity of all compoments Sakuli, Sahi, Sikuli, Spring - and Java in general can be changed individually with properties.
"Verbosity" means one of the levels DEBUG - INFO - WARN - ERROR
|
| Property | Description |
|---|---|
|
logging level for Sakuli output |
|
logging level for Sikuli output |
|
logging level for Sahi output |
|
logging level for the Spring framework (only used internally) |
|
logging level for all other Java classes and libraries |
| Property | Description |
|---|---|
|
Format string |
|
Log folder |
In general it is also possible to add your own Logback configuration under SAKULI_HOME/config/sakuli-log-config.xml. For more information about the Logback syntax please refer to the Logback manual.
Control the age of your log-files in the sakuli.properties, to prevent disk space erros.
| Property | Description |
|---|---|
|
Deletes all files that are older than (default) 14 days in the defined |
On Linux you can additional configure logrotate to tidy up old log files:
vim /etc/logrotate.d/sakuli

__SUITE_FOLDER__/*/_logs/* __SUITE_FOLDER__/*/_logs/_screenshots/* {
    size 1k
    missingok
    maxage 2
}
1.3.2.4. Secret De-/Encryption
Neither Sahi nor Sikuli have a way to prevent sensible data (passwords, PINs, etc.) from being logged and stored in the script in clear text.
That’s the reason why Sakuli is able to encrypt them on the command line, and to decrypt them again on runtime just for the moment when they are needed. There is no (quick) way to decrypt those secrets again on the command line, so this is rather a way to obscure things not everybody should see than high-secure a encryption mechanism. Since version v1.1.0 Sakuli provides two different possibilities to en-/decrypt secrets, each use the cipher algorithm AES/CBC/PKCS5Padding:
In this chapter the usage of the Sakuli CLI is defined for Linux sakuli but works on Windows sakuli.exe in the same way!
|
environment (default):Since version v1.1.0 Sakuli uses an environment based master-key mechanism as default way to de-/encrypt secrets.
1) Create a new Masterkey
First we have to create a new masterkey:
sakuli create masterkey
=========== Calling Sakuli JAR =====================================================


Create a Sakuli encryption master key (AES 128 bit):

ny3bC1ZKuHzg7saT1hRCMQ== (1)

... now add this as environment var 'SAKULI_ENCRYPTION_KEY' or property 'sakuli.encryption.key'| 1 | masterkey |
2) Encrypt a secret
To encrypt secrets, you can also use the command line. To use the generated masterkey from above, you can either set the environment variable SAKULI_ENCRYPTION_KEY…
export SAKULI_ENCRYPTION_KEY=ny3bC1ZKuHzg7saT1hRCMQ== (1)
sakuli encrypt foo
=========== Calling Sakuli JAR =====================================================


String to Encrypt: foo
...INFO  [2017-07-18 16:01:28.311] - use environment var 'SAKULI_ENCRYPTION_KEY' for encryption

Encrypted secret with 'environment masterkey':

tn9PPXjwgH6VDTIEEWTdY9G2StrYxCrX1tXCueA3HwY=  (3)

... now copy the secret to your testcase!
or define the CLI option -masterkey <secret>:
sakuli encrypt foo -masterkey ny3bC1ZKuHzg7saT1hRCMQ== (2)
=========== Calling Sakuli JAR =====================================================


String to Encrypt: foo
...
Encrypted secret with 'environment masterkey':

mLzYiksPjmoqbdivBMDhYglcbnYCzv3iVdpmnmdXbV4=  (3)

... now copy the secret to your testcase!| 1 | masterkey defined by environment variable |
| 2 | masterkey defined through CLI option |
| 3 | encrypted secret |
The encryption secret can now be used in our test case definition.
3) Decrypt a secret
For decrypting the secret, just define the masterkey with one of the following options:
-
Environment variable
SAKULI_ENCRYPTION_KEY -
Sakuli run option
sakuli run <test suite> -masterkey <masterkey> -
Sakuli property
sakuli.encryption.key
After that Sakuli will automatically decrypt secrets during runtime of the test cases when using one of the following methods:
Example usage in testcase:
//testcase.js
env.typeAndDecrypt("eKcf2WLQIab6APvi4BKKBiJdP31SK86z/oOJRUAQkdE=");| Both the environment variable and the property file containing the master key must be protected against other users. (User environment instead of system environment variable / set proper file permissions) |
interface:Among other parameters, Sakuli uses the MAC address of a local network interface card as a encryption salt. Hence no virtual adapters can be choosen.
1) Choosing a NIC
You can decide whether Sakuli should automatically select an adapter by setting the following properties:
sakuli.encrpytion.mode=interface
sakuli.encryption.interface.autodetect=true
..or a specific one should be used:
sakuli.encrpytion.mode=interface
sakuli.encryption.interface.autodetect=false
sakuli.encryption.interface=eth0
A second possibility is to use Sakuli starter option:
# use autodetect
sakuli COMMAND ARGUMENT -interface auto
# use specific interface
sakuli COMMAND ARGUMENT -interface eth0
2) Encrypt a secret
To encrypt secrets on the command line, Sakuli uses the MAC address of a NIC on the local machine (Windows/Linux). The following command lets Sakuli decide which NIC will be used:
sakuli encrypt foo -interface auto
=========== Calling Sakuli JAR =====================================================

String to Encrypt: foo
...
Encrypted secret with interface 'eth3': CKXIAZmO7rSoBVMGgJZPDQ==

... now copy the secret to your testcase!
Add -interface eth0 to select eth0 as salt interface. Add -interface list to get a list of all available adapters.
3) Decrypt a secret
To decrypt a secret define the interface encryption mode in your sakuli.properties or testsuite.properties (see Property loading mechanism).
sakuli.encrpytion.mode=interface
sakuli.encryption.interface.autodetect=true
After that Sakuli will automatically decrypt secrets during runtime of the test cases when using one of the following methods:
1.3.2.5. Screenshot settings
To set the format and destination folder for screenshots taken by Sakuli change the following properties:
| Property | Description |
|---|---|
|
take a screenshot in case of an exception |
|
folder for screenshot files (if activated) |
|
screenshot file format (Possible values: jpg, png) |
|
Screenshot dimensions for results sent to Gearmand |
1.3.2.6. GUI-only tests
If you want to run tests which do not include any web technology, you can use phantomJS instead of firefox/chrome/IE and use the Sahi default start URL:
case1/sakuli_demo.js http://sahi.example.com/_s_/dyn/Driver_initialized| Sakuli depends on Sahi running, which in turn needs a running browser instance. Using PhantomJS for this, hides the browser window completely. |
1.3.2.7. Sahi Controller
| Use the Sahi Controller to identify elements on the page to write and test Sahi methods! |
There are two ways to get Sahi instructions into your testcase your-testcase.js:
-
identify, copy & paste from the Sahi Controller
-
record by the Sahi Controller, copy & paste from the file, see Sahi Recorder
Add to your testcase the following line, at position where you want to identify your HTML object:
//.... your testcode
env.sleep(9999);
Then start your test suite and the Sakuli test should appear and stop at that position for 9999 seconds. The "sleep" statement is a nice trick when writing long tests; wherever you put a 9999s sleep in, the test will execute until this position and wait. Think of it like a breakpoint when debugging a program.
Now open the Sahi Controller (hold the ALT key on Windows or CTRL + ALT on Linux and doubleclick anywhere on the page) to open this window:
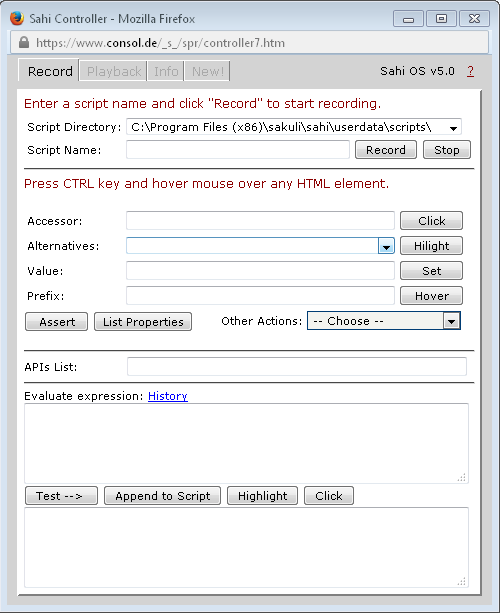
First, we want Sahi to check if there is for example the Sakuli Logo on the page. Hold the CTRL key and move the mouse pointer on the logo. Watch the Sahi Controller: it detects the HTML elements below the mouse pointer and generates the accessor method for "image" automatically:
![]()
Click on "Assert" to let Sahi autogenerate assertion methods:
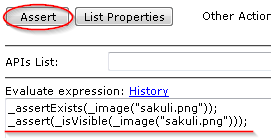
Just copy the second line (which checks the visibility of an element) into the clipboard and paste it into your testcase your-testcase.js before the env.sleep(9999) statement.
Further, we want for example to assure that the contact form of the web page os displayed correctly. Move the mouse pointer down to the "Kontakt" link; Sahi should display the accessor _image("Kontakt zu ConSol")
-
This time use the "click" button on the controller
-
To execute a click; this also generates the complete browser action statement
-
copy/paste also into the test case
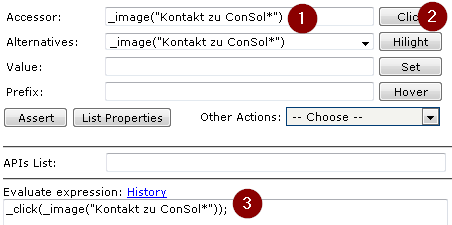
In the end, Sahi should check that the appeared popup window contains the text "Schreiben Sie uns!". You guessed it - move the mouse pointer over this text and click the "Assert" button again. The fourth assertion is the right one, which we also paste into the test script:
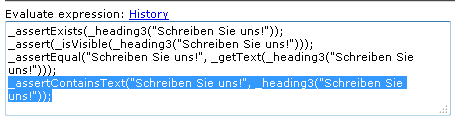
Now remove the "sleep" statement from the script file; it should look now like that:
_dynamicInclude($includeFolder);
var testCase = new TestCase(60, 70);
var env = new Environment()

try{
    //your code
    _assert(_isVisible(_image("sakuli.png")));
    _click(_image("Kontakt zu conSol"));
    _assertContainsText("Schreiben Sie uns!", _heading3("Schreiben Sie uns!"));
    //env.sleep(9999);

} catch (e) {
    testCase.handleException(e);
} finally {
    testCase.saveResult();
}
Perhaps you want Sahi to highlight the items it is acting on: just use the _highlight() method from the debug helper API to mark each element with a red border before accessing it: _highlight(_image("sakuli.png"));
|
1.3.2.8. Sahi Recorder
Another method to copy/paste code is to record all steps into a file. For this, open the Sahi controller (Open the Sahi Controller), enter a filename and click on "record":

actions like clicks are written to file automatically. All other actions like assertions can be written to file by clicking the button "Append to Script": 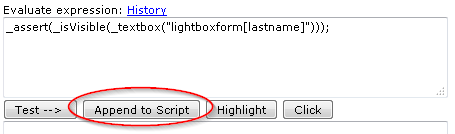
|
After you have clicked on "stop", open the recorded file, copy everything and paste the lines in to the Sakuli testcase your-testcase.js file.
1.3.2.9. Sahi settings
Browser selection
You may want to change the browser due to the following reasons:
-
to check if a web test (made with Sahi methods) for browser A is also running properly on browser B
-
to run a headless browser
-
just for curiosity :-)
-
to keep the browser in background while Sakuli tests a non-web application (e.g. fat client)
-
In addition to the possibilities described property testsuite.browser, see Property loading mechanism, the generic Sakuli starter sakuli/sakuli.exe can also be given the parameter -browser:
sakuli run /path/to/suite -browser chromeBrowser configuration
If the Sahi dashboard does not show any browser or if you want to add another browser to the dashboard …
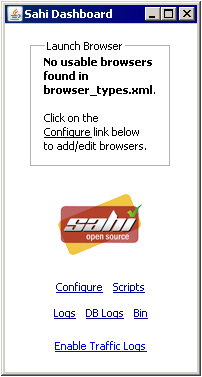
… you have to edit SAHI_DIR/userdata/config/browser_types.xml. Each browser is defined within a browserType block. Please refer to the Sahi Documentation, "Configure Browsers" to see the browserType Nodes for popular browsers.
For PhantomJS please save sahi.js into the folder SAHI_DIR\phantomjs\ and use this option line:
<options>--proxy=localhost:9999 __SAHI_DIR__\phantomjs\sahi.js</options>Attention: PhantomJS 2 is currently unsupported. Use version 1.9.x
Sahi behind a proxy
Set the following properties (globally in sakuli.properties) to define a proxy Sahi should connect to.
### HTTP/HTTPS proxy Settings
### Set these properties, to enable the test execution behind company proxies
# Use external proxy server for HTTP*
ext.http.proxy.enable=true
ext.http.proxy.host=proxy.yourcompany.com
ext.http.proxy.port=8080
ext.http.proxy.auth.enable=false
ext.http.proxy.auth.name=user
ext.http.proxy.auth.password=password

# Use external proxy server for HTTPS
ext.https.proxy.enable=true
ext.https.proxy.host=proxy.server.com
ext.https.proxy.port=8080
ext.https.proxy.auth.enable=false
ext.https.proxy.auth.name=user
ext.https.proxy.auth.password=password

# There is only one bypass list for both secure and insecure.
ext.http.both.proxy.bypass_hosts=localhost|127.0.0.1|*.internaldomain.com|www.verisign.com
HTTPS support in Sahi
This documentation is not complete yet. Any help is appreciated.
This will work on most systems, especially the ones you have full control over.
-
Open Sahi Dashboard, start the browser.
-
On the Sahi start page, navigate to the https site you want Sahi to trust (e.g. https://github.com)
-
You will be presented a message that this page "connection is not secure/trusted".
-
On Firefox, click "I understand the risks."
-
On Chrome, click "Proceed anyway (unsecure)"
-
On IE, click "Continue to the website (not recommended)".
-
Once the page has loaded, click "SSL Manager" from the Sahi start page
-
You should be presented a green check mark right of the https URL, indicating that Chrome accepted the site’s certificate, signed by Sahi:

| This is a browser-specific solution and can be different in newer Browser versions or other operating systems! |
-
Open Sahi Dashboard, start Chrome
-
On the Sahi start page, navigate to the https site you want Sahi to trust (e.g. https://github.com )
-
You will be presented a message that this page "connection is not secure". Click on the red-crossed locker symbol left of the URL in the address bar and then "Certificate information"
-
Change to tab "Details" and press "Copy to File…"
-
In the following export assistent, save the certificate as "Cryptographic Message Syntax Standard PKCS #7 Certificates (.P7B)""
-
Go to Chrome preferences, "Manage certificates"
-
"Import…" -> select the exported .p7b certificate (in the "Open" dialogue, chnange the filename extension filter to "PKCS#1" )
-
Choose "Trusted Root Certification Authorities" as certificate store
-
Accept the Import confirmation.
-
Restart Chrome from the Sahi dashboard.
-
From the Sahi start page (step #2), click "SSL Manager"
-
You should be presented a green check mark right of the https URL, indicating that Chrome accepted the site’s certificate, signed by Sahi:
-
Open Sahi Dashboard, start Firefox/Firefox portable
-
On the Sahi start page, navigate to the https site you want Sahi to trust (e.g. https://github.com )
-
You will be presented a message that this page "connection is not secure". Click on I understand the risks" and add the certificate exception. Now navigate back to the sahi start page and click on the Link "SSL Manager":

You will be promptet again a security warning for connecting to "sahi.example.com" (a local dummy domain), add the certificate here also as an exception.
The following page contains a list of all so far trusted and untrusted domains and their certificates. To import the red marked into the browser’s certificate store, open the links by clicking them with the middle mouse key. This opens the page within a new tab; only in this way you are allowed to add the certificate exception.
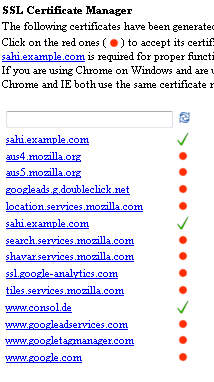
You can close every opened tab when it is displaying "Successfully connected" for the domain:
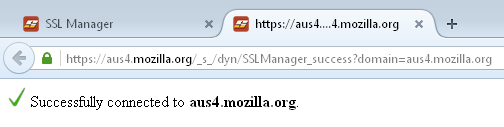
Now go back to the SSL Manager overview and click the "refresh" button. Every previously untrusted domain should now be marked as OK:
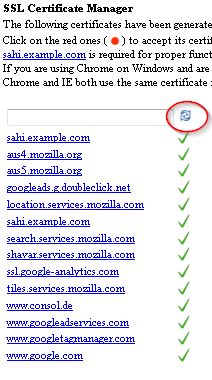
Ensure that Firefox really save the certificates permanently! 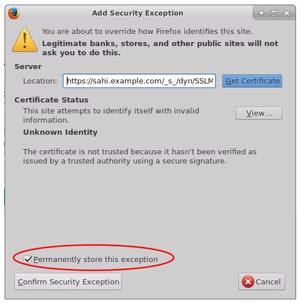
|
See Sahi description Configure SSL in Sahi.
To run your tests on different hosts, Containerized Execution or orchestrated by some continuous integration tool(e.g. Jenkins), it’s necessary that you can share the HTTPS config for different hosts.
| The usage is described for the Firefox browser. For other browser try to copy there certificate store. |
-
You have to accept the Sahi fake certificates, like seen above:
-
Now two things happened:
-
Sahi added a Java Keystore for each accepted certificate domain (e.g.
sahi_example_com,www_github_com) in~/sakuli/sahi/userdata/certs/. -
The Firefox profile
~/sakuli/sahi/userdata/browser/ff/profiles/sahi0now contains an updated version of:-
cert8.db- certificate store -
key3.db- key parts of certificates -
cert_override.txt- list of certificate exceptions
-
-
-
Ensure that above files will be copied before the tests starts like described here:
-
copy all created Sahi fake certificates:
sahi_example_com  -->  __SAKULI_ROOT__/sahi/userdata/certs/
www_github_com    -->  __SAKULI_ROOT__/sahi/userdata/certs/
-
copy the Firefox certificate store to Sahi default profile
cert8.db          -->  __SAKULI_ROOT__/sahi/config/ff_profile_template/
key3.db           -->  __SAKULI_ROOT__/sahi/config/ff_profile_template/
cert_override.txt -->  __SAKULI_ROOT__/sahi/config/ff_profile_template/
-
Fore more information see: Docker - Writing HTTPS Sahi web tests, JavaDSL - HTTPS Sites
Sahi and webpack-dev-server
Due to issue sahi test not run with webpack dev server #295 Sahi OS have currently some problems with the "auto loading" function of the webpack-dev-server. If you use the startup option webpack-dev-server --inline Sahi may will throw this error:
....
ERROR [2017-12-01 13:00:12.332] - ERROR:
CASE "tests": _sahi.setServerVar('lastURL', window.document.location.href); Window/Domain not found:  popupNameFromStep=; derivedName=; windowName=; windowTitle=; wasOpened=0; domain=guestbook ...
Important in this error message is Window/Domain not found: popupNameFromStep=; derivedName=; windowName=; windowTitle=; wasOpened=0 which will produced by the auto load function "inline Hot Module Replacement". This automatic refresh won’t work well with the Sahi proxy injection architecture, so we have to disable the webpack auto reload function with the --no-inline option:
  "scripts": {
    (1)
    "dev": "webpack-dev-server --inline --progress --config build/webpack.dev.conf.js",
    (2)
    "e2e-server": "webpack-dev-server --no-inline --progress --config build/webpack.dev.conf.js",
},| 1 | for development with "auto reload" |
| 2 | for end-to-end testing with disabled "auto reload" for Sakuli |
For more the issue #295.
1.3.3. Troubleshooting
1.3.3.1. Growing Firefox profile folder
If you experience that the Sahi profile folders sahi0-9 of Mozilla Firefox (located in sahi\userdata\browser\ff\profiles) are getting bigger and bigger: this is caused by two bugs:
We do not know any Firefox settings which can prevent the creation of SQLITE writeahead-logs (if you do, please let us know). The only pragmatic solution at the moment is to delete all SQLITE files periodically or before each Sakuli run (e.g. by running as a preHook). %SAKULI_HOME%\bin\helper\ff_purge_profile.bat contains an example for windows.
1.3.3.2. Hanging applications
If you are testing applications which tend to hang/freeze, you can run a "tidy-up"-Script by using the -pre-Hook option of Sakuli:
sakuli run __INST_DIR__/example_test_suites/example_ubuntu/ -preHook 'cscript.exe %SAKULI_HOME%\bin\helper\killproc.vbs -f %SAKULI_HOME%\bin\helper\procs_to_kill.txt'In procs_to_kill.txt you can define which processes should be killed before Sakuli starts a new check:
# Full path:
C:\Program Files\Mozilla Firefox\firefox.exe
C:\Program Files\Internet Explorer\iexplore.exe
# Using wildcards (%):
java%sakuli.jar
1.3.3.3. Sikuli does not recognize images
If Sikuli does not recognize regions on the screen or does recognize the wrong ones, check the following list of possible reasons:
-
Run the client’s OS on a fixed resolution: Some applications/OS scale window elements slightly depending on the resolution. for example, if you are running Sakuli within Virtualbox, the guest OS changes its resolution as soon as you resize the VM window. The dimensions of window elements can then slightly diverge by 1-2 pixels from the screenshots taken before. This difference is small for human’s eyes, but a big one for Sikuli. Make sure to disable features like "Auto-Adjust Guest Display" and set the Client’s desktop to a common resolution (e.g. 1024x768). Side note: the smaller you set the resolution, the less work has to be done by Sikuli.
-
Disable any image compression algorithms in your screenshot capturing program (Greenshot, Shutter, …). Otherwise Sikuli will compare compressed pattern images with umcompressed image data on the screen, which will fail for sure.
-
Sikuli uses a similarity value of 0.99 by default. That value (range: 0-0.99) determines that more than (X * 100) % of the region pixels have to match. If Sikuli does not recognize anything or the wrong regions, try to slightly decrease the similarity by changing
sakuli.region.similarity.defaultglobally or inside a test e.g. withenv.setSimilarity(0.8). This should only be neccessary if the pattern images are of poor quality or the screen always differs slightly from the pattern images (e.g. due to compression of remote sessions like vnc). Please note that a similarity of "1" would mean that "more than 100%" of the region pixels would have to match - which is completely wrong.
1.3.3.4. Missing keystrokes on type or failing paste
Sikuli keyboard events type() and paste() on a Sahi-controlled browser instance can get lost if they are executed at the same time when Sahi internal status requests are sent from the browser to the Sahi proxy (default: 10x per sec).
For this reason, Sikuli type/paste methods first extend the Sahi status interval to the value of sahi.proxy.onSikuliInput.delayPerKey (in ms) which is long enough to execute one keyboard action. For the method type (which is "press/release" character by character), a multiple if this value is chosen. Before leaving the paste/type method, the interval gets reset by Sakuli to the default Sahi status interval.
# some recommended values for correct pasting and typing
# sakuli.properties

sahi.proxy.onSikuliInput.delayPerKey=500| This setting is not needed if Sikuli does keyboard actions on GUIs not controlled by Sahi. |
1.3.3.5. Application.getRegion() returns NULL
If the execution of new Application("…").open().getRegion() throws a NullPointerException or retruns null, firstly turn on debug logging, see [logging]. Then you mostly will see at the log output that an OS based library is missing.
On Ubuntu or other Linux based OS check if the packe wmctrl is installed. If not install it via:
sudo apt-get install wmctrl1.4. Integration in other Tools
Sakuli can hand over test result to "Forwarder", which can be currently feed different tools like Nagios based monitoring systems or continuous integration server. If no forwarder is defined, a result summary is printed out in the end of a suite.
Feel free to develop another forwarder or ask us to do this.
| Forwarder | Technology | Use cases |
|---|---|---|
default |
- Log-Files and screenshots |
- Continuous Integration server |
- JDBC-SQL |
- Integration in Nagios based monitoring systems as active checks with check_mysql_health |
|
- Gearman |
- Integration in Nagios based monitoring systems as passive checks |
|
- Icinga2 REST API |
- Integration in Icinga2 as passive checks |
|
- Result spool file on check_mk agent |
- Integration in CheckMK through customizable spool file |
1.4.1. Monitoring integration
1.4.1.1. OMD preparation
This chapter describes all necessary steps to prepare a OMD site with a Nagios compatible monitoring system to receive Sakuli test results with one of the forwarders gearman, database, Check_MK or icinga2-api. For some parts of this documentation, OMD with Thruk as web frontend will be presupposed, but any other Nagios based system will do also (the configuration steps may vary then).
OMD Docker image
| If you want to run OMD-Labs in a container then check out the OMD-Labs on Docker project. |
Requirements
-
OMD installed on a Linux operating system
-
a running OMD site
Nagios configuration
Use the Makefile located in $OMD_ROOT/share/sakuli/omd to
-
install predefined Nagios/Naemon service templates
-
install the Sakuli logo
-
enable HTML interpretation in the service output
OMD[demo]:~/share/sakuli/setup/omd$ make configNow choose one of the Sakuli forwarder modules.
1.4.1.2. Gearman forwarder
This page describes how the results of Sakuli tests can be transmitted directly into the Gearman result queue of a monitoring system.
| If you do not use a gearman-enabled monitoring system in a OMD environment, the procedure may vary. |
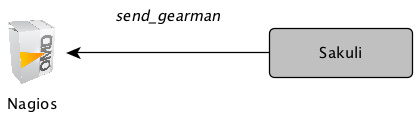
OMD Configuration
Use the Makefile located in $OMD_ROOT/share/sakuli/omd/ to configure mod_gearman:
-
enable all services for mod_gearman
-
set the bind IP and port (default:
0.0.0.0:4730; overwrite with e.g.export GEARMAND_PORT=192.168.130.10:4731) -
set the encryption key (default:
sakuli_secret; overwrite with e.g.export GEARMAN_SECRET=mykey)
OMD[demo]:~/share/sakuli/setup/omd$ make gearman [enter]
...| For security reasons, the Makefile will only configure mod-gearman if it is not enabled yet. If it is already enabled, inspect the Makefile, read the steps carefully and execute the steps by hand. |
| For PRODUCTION usage please use individual encryption key! |
By default, mod_gearman does only accept AES encrypted packages. Since version 1.1.0 Sakuli will automatic use the encryption key sakuli_secret (located at the sakuli-default.properties). To change the encryption password, see Sakuli Client Configuration.
If you do not want to use encryption at all enable accept_clear_results and disable sakuli.forwarder.gearman.encryption:
OMD[demo]:~ vim ~/etc/mod-gearman/server.cfg
...
accept_clear_results=yes
#testsuite.properties
sakuli.forwarder.gearman.encryption=falseCreate a service which should receive Sakuli test results. Host/service names derive from the following properties:
-
host:
sakuli.forwarder.gearman.nagios.hostname(defined globally or per suite) -
service:
testsuite.id(defined intestsuite.properties)
define host {
  host_name                      sakuli_client
  alias                          sakuli_client
  address                        __SAKULI_CLIENT_IP__
  use                            generic-host
}

define service {
  service_description            example_xfce
  host_name                      sakuli_client
  use                            tpl_s_sakuli_gearman
  freshness_threshold            180
}| freshness_threshold should be slightly higher than the interval Sakuli tests are executed |
The check is waiting now for check results from a Sakuli client.
Sakuli Client Configuration
On the Sakuli client you must set the global properties for the gearman receiver. For this, edit sakuli.properties in the folder containing the test suites (you can copy the lines from SAKULI_HOME/conf/sakuli-default.properties):.
__INST_DIR__/example_test_suites/sakuli.properties:

sakuli.forwarder.gearman.enabled=true
sakuli.forwarder.gearman.encryption=true (1)
sakuli.forwarder.gearman.secret.key=secret_password (1)
sakuli.forwarder.gearman.server.host=__GEARMAN_IP__
sakuli.forwarder.gearman.server.port=[Gearman Port defined in "omd config" (default:4730)]
sakuli.forwarder.gearman.server.queue=check_results (2)

# Nagios host where all Sakuli services are defined on. If neccessary, override this value per test suite.
# (Nagios service name is defined by testsuite.properties -> suiteID)
sakuli.forwarder.gearman.nagios.hostname=sakuli_client
sakuli.forwarder.gearman.nagios.check_command=check_sakuli| 1 | Enable encryption and set the key only if you did not activate accept_clear_results in mod_gearman. Otherwise, set encryption to false. |
| 2 | Change this queue name if you use the Sakuli Gearman proxy |
In case you get a java.lang.security.InvalidKeyException with error message "Illegal key size or default parameters" you probably
need to enable unlimited strength security policies in your Java JRE. This is done by installing OpenJDK or by adding a special security policy JAR to the Java JRE lib directory. For the Java JRE 8, take a look at Oracle - Java Cryptography Extension 8.
|
Gearman proxy (optional)

Use the Sakuli gearman proxy script if you want to intervene into the communication between Sakuli and Naemon/Nagios.
Possible use cases:
-
Change parts of the messages Sakuki sends to the monitoring system ⇒ there are some examples contained already
-
Getting notified when Sakuli sends results to services which do not exists
-
Auto-create services for incoming results (not yet implemented)
Use the Makefile located in $OMD_ROOT/share/sakuli/ to enable the feature:
OMD[demo]:~/share/sakuli/setup/omd$ make gearman_proxyEdit etc/mod-gearman/sakuli_gearman_proxy.cfg:
$remoteHost="172.17.0.2"; (1)
$remotePort="4730"; (1)
$localHost="172.17.0.2"; (2)
$localPort="4730"; (2)
$queues = {
    "$remoteHost:$remotePort/check_results_sakuli"  => "$localHost:$localPort/check_results",
}; (3) (4)

$err_h = 'error_host'; (5)
$err_s = 'eror_svc';
$err_r = '2'; (6)| 1 | Gearman IP/Port listening for Sakuli results. Set this to the same values as <2> unless gearman_proxy.pl is running on another system. |
| 2 | Gearman IP/Port of the monitoring system |
| 3 | check_results_sakuli ⇒ queue name to receive Sakuli results. Make sure this queue name is defined in property sakuli.forwarder.gearman.server.queue on all Sakuli clients (see Sakuli Client Configuration) |
| 4 | check_results ⇒ default queue of mod-gearman where gearman workers write back their results. (no need to change that) |
| 5 | The proxy does a livestatus query for each incoming package to ensure that the receiving host/service exists. Provide a special "error host/service" pair where the proxy can send a message when there are results coming in for non-existent services. |
| 6 | Status of messages for non-existent services (2=CRITICAL) |
Start the proxy:
OMD[demo]:~$ omd start sakuli_gearman_proxy
Starting sakuli_gearman_proxy...OK
Check that the queue check_results_sakuli is running in addition to the default queue check_results.
OMD[demo]:~$ gearman_top
2017-06-09 13:37:28  -  localhost:4730  -  v0.33

 Queue Name           | Worker Available | Jobs Waiting | Jobs Running
-----------------------------------------------------------------------
 check_results        |               1  |           0  |           0
 check_results_sakuli |               1  |           0  |           0
-----------------------------------------------------------------------
This change does affect other monitoring checks executed with mod-gearman, because only Sakuli will send results into the queue check_results_sakuli.
|
1.4.1.3. Database forwarder
This page describes how the results of the Sakuli tests (e.g. example_windows7/ubuntu/opensuse) can be written into a MySQL database which is then checked asynchronously by the monitoring system with check_mysql_health.
| If you do not use MySQL in a OMD environment, the procedure may vary. |
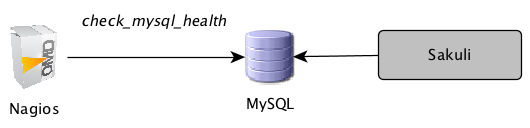
OMD Configuration
If not already done for other reasons, a site-specific MySQL instance has to be started. That’s the place where Sakuli clients can store their check results.
Use the Makefile located in $OMD_ROOT/share/sakuli/omd/ to configure mysql:
-
enable MySQL in OMD
-
create & initialize the database
-
install check_mysql_health Perl module to check the Sakuli result database, configure the check_command
-
create the sakuli user (default:
sakuli; overwrite with e.g.export MYSQL_USER=alice) -
set the password of sakuli user (default:
sakuli; overwrite with e.g.export MYSQL_PASSWORD=topsecret) -
set the bind IP (default:
0.0.0.0; overwrite with e.g.export MYSQL_BINDADDRESS=192.168.130.10) -
set the bind port (default:
3306; overwrite with e.g.export MYSQL_PORT=3377)
OMD[demo]:~/share/sakuli/setup/omd$ make mysql [enter]
...OMD[sakuli]:~$ lib/nagios/plugins/check_mysql_health -H __DB_IP__ --username sakuli --password sakuli --database sakuli --port 3306 --mode connection-time
OK - 0.24 seconds to connect as sakuli | connection_time=0.2366s;1;5Nagios fetches Sakuli check results using the plugin check_mysql_health, which is already contained in OMD.
The Perl module CheckMySQLHealthSakuli.pm enhances the functionality of check_mysql_health by introducing the mode --my-sakuli-suite.
Set USER macros for static vars in resource.cfg, which makes it easy to use them in all nagios checks:
OMD[sakuli]:~$ vim ~/etc/nagios/resource.cfg
  # database name
  $USER10$=sakuli
  # database user
  $USER11$=__DB_USER__
  # database password
  $USER12$=__DB_PASSWORD__
  # database port
  $USER13$=__DB_PORT__
  # check_mysql_health module dir
  $USER15$=~/etc/check_mysql_health/
  # database IP
$USER16$=__MySQL_Database_IP__Create the following host/service object for the first test case. Note the ARG2 in check_command: the database check will only evaluate the last result if it is max. 180 seconds old. If older, the check will return UNKNOWN. (For comparison: this is equivalent to "freshness_threshold" if you would use the Gearman forwarder.
| PNP4Nagios: you should set the RRD heartbeat to the same value to get a realistic gap in the graph if recent client results are missing. Otherwise the heartbeat of 2 hours will fill up the graph. |
define host {
  host_name                      sakuli_client
  alias                          sakuli_client
  address                        __SAKULI_CLIENT_IP__
  use                            generic-host
}

define service {
  # service_description            example_windows7
  # service_description            example_opensuse
  service_description            example_ubuntu
  host_name                      sakuli_client
  use                            generic-service,srv-pnp
  check_command                  check_sakuli!sakuli_demo!180
}
Reload the monitoring core:
omd reload coreNow open Thruk; you should see now the Sakuli host with one service attached:

Re-scheduling this service should display the UNKNOWN message that the requested suite could not be found. For the moment, this is ok:

Sakuli Client Configuration
On the Sakuli client you must set the global properties for the database receiver, as described here: Enable database forwarder
Execute one of the example test case:
-
Ubuntu:
sakuli run INST_DIR/example_test_suites/example_ubuntu/ -
openSUSE:
sakuli run INST_DIR/example_test_suites/example_opensuse/ -
Windows 7:
sakuli run INST_DIR\example_test_suites\example_windows7\ -
Windows 8:
sakuli run INST_DIR\example_test_suites\example_windows8\
The service should change its status to:

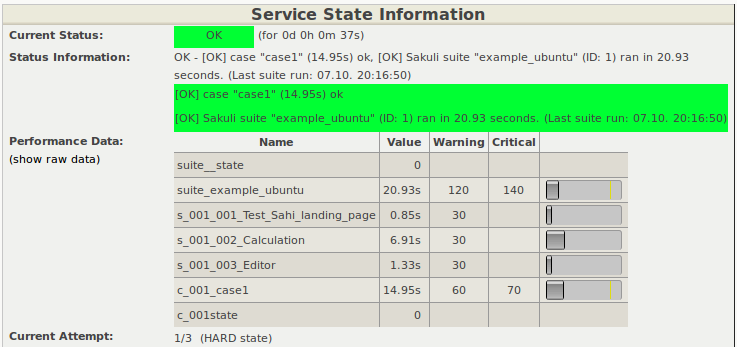
Database cleanup (optional)
Sakuli’s database can get very large over time. Use the following database maintenance script to keep only the most recent data.
Uncomment and adapt the preinstalled OMD crontab entry:
OMD[sakuli]:~$ vim etc/cron.d/sakuli
00 12 * * * $OMD_ROOT/local/bin/mysql_purge.sh 90 > /dev/null 2>&1
After that, reload the OMD crontab:
OMD[sakuli]:~$ omd reload crontab
Removing Crontab...OK
Initializing Crontab...OK
Troubleshooting
Possible error 1: mysql_install_db fails:
141021 16:40:03 [Warning] Can't create test file /omd/sites/sakuli/var/mysql/omd2.lower-test
ERROR: 1005  Can't create table 'db' (errno: 13)
Possible error 2: MySQL startup fails:
OMD[sakuli]:~$ omd start
Starting gearmand...OK
Starting MySQL... ..........ERROR.
Starting rrdcached...OK
Solution:
Check /var/log/syslog or /var/log/messages for apparmor messages:
…
Oct 21 17:08:21 omd2 kernel: [116300.215520] type=1400 audit(1413904101.323:27): apparmor="DENIED" operation="open" profile="/usr/sbin/mysqld" name="/opt/omd/sites/sakuli/.my.cnf" pid=13136 comm="mysqld" requested_mask="r" denied_mask="r" fsuid=999 ouid=999
…
Apparmor has prevented you from using a non-default config file for MySQL. If you know how to create a apparmor profile for MySQL on OMD, let us know :-)
The quick solution is to completely disable apparmor. Check if unloading apparmor profiles solves the problem:
root@omd:~# service apparmor teardown
 * Unloading AppArmor profiles
If so, execute the following command to uninstall apparmor:
root@omd2:~# apt-get remove apparmor1.4.1.4. Icinga2 forwarder
This page describes how the results of Sakuli tests can be sent to the REST API of an Icinga2 monitoring instance.
| This part of the documentation does not apply to OMD. Some steps may vary for Icinga2 on OMD. |

Icinga2 Configuration
The steps to enable the Icinga2 API are described in the REST API documentation.
Create a check_command, which will be executed only if Icinga did not receive a Sakuli result within a certain time. This ensures that you get a notification even if no passive check results arrive in Icinga at all:
vim /etc/icinga2/conf.d/commands.conf

object CheckCommand "check_dummy" {
   import "plugin-check-command"
   command = [
     PluginDir + "/check_dummy","$dummy_state$","$dummy_text$"
   ]
   vars.dummy_state = 0
   vars.dummy_text = "Check was successful."
}

object CheckCommand "check_sakuli" {
   import "check_dummy"
   vars.dummy_state = 3
   vars.dummy_text = "No passive Sakuli check result received."
}
Create a host object for the Sakuli client:
vim /etc/icinga2/conf.d/hosts.conf

object Host "sakuliclient01" {
   import "generic-host"
   address = [IP]
}
Create the following service object for the first test case. freshness_threshold should be slightly higher than the interval Sakuli tests are planned (if you are using PNP4Nagios, see also RRD heartbeat )
object Service "sakuli_demo" {
  import "generic-service"
  host_name = "sakuliclient01"
  check_command = "check_sakuli"
  enable_active_checks = 0
  enable_passive_checks = 1
  enable_flapping = 0
  volatile = 1
  enable_perfdata = 1
}
Reload Icinga2:
service icinga2 reloadNow open Icingaweb2; you should see the Sakuli host with the service "sakuli_demo" attached:
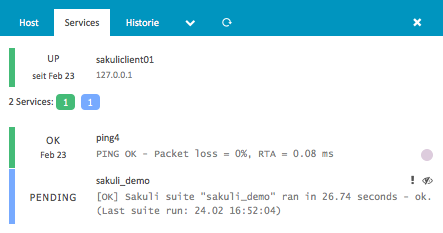
The check is waiting now for check results from a Sakuli client.
Sakuli Client Configuration
On the Sakuli client you must set the global properties for the Icinga2 receiver. For this, edit sakuli.properties in the folder containing the test suites (you can copy the lines from SAKULI_HOME/conf/sakuli-default.properties):
## En-/disable Icinga2 forwarder, default: false
sakuli.forwarder.icinga2.enabled=true
sakuli.forwarder.icinga2.api.host=__ICINGA_IP__
sakuli.forwarder.icinga2.api.port=5665
sakuli.forwarder.icinga2.api.username=icingasakuli
sakuli.forwarder.icinga2.api.password=icingasakuli
sakuli.forwarder.icinga2.hostname=sakuliclient01
For other OPTIONAL gearman parameters you can adjust, see sakuli-default.properties file.
Execute one of the example test case:
-
Ubuntu:
sakuli run INST_DIR/example_test_suites/example_ubuntu/ -
openSUSE:
sakuli run INST_DIR/example_test_suites/example_opensuse/ -
Windows 7:
sakuli run INST_DIR\example_test_suites\example_windows7\ -
Windows 8:
sakuli run INST_DIR\example_test_suites\example_windows8\
The service in Icnga2 should change its status to:

Graph settings
Icinga2 integration is very new; we did not yet dive into the configuration of Graphite or Grafana graphs. The only supported graphing solution is PNP4Nagios. Nevertheless you are welcome to contribute graph templates for Grafana and/or Graphite!
Set the RRD storage type of PNP to MULTIPLE, which creates one RRD file per perfdata label:
echo "RRD_STORAGE_TYPE = MULTIPLE" > /etc/pnp4nagios/check_commands/check_sakuli.cfgCopy the PNP graph template check_sakuli.php from %SAKULI_HOME%/setup/nagios/ on the client to /usr/share/nagios/html/pnp4nagios/templates/ on the Icinga2 server.
1.4.1.5. Check_MK
This page describes how to setup a Sakuli client to send results to a Check_MK monitoring system.

Sakuli Client Configuration
It is assumed that the client is already monitored by Check_MK and a agent is installed and running on it.
Create a new folder spool in the installation path of the Check_MK agent. This is the folder where the results will be written to. The user which is used to run Sakuli checks must be given write access to this folder.
Now set the properties for the check_mk receiver. For this, edit sakuli.properties in the folder containing the test suites (you can copy the lines from SAKULI_HOME/conf/sakuli-default.properties):
INST_DIR/example_test_suites/sakuli.properties:
-
sakuli.forwarder.check_mk.enabled=true -
sakuli.forwarder.check_mk.spooldir=C:\\Program Files (x86)\\check_mk\\spool- Path to the spool folder as defined above. On Windows, the backslashes have to be escaped with\. Check_MK is expecting the result files from Sakuli here. Default value:/var/lib/check_mk_agent/spool(Linux) /(installation_path)\\spool(Windows). -
sakuli.forwarder.check_mk.freshness- Defines the maximal age in seconds in which the result is still valid. If the last modification of the result file is older than this property, the result file will be ignored. The check_mk service will turn into UNKNOWN. Default value:600. -
sakuli.forwarder.check_mk.spoolfile_prefix- Defines the result file prefix. It can be used to change the default naming convention for the Check_MK output files. Default value:sakuli_suite_. -
sakuli.forwarder.check_mk.service_description- Defines the service description, which is used within the check result. Default value:${testsuite.id}. If you want to use a PNP graph template, the service name must begin withsakuli_. Only then the generic PNP template of check_mk for local (=passive) checks will be able to determinesakuli.phpas a valid template for this check result. For more information see here.
An example configuration could look like:
sakuli.forwarder.check_mk.enabled=true
sakuli.forwarder.check_mk.spooldir=/var/lib/check_mk_agent/spool
sakuli.forwarder.check_mk.freshness=600
sakuli.forwarder.check_mk.spoolfile_prefix=sakuli_suite_
sakuli.forwarder.check_mk.service_description=My_Custom_ServiceWith the implementation of the Check_MK forwarder a new Jtwig templating mechanism has been introduced in Sakuli, which decouples the output format from the Sakuli binary. This which allows format adaptions to fulfill your needs at any time without installing a new version of Sakuli.
In near time, all other forwarder modules of Sakuli will support the templating feature too.
Sakuli comes with default templates, which are placed in $INSTALL_DIR/config/templates. The default Check_MK templates can be found in a subdirectory check_mk.
For further information how the default template directory can be changed or how the forwarder templates can be customized please refer to Forwarder Templates.
1.4.1.6. Screenshot history
INFO: This section applies to OMD-Labs and the web interface Thruk. To use the screenshot history functionality on other platforms/web interfaces, the steps may vary.
Feature description
In case of an exception, Sakuli takes a screenshot of the current screen and embeds this image into the service output (base64 encoded). The user is able to view the screenshot on the monitoring user interface.
The drawback of this method is that the screenshot only resists in the monitoring core’s memory; as soon as the test recovers, the test output changes back to OK and the image is gone. There are the Nagios/Naemon event logs to inspect former exceptions, but they do not contain the screenshots (fortunately).
With the Screenshot history feature, the monitoring core (Nagios/Naemon/Icinga) fires a event handler script each time the check has a CRITICAL result. The script analyzes the service output, parses the image data and stores it on the local file system within a folder structure published by the OMD site apache process. Sakuli services contain a Thruk action menu which allow the user to see all saved screenshots.
Activating the feature
Use the Makefile located in $OMD_ROOT/share/sakuli/omd/ to enable the feature:
OMD[demo]:~/share/sakuli/setup/omd$ make screenshot_historyEvent handler template
Use the service template tpl_s_sakuli_screenshot_history in all Sakuli services to enable the eventhandler:
define service {
  service_description            example_xfce
  host_name                      sakuli_client
  use                            tpl_s_sakuli_gearman_grafana, tpl_s_sakuli_screenshot_history
}
Each time a CRITICAL Sakuli result comes in, the eventhandler will log its actions:
OMD[demo]:$ tail -f var/log/sakuli_screenshot_eventhandler.log
...
[6893] 06/08/17 03:28:27 ---------------------------------------
[6893] 06/08/17 03:28:27 HOST/SERVICE: sakuli_client / example_xfce
[6893] 06/08/17 03:28:27 STATE: CRITICAL
[6893] 06/08/17 03:28:27 LASTSERVICECHECK: 1496892468
[6893] 06/08/17 03:28:27 PLUGIN_OUT: [CRIT] Sakuli suite "example_xfce" (23.11s) EXCEPTION: 'CASE "case1": STEP "Test_Sahi_landing_page": _highlight(_link("XSSL Manager")): TypeError: el is undefined Sahi.prototype._highlight@http://sahi ...\
[6893] 06/08/17 03:28:27 Found screenshot format: jpg
[6893] 06/08/17 03:28:27 IMG_DIR: /omd/sites/demo/var/sakuli/screenshots/sakuli_client/example_xfce/1496892468
[6893] 06/08/17 03:28:27 Moving /omd/sites/demo/tmp/sakuli/screenshot_1496892468.jpg to /omd/sites/demo/var/sakuli/screenshots/sakuli_client/example_xfce/1496892468/screenshot.jpg
[6893] 06/08/17 03:28:27 Writing image path to InfluxDB...
[6893] 06/08/17 03:28:27 InfluxDB responded: < HTTP/1.1 404 Not Found
[6955] 06/08/17 03:29:18 ---------------------------------------
Thruk action_menu
Open $OMD_ROOT/etc/thruk/thruk_local.d/sakuli_action_menu.conf and adapt the section <action_menu_apply>. The following example applies the action_menu only on services whose host names begin with "sakuli". See the Thruk documentation for more examples.
# Apply the action_menu on all services of hosts starting with "sakuli"
<action_menu_apply>
     sakuli_history_menu = ^sakuli.*;.+$
</action_menu_apply>
After reloading the web server you should see a small dropdown arrow on each Sakuli service, giving you access to the screenshot history lightbox:
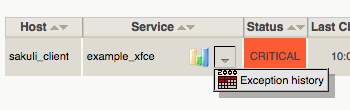
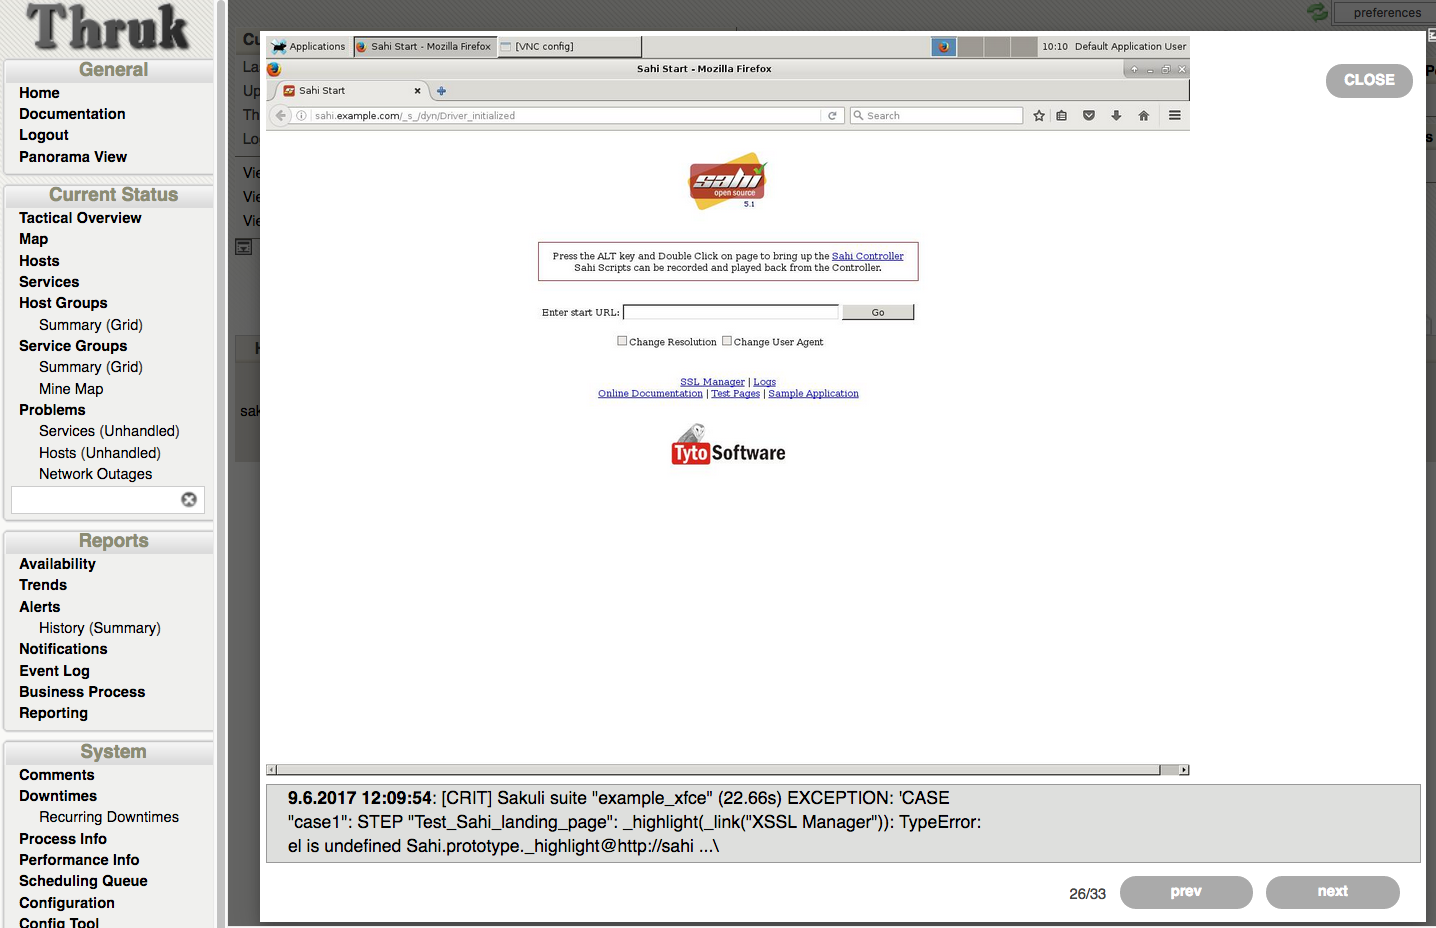
The lightbox always shows the last/current screenshot and the error message. To navigate forth/back, use the left/right arrow keys or the buttons in the bottom right corner. Press Esc to close the box again.
Grafana integration
Read the Grafana screenshot annotations section if you want to integrate the screnshots as Grafana annotations.
| For PNP4Nagios there is no such feature available. |
1.4.1.7. Grafana graphs
| This section is written for OMD-Labs environments with InfluxDB/Grafana enabled. It may be useful for others too, but the steps may vary then. |
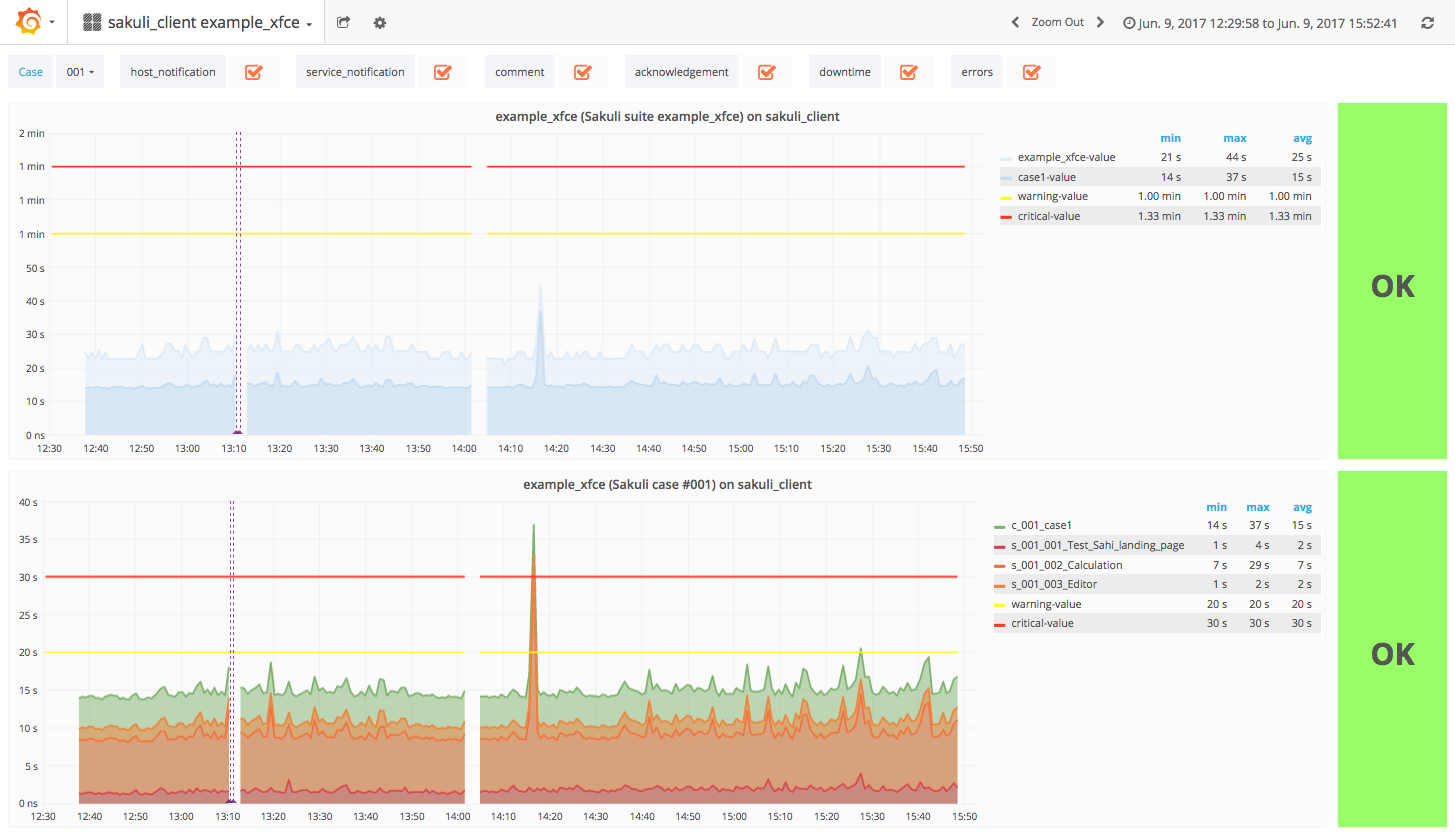
Feature activation
Check the OMD Labs documentation for infos on how to enable Grafana/InfluxDB.
OMD-Labs already contains a graph template check_sakuli for Histou, the Grafana templating system.
|
Screenshot annotations
Grafana graphs can also show screenshots of the Screenshot history as anotations.
Execute the Sakuli Makefile to patch the influxDB init script. It will restart InfluxDB and create the Sakuli image database:
OMD[demo]:~/share/sakuli/setup/omd$ make grafanaIn case of an exception, the screenshot history event_handler saves the image on the file system and its path into the InfluxDB database "sakuli" (measurement: images).
Violet vertical lines in the Sakuli graph indicate a saved screenshot. Hover the mouse over the bottom of the line to show the thumbnail:
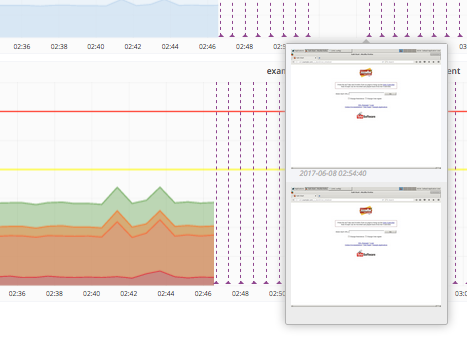
Click the thumbnail to get the image enlarged.
1.4.1.8. PNP4Nagios graphs
RRD Storage Type
In PNP4Nagios RRD Storage type "MULTIPLE" is of great importance for Sakuli checks, because the number of steps can change by time (=if you are adding/deleting some).
Verify RRD_STORAGE_TYPE in process_perfdata.cfg:
OMD[sakuli]:~$ vim ~/etc/pnp4nagios/process_perfdata.cfg
  RRD_STORAGE_TYPE = MULTIPLE
If this value is "SINGLE" on your system and you do not want to change it globally, use the custom check_command cfg file. PNP4Nagios will then use storage type "MULTIPLE" only for this check_command then:
OMD[sakuli]:~$ cp __TEMP__/sakuli-vx.x.x-SNAPSHOT/setup/nagios/check_sakuli.cfg ~/etc/pnp4nagios/check_commands/RRD heartbeat
Each RRD file contains a heartbeat value, which determines how much time must pass without any new update, before RRDtool writes an UNKNOWN value (nan) into the data slot (the graph will have a gap then). In PNP4nagios heartbeat is defined at approx. 2 1/2 hours. If your Sakuli check runs only every 2 hours, this value will be fine. But for a 5 minute interval, this is way too long. As a consequence, the graph line will be continuously drawed even Sakuli did no check for two hours. Hence, always make sure to adapt the heartbeat to a value which is slightly higher than the interval of Sakuli checks (and indeally the same as [omd-gearman-freshness_threshold], if you use the gearman receiver):
OMD[sakuli]:~$ cd ~/var/pnp4nagios/perfdata/sakulihost/
# Sakuli check interval: 2 minutes --> RRD heartbeat 3 minutes
OMD[sakuli]:~$ for file in sakuli_e2e_webshop*.rrd; do rrdtool tune $file --heartbeat 1:180; done
install PNP graph template
Copy the PNP4nagios graph template into the templates folder:
OMD[sakuli]:~$ cp __TEMP__/sakuli-vx.x.x-SNAPSHOT/setup/nagios/check_sakuli.php ~/etc/pnp4nagios/templates/CPU/Memory metrics
If Sakuli reports a long check runtime, it is good to know the CPU/Memory metrics on the Sakuli client machine, because CPU/IO bottlenecks affect Sakuli tests, too.
The following optional enhancement displays the CPU/Memory graph lines of the Sakuli test client in the suite/case graph. By setting custom host macros, the graph template knows where to fetch these data from.
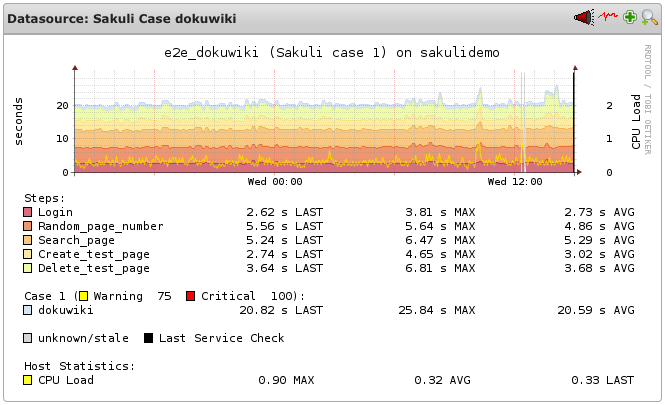
Add this command to commands.cfg:
define command{
    command_name    check_local_load
    command_line    $USER1$/check_load -w $ARG1$ -c $ARG2$
}
Add this service to services.cfg:
define service {
  service_description            CPU_Load
  host_name                 sakuli_client
  use                            generic-service,srv-pnp
  # if Sakuli checks are running on the same machine (as in the demo VM)
  check_command                  check_local_load!2.5,1.5,1!5,3.5,2
  # if Sakuli checks are running on another host than OMD
  check_command                  check_by_ssh!check_load!2.5,1.5,1!5,3.5,2
}
Add this custom host macros to every Sakuli host in hosts.cfg:
define host {
    …
    _E2E_CPU_HOST                  sakuli_client
    _E2E_CPU_SVC                   CPU_Load_load5
}
Now reload OMD:
omd reloadYou should see now the following service on sakuli_client:

The value of _E2E_CPU_SVC and _E2E_MEM_SVC refer to the file name of the corresponding RRD file. CPU_Usage_5 for example means to get the the CPU usage data from $OMD_ROOT/var/pnp4nagios/perfdata/[_E2E_CPU_HOST]/CPU_Usage_5.rrd.
|
Install NSClient++ on the Windows client. Then add this command check_nrpe_arg:
    vim ~/etc/nagios/conf.d/commands.cfg

    define command {
      command_name                   check_nrpe_arg
      command_line                   $USER1$/check_nrpe -H $HOSTADDRESS$ -c $ARG1$ -a $ARG2$
    }
Then add these services to Nagios:
    define service {
      service_description          CPU_Usage
      host_name                    win7sakuli
      use                          generic-service,srv-pnp
      check_command                check_nrpe_arg!CheckCPU!warn=80% crit=90% time=15 time=5 time=1 ShowAll
    }

    define service {
      service_description          Mem_Usage
      host_name                    win7sakuli
      use                          generic-service,srv-pnp
      check_command                check_nrpe_arg!CheckMem!MaxWarn=80% MaxCrit=90% ShowAll type=page type=paged type=physical type=virtual
    }
Add these host macros to every Nagios host where Sakuli checks are defined:
    _E2E_CPU_HOST                  win7sakuli
    _E2E_CPU_SVC                   CPU_Usage_5
    _E2E_MEM_HOST                  win7sakuli
    _E2E_MEM_SVC                   Mem_Usage
Now reload OMD:
omd reload
The value of _E2E_CPU_SVC and _E2E_MEM_SVC refer to the file name of the corresponding RRD file. CPU_Usage_5 for example means to get the the CPU usage data from $OMD_ROOT/var/pnp4nagios/perfdata/[_E2E_CPU_HOST]/CPU_Usage_5.rrd.
|
As soon as the created services produce perfdata for the first time, their XML file created by PNP4Nagios will also contain the host macros created in the step before. If not, check if XML_UPDATE_DELAY in etc/pnp4nagios/process_perfdata.cfg is set too high.
OMD runs PNP by default in Bulk Mode with NPCD and npcdmod.o. In this mode the Nagios broker module npcdmod.o reads the performance directly from the monitoring core and writes them in var/spool/perfdata. This data are not expandable with custom macros - therefore the mode has to be changed to Bulk Mode with NPCD. (the performance of both modes will be equal).
In this mode the monitoring core itself writes perfdata to the spool directory (instead of npcdmod.o). The format of this data can be freely defined by adapting service_perfdata_file_template. In the following code block you can see that the four custom host macros were added to this template string. Perfdata files are then moved to var/spool/perfdata every 15 seconds by the monitoring core.
Make sure to replace the OMD site name placeholder OMD_SITE with your site name! (in vim type :%s/OMD_SITE/yoursitename/g)
|
vim ~/etc/nagios/nagios.d/pnp4nagios.cfg

process_performance_data=1

# COMMENT THE LINE BELOW
# broker_module=/omd/sites/__OMD_SITE__/lib/npcdmod.o config_file=/omd/sites/__OMD_SITE__/etc/pnp4nagios/npcd.cfg

# services
service_perfdata_file=/omd/sites/__OMD_SITE__/var/pnp4nagios/service-perfdata
service_perfdata_file_template=DATATYPE::SERVICEPERFDATA\tTIMET::$TIMET$\tHOSTNAME::$HOSTNAME$\tSERVICEDESC::$SERVICEDESC$\tSERVICEPERFDATA::$SERVICEPERFDATA$\tSERVICECHECKCOMMAND::$SERVICECHECKCOMMAND$\tHOSTSTATE::$HOSTSTATE$\tHOSTSTATETYPE::$HOSTSTATETYPE$\tSERVICESTATE::$SERVICESTATE$\tSERVICESTATETYPE::$SERVICESTATETYPE$\tE2ECPUHOST::$_HOSTE2E_CPU_HOST$\tE2ECPUSVC::$_HOSTE2E_CPU_SVC$\tE2EMEMHOST::$_HOSTE2E_MEM_HOST$\tE2EMEMSVC::$_HOSTE2E_MEM_SVC$
service_perfdata_file_mode=a
service_perfdata_file_processing_interval=15
service_perfdata_file_processing_command=omd-process-service-perfdata-file

# hosts
host_perfdata_file=/omd/sites/__OMD_SITE__/var/pnp4nagios/host-perfdata
host_perfdata_file_template=DATATYPE::HOSTPERFDATA\tTIMET::$TIMET$\tHOSTNAME::$HOSTNAME$\tHOSTPERFDATA::$HOSTPERFDATA$\tHOSTCHECKCOMMAND::$HOSTCHECKCOMMAND$\tHOSTSTATE::$HOSTSTATE$\tHOSTSTATETYPE::$HOSTSTATETYPE$
host_perfdata_file_mode=a
host_perfdata_file_processing_interval=15
host_perfdata_file_processing_command=omd-process-host-perfdata-file
Check if the perfdata processing commands are present:
vim ~/etc/nagios/conf.d/pnp4nagios.cfg

define command{
    command_name    omd-process-service-perfdata-file
    command_line    /bin/mv /omd/sites/__OMD_SITE__/var/pnp4nagios/service-perfdata /omd/sites/__OMD_SITE__/var/pnp4nagios/spool/service-perfdata.$TIMET$
}

define command{
    command_name    omd-process-host-perfdata-file
    command_line    /bin/mv /omd/sites/__OMD_SITE__/var/pnp4nagios/host-perfdata /omd/sites/__OMD_SITE__/var/pnp4nagios/spool/host-perfdata.$TIMET$
}
Restart the OMD site to unload the npcdmod.o module:
omd restartFirst reschedule the CPU/Mem check on the sakuli client. It can take several minutes to store the values in the RRD database. As soon as you can see "real" values in the PNP4Nagios graph of "CPU Load" (instead of “-nan”), restart the Sakuli check. The Sakui graph should now contain also CPU/Memory values.
1.4.1.9. Forwarder Templates
With release 1.1 Sakuli introduced the Jtwig template engine, which is used for generating the output of the Sakuli test suite for certain forwarders. (Currently only the Check_MK forwarder supports Jtwig templates.)
Using templates for the forwarder output makes it possible to easily modify the output of Sakuli and adapt it without the need to release a new Sakuli version.
Here we want to describe how Jtwig is working, how to use a customized template and what you have to pay attention to.
JTwig template
Jtwig is a template engine based on Java, which has a simple and understandable syntax und is easy to use. The following snippet shows an example of a Jtwig template used in Sakuli.
    {% for testStep in testCase.stepsAsSortedSet %}
        , step "{{ testStep.name }}"$whitespace$
        {% if (testStep.state.error) %}
            EXCEPTION: {{ errorMessageCreator.exceptionMessage(testStep) }}
        {% else %}
            over runtime ({{ testStep.duration }}s/warn at {{ testStep.warningTime }}s)
        {% endif %}
    {% endfor %}
The input for this template is the testCase object, which has a set ot test steps. The template iterates over all the steps and prints certain step information based on the state of the test step.
Customized Jtwig Functions
Jtwig comes with a list of functions like abs, concat etc, which can be used within a template. In addition to the standard functions, Jtwig supports the implementation and injection of custom functions. Sakuli provides following custom functions:
-
abbreviate- The function abbreviates a certain string to a specified length. The implementation is based on the StringUtils.abbreviate method from the Apache commons library. -
extractScreenshot- The function extracts the screenshot from a specified test data entity, which contains an exception. -
getOutputDuration- The function returns the formatted duration for a specified test entity. -
getOutputState- The function returns theOutputStatefor a specified SakuliState. -
isBlank- The function checks whether the specified string parameter is blank.
Please refer to the Sakuli default Jtwig templates, to see the custom functions in action.
The forwarder implementation provides a special handling of white spaces and new lines within the templates. For this feature the jtwig-spaceless-extension has been used, which comes with a SpaceRemover interface. This has been implemented by the LeadingWhitespaceRemover. The LeadingWhitespaceRemover is configured in the twig template engine and removes all leading whitespaces for every line and all line endings within the template. It can be activated by adding the text snippet or the whole template within the following tags {% spaceless %} and {% endspaceless %}.
The LeadingWhitespaceRemover has been introduced, to make the implementation and maintaining of the templates easier.
Since the leading white spaces and the new lines are removed, some special placeholder have been introduced, which are replaced by the real characters at the end of the template generation:
* $whitespace$ - the placeholder will be replaced by a real white space.
* $newline$ - the placeholder will be replaced by a new line '\n'.
Sakuli provides a default template set, which is placed within the templates directory under SAKULI_HOME/config/templates within the Sakuli home folder (e.g. the default Check_MK templates can be found in a subdirectory check_mk).
The property sakuli.forwarder.template.folder defines the path to the main.twig template for the respective forwarder. The default value is set to ${sakuli.home.folder}/config/templates.
Before customizing a default template, it is essential to copy the templates to a new location and configure that location as the template location in Sakuli, otherwise installing a new Sakuli release would overwrite the modified templates within the config directory.
Generally the forwarder is expecting to find a certain template file named main.twig within the configured template directory. The default main.twig template doesn’t contain the whole output, but includes further templates to make the single templates more readable. Since the templates are fully customizable, the user can decide how the templates are structured, whether to use nested templates or to define everything within a single file.
The following snippet shows the default main.twig template provided by Sakuli for the Check_MK forwarder. This template is also showing the use of the spaceless extension and the special character for a new line.
    {% spaceless %}
    {% import 'error_message_creator.twig' as errorMessageCreator %}
        <<<local>>>$newline$
        {% include 'performance_data.twig' %}
        {% include 'short_summary.twig' %}
        {% include 'detailed_summary.twig' %}
        $newline$
{% endspaceless %}-
Check_MK: see Check_MK
1.4.3. SQL Database
This page describes how the results of Sakuli can be stored into a MySQL database which can be read by other 3rd party systems.
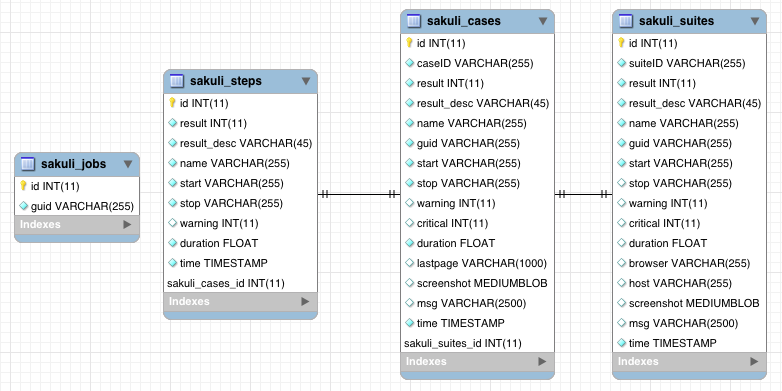
Create Sakuli DB
Create the Sakuli database and the DB user:
$ mysql < __TEMP__/sakuli-vx.x.x-SNAPSHOT/setup/database/create_sakuli_database.sqlCreate the database user:
$ mysql
  grant ALL on sakuli.* to '__DB_USER__'@'%' identified by '__DB_PASSWORD__';
  flush privileges;
  quit
Check the connection with your favorit SQL tool:
Enable database forwarder
On the Sakuli client you must set the properties for the database receiver. For this, edit sakuli.properties in the folder containing the test suites (you can copy the lines from SAKULI_HOME/conf/sakuli-default.properties):
__INST_DIR__/example_test_suites/sakuli.properties:

# DEFAULT: false
sakuli.forwarder.database.enabled=true

#DEFAULT: mysql
sakuli.forwarder.database.jdbc.driverClass=com.mysql.jdbc.Driver
sakuli.forwarder.database.host=__DB_IP__
sakuli.forwarder.database.port=__DB_PORT__
sakuli.forwarder.database=sakuli
sakuli.forwarder.database.user=__DB_USER__
sakuli.forwarder.database.password=__DB_PW__Execute the example test case:
-
Ubuntu:
sakuli run INST_DIR/example_test_suites/example_ubuntu/ -
openSUSE:
sakuli run INST_DIR/example_test_suites/example_opensuse/ -
Windows 7:
sakuli run INST_DIR\example_test_suites\example_windows7\ -
Windows 8:
sakuli run INST_DIR\example_test_suites\example_windows8\
The database should now contain the results.
Integration in other tools
You can find queries using the Sakuli DB in /setup/nagios/CheckMySQLHealthSakuli.pm in the extracted Sakuli sources folder.
We are looking forward to reading your story of how you integrated the DB results in your toolchain.
Database cleanup (optional)
Sakuli’s database can get very large over time. Use the following database maintenance script to keep only the most recent data.
Create a crontab entry for a automatic database cleanup of data older than 90 days:
~$ crontab -e
00 12 * * * $SAKULI_HOME/bin/helper/mysql_purge.sh 90 > /dev/null 2>&1
After that, the crontab should be active.
1.5. Developer Documentation
In this section you will find a few helpful documentation for developers who want to contribute.
-
Jenkins-CI labs-build.consol.de/view/Sakuli
-
Some additional Maven aspects
-
(only for Linux) sikulix-supplemental package
1.5.1. Installation guide for Sakuli-Developers
For the following guide you need
-
Access to the issue-tracker tool (currently GitHub-Issues and internal GitLab)
-
Git
-
Development environment (we advise IntelliJ IDEA)
-
Maven 3 (check version
mvn -version)
For Ubuntu users!!! - check the maven version with apt show maven
|
-
Java JDK 1.8
-
Please use the original Oracle JDK - OpenJDK unfortunately won’t work for the JavaFX based integration test, until #245 is not closed. Also see Install JavaFX
-
Ensure that your
JAVA_HOMEsystem variable links to the correct jdk-version
Import
-
Check out the project via git
-
Import the project as a maven-project
Maven Settings
-
Ensure that you have at least installed maven 3, run
mvn -version -
Config the local maven settings
~/.m2/settings.xmlfor your environment as follows:
<settings xmlns="http://maven.apache.org/SETTINGS/1.0.0"
  xmlns:xsi="http://www.w3.org/2001/XMLSchema-instance"
  xsi:schemaLocation="http://maven.apache.org/SETTINGS/1.0.0
                      http://maven.apache.org/xsd/settings-1.0.0.xsd">

<server>
 <id>labs-consol-sakuli-install</id>
 <username>sakuli</username>
 <privateKey>${user.home}/.ssh/your-key-file</privateKey>
 </server>

<server>
 <id>labs-consol-sakuli-repository</id>
 <username>maven-repository</username>
 <privateKey>${user.home}/.ssh/your-key-file</privateKey>
 </server>

</settings>-
Download Sahi5 from https://labs.consol.de/sakuli/install/3rd-party and execute the sahi installation:
java -jar install_sahi_v50_20141105.jar.jar-
Install Sahi into
<project-dir>/sahi. Ensure that this path is set insahi.proxy.homePathin filesakuli.properties.
| You only need to install the components: Sahi Core, Tools Userdata |
Setup a local MySQL database to save the results of test case executions. The database won’t be needed for running mvn install.
-
User:
sakuli -
Password:
sakuli -
Database:
sakuli -
SQL-Script: create_sakuli_database.sql
If you want to use a Docker-Container, you can build and run it with the following commands:
cd src/common/src/main/resources/org/sakuli/common/setup/database/create_sakuli_database
docker build -t=your-user/mysql-sakuli .
docker run --name mysql-sakuli -p 3306:3306 your-user/mysql-sakuli-
Execute
mvn clean verifyto ensure that the setup is correct -
Include the license header to your IDE
-
For IntelliJ see Help or our predefined copyright configuration:
Sakuli - Testing and Monitoring-Tool for Websites and common UIs.

Copyright 2013 - $today.year the original author or authors.

Licensed under the Apache License, Version 2.0 (the "License");
you may not use this file except in compliance with the License.
You may obtain a copy of the License at

    http://www.apache.org/licenses/LICENSE-2.0

Unless required by applicable law or agreed to in writing, software
distributed under the License is distributed on an "AS IS" BASIS,
WITHOUT WARRANTIES OR CONDITIONS OF ANY KIND, either express or implied.
See the License for the specific language governing permissions and
limitations under the License.
-
In order to run Sakuli test cases directly from the IDE, you need to build up a run configuration. For IntelliJ see the predefined run configurations under intellij/runConfigurations
-
classpath of module:
sakuli-core -
working directory:
$MODULE_DIR$ -
main class:
org.sakuli.starter.SakuliStarter -
program arguments: [[source]
-run <path to your Sakuli test suite folder> --sakuli_home <path to your "main" folder> --sahi_home <path to your sahi folder>
e.g. for the provided Win7 example use:
-run ../sakuli_test_suites/example src/main/_include ../sahi-
To run the testng tests correctly and prevent wrong file paths, set the default TestNG config like follow:
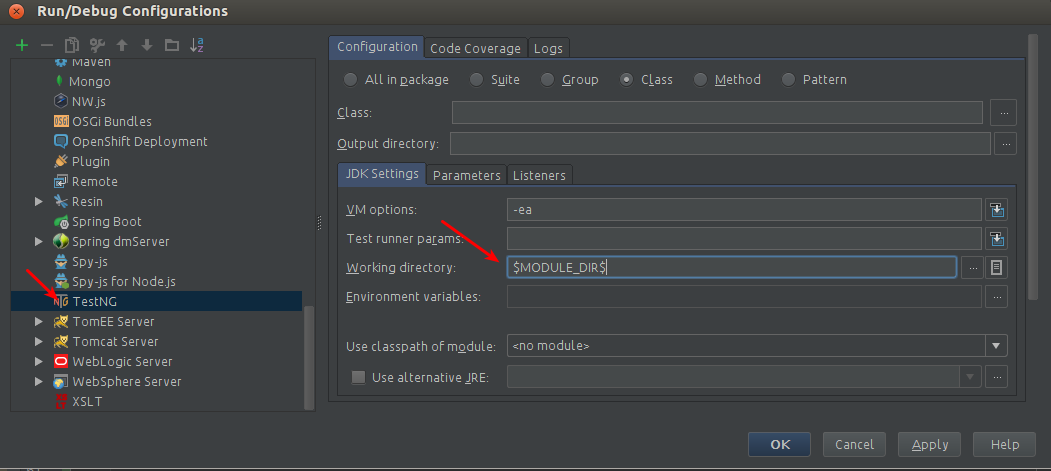
| Startup error: If you run your Sakuli test the first time, you might get a native library error, caused by Sikuli, saying that it could not find the correct native library to work with. At the same time, Sikuli already tried to fix the problem by modyfing PATH. Solution: Just log out and in again, so that the modified PATH-Variable will be read. Sakuli should start now without any error. |
-
Ensure that you have installed the latest JDK-8 version with included JavaFX
-
Ensure that the system variable
java.homepoints to your JDK directory and includes the file${java.home}/lib/ext/jfxrt.jar -
(optional) Download the JavaFX SceneBuilder for development from Oracle
-
(optional) Install the SceneBuilder to your IDE:
-
Intellij see Oracle-Help-Page
-
1.5.2. How to create a new release
-
Check if all features are merged in dev
-
Check if
changelog.adocis correct
-
Go to Jenkins - Sakuli_perform_release and execute the job and set the parameters
REL_VERSIONandDEV_VERSION -
Check if maven artifacts have been deployed at https://labs.consol.de/maven/repository/org/sakuli/
-
Check the new taged verison on DockerHub with same
REL_VERSIONfor the following images: DockerHub - Sakuli -
Test the new docker images as long the sakuli-exampels are not in the automated build
-
Check te latest documentation is updated at http://consol.github.io/sakuli/.
-
Make a new GitHub Release:
-
Add
sakuli-vXXX-installer.jarandsakuli-vXXX.zipfrom https://labs.consol.de/sakuli/install/ to a new release XXX -
Copy the latest changelog to the new release page
-
Check and publish new release
-
1. Dry-run (if needed)
Generate a new relase over jgitflow-maven-plugin (branch: release/xxx):
mvn jgitflow:release-start -DnoDeploy=true -DpushReleases=false -DlocalOnly=trueDo a dry-run without deploying and pushing any new files:
mvn jgitflow:release-finish -DnoDeploy=true -DpushReleases=false -DlocalOnly=trueDelete all local git changes and branches
2. Release
Generate a new relase over jgitflow-maven-plugin (branch: release/xxx):
mvn jgitflow:release-startExecute the following commands, to update the Dockerfiles to the new release version at the branch release/xxx .
    docker/update_sakuli_version.sh --new-version $REL_VERSION
    git commit -am "update Dockerfiles to REL-Version v$REL_VERS"
Start the release deploying and pushing any new branches and tags if needed:
mvn jgitflow:release-finishGo to the dev branch and adjust the version of the Dockerfiles:
    docker/update_sakuli_version.sh --new-version $DEV_VERS
    git commit -am "update Dockerfiles to DEV-Version v$DEV_VERS"
Push your changes:
git push --allFinally delete the no longer needed remote feature branch and do the manual release steps from above (after Jenkins job):
git branch -d <branchName>
git push origin --delete <branchName>Re-use a tag
To re-use an already set tag, remove it from git (local and remote):
# delete the tag locally:
git tag -d sakuli-X.X.X`
# push to remote:
git push --delete origin sakuli-X.X.X`
General
-
Check your maven settings in
~/.m2/settings.xml: -
Ensure that your private key has access rights for user
sakuli@labs.consol.de -
Ensure that your private key is added to ssh-agent:
ssh-add <path-to-key> -
Check proxy settings - the server
labs.consol.demust be reachable -
Ensure that the ConSol-Labs server is configured correctly, see SQL Database
1.5.3. Maven aspects
Following default lifecycle actions are currently used:
mvn clean deploy-
Compiles the sources with the
aspectj-maven-pluginto weave the source code and the dependencies -
Executes all unit tests
-
Executes all integration tests (without UI-Tests)
-
Adds the built maven artifacts to the local workspace
-
Builds the
sakuli-vX.X.X.zip`and `sakuli-vX.X.X-installer.jarfile locally -
Deploys the maven artifacts to the local repository
mvn testRuns all steps until step 2.
mvn verifyRuns all steps until step 3
mvn installRuns all steps until step 6
See the instruction: How to create a new release
Profiles can be added with option -P, followed by a parameter, e.g.
mvn install -P upload-release-
upload-releaseCopies the generatedsakuli-zipped-release-vX.X.X.zip,sakuli-vX.X.X-installer.jarfile and maven artifacts to the ConSol Labs server. Your private key for the ssh connection have to be configured in maven config file.m2/settings.xml:
.m2/settings.xml <servers>
<server>
<id>labs-consol-sakuli-install</id>
<username>sakuli</username>
<privateKey>${user.home}/.ssh/id_rsa</privateKey>
</server>
<server>
<id>labs-consol-sakuli-repository</id>
<username>maven-repository</username>
<privateKey>${user.home}/.ssh/id_rsa</privateKey>
</server>
</servers>-
ui-testsEnables the UI based test in phase integration-test in the modulintegration-testandjava-dsl. -
generate-manualThis profile will generate the AsciiDoc documentation in the module docs-manual, see AsciiDoc documentation aspects. -
generate-markdownThis profile will generate Markdown file in the module docs the file Sakuli API.
| To use the profile behind a HTTP/HTTPS proxy, be aware that the following things are configured: |
1) include in your $M2_HOME/settings.xml the proxy tag (if needed):
  <proxies>
  <proxy>
      <id>my-proxy-config</id>
      <active>true</active>
      <protocol>http</protocol>
      <host>proxy.company.com</host>
      <port>8888</port>
  </proxy>
  </proxies>
2) configure your system HTTP and HTTPS proxy over Environment (for Ubuntu). Set in bash.rc:
  export http_proxy=http://proxy.company.com:8888/
  export https_proxy=http://proxy.company.com:8888/
export ftp_proxy=http://proxy.company.com:8888/-
cl(internal use) This profile will be only to build a custom installer for CL.
for example for the sahi JARs, more information see: guide-3rd-party-jars-remote.
install to local repo
mvn install:install-file -DgroupId=net.sf.sahi -DartifactId=sahi -Dversion=5.1 -Dpackaging=jar -Dfile=sahi-5.1.jar

mvn install:install-file -DgroupId=net.sf.sahi -DartifactId=ant-sahi -Dversion=5.1 -Dpackaging=jar -Dfile=ant-sahi-5.1.jar

mvn install:install-file -DgroupId=net.sf.sahi -DartifactId=sahi-install -Dversion=5.1 -Dpackaging=zip -Dfile=sahi-install-5.1.zip
install to remote repo
mvn deploy:deploy-file -DgroupId=net.sf.sahi -DartifactId=sahi -Dversion=5.1 -Dpackaging jar -Dfile=sahi-5.1.jar -Drepository=labs-consol-sakuli-repository -Durl=scpexe://labs.consol.de/home/maven-repository/www/htdocs/repositoryor copy the local artifacts via SCP:
scp -r ~.m2/repository/net/sf/sahi/sahi/5.1 maven-repository@labs.consol.de:/home/maven-repository/www/htdocs/repository/net/sf/sahi/sahi/5.11.5.4. AsciiDoc documentation aspects
Execute:
mvn install -f src/docs-manual/pom.xml -P generate-manual
The Asciidoctor-maven-plugin now generates a HTML page and the PDF:
 $ ls src/docs-manual/target/generated-docs/
 $ ls src/docs-manual/target/generated-docs/pdf
Then you can open the file src/docs-manual/target/generated-docs/index.html in your favourite browser.
If you want to update the Github Page consol.github.io/sakuli, just add the profile upload-manual:
mvn install -f src/docs-manual/pom.xml -P generate-manual,upload-manual
OR use the Jenkins CI job Sakuli_CI_update_documentation
While writing the documentation it is useful to have a live preview. For this you can do the following:
Start the auto-refresh goal of the Asciidoctor-maven-plugin, which re-creates the html pages as soon as there are changes on the file system:
mvn clean install -f src/docs-manual/pom.xml -P generate-manual-watchThen use one of the following methods to serve the documentation locally with an ad-hoc webserver:
python -m SimpleHTTPServer (1)
live-server src/docs-manual/target/generated-docs (2)| 1 | Open a small python adhoc web server on http://127.0.0.1:8000 (manual refresh) |
| 2 | Install and open the NPM based "live-server" on http://127.0.0.1:8080; will refresh the broewser window on every page recreation. |
Currently there is no fully automated way between the documented Sakuli API in docs/manual/testdefinition/sakuli-api.md and the final docs/manual/testdefinition/sakuli-api.adoc .
The following steps have to be executed:
1) Generate the sakuli-api.md file
Run the maven markdown generation build:
mvn install -f src/docs-sakuli-api/pom.xml -P generate-markdownThe markdown file will be generated under: docs/manual/testdefinition/sakuli-api.md
2) Convert to AsciiDoc
pandoc -s -S sakuli-api.md -t asciidoc -o sakuli-api.adoc
3) Copy & paste the changed content to one of matching the files and maybe adjust heading level to .Class.method():
$ ls docs/manual/testdefinition/sakuli-api*.adoc
docs/manual/testdefinition/sakuli-api.adoc
docs/manual/testdefinition/sakuli-api-application.adoc
docs/manual/testdefinition/sakuli-api-environment.adoc
docs/manual/testdefinition/sakuli-api-key.adoc
docs/manual/testdefinition/sakuli-api-logger.adoc
docs/manual/testdefinition/sakuli-api-mouse-button.adoc
docs/manual/testdefinition/sakuli-api-region.adoc
docs/manual/testdefinition/sakuli-api-testcase.adocReplace GitHub issues #999 numbers with links:
Search Regex:
#(\d+)Replace expression:
https://github.com/ConSol/sakuli/issues/$1[#$1]1.5.5. sikulix-supplemental package
| Only for Linux Operating Systems! |
The current build libVisionProxy.so is already included in the fork toschneck/SikuliX-2014 and the following maven dependency:
 <dependency>
     <groupId>com.sikulix</groupId>
     <artifactId>sikulixapi-complete</artifactId>
     <version>1.1.990/version> (1)
</dependency>| 1 | Version can be newer, but with prefix 1.1.99 |
-
Download under SikuliX-2014/Setup/SikuliX-1.1.0-Beta-Supplemental-Linux.zip
-
Unzip and read included README
-
Do the following steps.
sudo apt-get install libcv-dev

sudo apt-get install libtesseract-dev

./ubuntu14_openCV_symbolic_links.sh

./makeVisionProxy-
replace the
libVisionProxy.sofile
3. Publications
03/2018: Pressemitteilung: Continentale überwacht Unternehmensapplikationen mit Consol-Lösung Sakuli
04/2017: OBJEKTspektrum: End-2-End-UI-Tests mit Sakuli in Container-Umgebungen - "Time-to-Test" im Griff (Tobias Schneck, Simon Meggle)
03/2017: JAXenter: End-2-End-Testing und -Monitoring im Container-Zeitalter (Tobias Schneck)
01/2017: Java aktuell: Automatisiertes Testen in Zeiten von Microservices (Christoph Deppisch / Tobias Schneck)
10/2016: Informatik Aktuell: Software-Test im Container: So können Sie Graphical User Interfaces mit Docker und Sakuli testen (Tobias Schneck)
10/2016: ConSol Labs: Containerized UI-Tests in Java with Sakuli and Docker (Tobias Schneck)
10/2016: ConSol Labs: Sakuli EndToEnd Tests mit Android (Philip Griesbacher)
8/2016: heise Developer: Testautomatisierung in Zeiten von Continuous Delivery (Christoph Deppisch / Tobias Schneck)
2/2016: IT Administrator: "Den Anwender simuliert" (Simon Meggle)
2/2015: IT Administrator: End2End-Monitoring mit dem Open Source-Tool Sakuli (Simon Meggle)
4. Events
September 10, 2018: SwanseaCon 2018 (Tobias Schneck)
→ Talk: UI-Testing - Selenium? Rich-Clients? Containers?
July 18, 2018: Lightweight Java User Group München (Tobias Schneck)
→ Talk: OpenShift-Build-Pipelines: Build → Test → Run!
July 5, 2018: Java Forum Stuttgart (Tobias Schneck)
→ Talk: OpenShift-Build-Pipelines: Build → Test → Run!
June 7, 2018: Meetup of Java User Group Thüringen (Tobias Schneck)
→ Slides: OpenShift-Build-Pipelines: Build → Test → Run!
→ Demo Code: ![]() toschneck/openshift-example-bakery-ci-pipeline
toschneck/openshift-example-bakery-ci-pipeline
→ Video: ![]() https://www.youtube.com/watch?v=8Gwem76OxlA
https://www.youtube.com/watch?v=8Gwem76OxlA
April 24, 2018: APEX Connect 2018 (Tobias Schneck)
→ Slides: UI-Testing - Selenium? Rich-Clients? Containers?
→ Demo Code: ![]() ConSol/sakuli-examples/java-selenium-example
ConSol/sakuli-examples/java-selenium-example
August 9, 2017: Monitoring Workshop 2017: Sakuli - Durchmarsch und Skalierungsmöglichkeiten (Simon Meggle)
→ Slides: Sakuli - Skalierungsmöglichkeiten (Windows / OpenShift / Kubernetes)
July 11, 2017: ConSol/Redhat OpenShift Day - everything Continuous (Tobias Schneck)
→ Slides: Continuous Testing: Integration- und UI-Testing mit OpenShift-Build-Pipelines
→ Demo Code: ![]() toschneck/openshift-example-bakery-ci-pipeline
toschneck/openshift-example-bakery-ci-pipeline
May 4, 2017: Check_MK Conference 2017 (Hardy Düttmann, ITeRATIO)
→ Slides: End-To-End-Monitoring with Check_MK
→ Video: YouTube: Hardy Düttmann | End-To-End-Monitoring with Check_MK
April 27, 2017: Stuttgarter Test-Tage, Stuttgart (Tobias Schneck)
→ Slides: Testing - Selenium? Rich-Clients? Containers?
January 30 - February 3, 2017: OOP 2017, Munich (Tobias Schneck)
January 19, 2017: Agile Testing Meetup - Testen im Zeitalter von Containern, Munich (Tobias Schneck)
→ Slides: Containerized End-2-End-Testing
November 16, 2016: ContainerConf 2016, Mannheim (Tobias Schneck)
November 3, 2016: Software QS-Tag 2016, Nuremberg (Tobias Schneck)
September 30, 2016: JUG Saxony Day, Dresden (Tobias Schneck)
→ Slides: Containerized End-2-End-Testing (German)
August 31, 2016: Herbstcampus 2016, Nuremberg (Tobias Schneck)
July 25, 2016: JUG München (Tobias Schneck)
June 27, 2016 Meetup during the ContainerDays, Hamburg (Tobias Schneck)
→ Slides: Containerized End-2-End-Testing
March 8-10, 2016: JavaLand, Brühl (Tobias Schneck)
March 3, 2016: Allianz Arena München (Simon Meggle)
March 1, 2016: Icinga Camp, Berlin (Simon Meggle)
January 26, 2016: Linux-Stamtisch München (Tobias Schneck)
October 24, 2015: Ubucon Berlin (Simon Meggle)
October 13, 2015: Testing & Integration Day, Allianz Arena Munich (Tobias Schneck)
June 22, 2015: Agile Testing Munich (Tobias Schneck)
May 14, 2015: OpenTechSummit (Simon Meggle)
March 28, 2015: LinuxTag Augsburg (Simon Meggle)
2014: ConSol Internal DevDay (Tobias Schneck)
→ Slides: End-to-end testing for web sites and common UIs with full Nagios integration
5. Media
last updated: 12.2017
Shows how to use Sakuli, Citrus in OpenShift build pipelines.
Episode 9 of the ConSol Monitoring Minutes shows the main features of Sakuli in 15 minutes. The machine used in this video is an instance of our demo appliance.
6. Change Log
-
Merge PR Sakuli OpenShift Source-2-Image (S2I) Build from Sven Hettwer (#296)
-
Add methods to read environment variables and property values (#251):
-
Improve error message if AES algorithm is not possible due to missing Java Cryptography Extension (#277, Invalid Key Exception in AES)
-
Fix Application.open(): won’t fail if application could not started and improve error message (#264)
-
-
Fix calculation of JVM_HEAP_XMX with to high count of cgroup memory limit in bytes (#280)
-
Add default JVM options
-XX:+UseCGroupMemoryLimitForHeapfor optimized jvm runtime in Docker (#291) -
Use version
1.2.2of Docker headless VNC image due to hanging vnc handshake if container is offline (ConSol/docker-headless-vnc-container #50) -
Optimize memory usage of Firefox and Chrome (#276)
-
Add missing lsb-release package to Ubuntu image
-
-
Kubernetes and OpenShift Support (#258):
-
Update Templates with latest optimizations
-
Add
KUBERNETES_RUN_MODEenvironment variable to have better Job Config support
-
-
Fix drag and drop won’t work on every native desktop (#292)
-
Revert (#276 "use private mode of firefox for tests" due to the fact that the SSL certificate handling is worse in this mode (#285)
-
Use PNG as default error screenshot format to improve default compression and make it usable for images in test cases (#174)
-
Increase details of error output at availability check in Linux Util, to show if used tools like
wmctrlis missing (#266, RaiMan/SikuliX-2014 #279) -
Fix method
Region.takeScreenshot(filename),Environment.takeScreenshot(filename)to save the screenshot on a fixed path without timestamp and add methodRegion.takeScreenshotWithTimestamp(filenamePostfix, optFolderPath, optFormat), `Environment.takeScreenshotWithTimestamp(filenamePostfix, optFolderPath, optFormat)(#263) -
Add Encryption Mode
environmentCipher with masterkey setup as default (#197) -
Add environment variable
SAKULI_ROOTto Windows / Linux installer (#191) -
Add automatic parsing from dashed environment vars, see Property loading mechanism (#238)
-
Add Mac compatible
sakulibinary to installer (#298, ConSol/sakuli-go-wrapper/ #4 -
Update Sakuli Examples:
-
Add Sakuli Tutorial - Docker based E2E application monitoring
-
Update first steps tutorial
-
Add
example_icewmfor icewm docker containers (#241) -
Add validation of Sahi logo to
example_icewm,example_xfcedocker containers -
Update
example_windows8
-
-
Update Documentation:
-
Update README page and change documentation to github-pages/ascii-doc setup, new official Documentation: http://consol.github.io/sakuli/ (#243)
-
Provide the latest documentation link (#283): http://consol.github.io/sakuli/latest
-
How to use Sahi and webpack-dev-server (#295)
-
How to fix chromium crashes with high VNC resolution (ConSol/docker-headless-vnc-container #53)
-
Add usage of OpenJDK in case of
InvalidKeyExceptionto gearman encryption documentation (#91) -
Add documentation for automatically importing firefox ssl certificates in docker (#285)
-
Improve documentation of Property loading mechanism: add "Property References" to documentation (#261)
-
Update Events and Publications
-
-
-
Fixed screenshot event handler parameter (#294)
-
Add Sakuli setup for different OMD setups with make/Ansible (#257)
-
Replaced all "demo" occurrences with placeholder and modify Ansible template (#293)
-
Removed Grafana template; distributed by Histou project Griesbacher/histou
-
Thruk SSI: Add png/jpg support (#208)
-
Fix linefeed problem under windows for Check_MK template engine (#176)
-
Moved OMD setup Ansible playbooks into separate folder omd
-
Documentation: Gearman forwarder, OMD Docker image, Gearman proxy (optional), Screenshot history, Grafana graphs, Check_MK.
-
-
OpenShift and enhanced Sakuli Docker Images support (#218):
-
add different OpenShift templates under
docker/openshift:-
Docker Image Build from sources
-
Deployment Config for continuous test running
-
Job Config for onetime execution
-
POD run config for single execution only
-
GitRepoVolumeSource example configuration for a ready to use git-based testsuites execution
-
-
change startup to a non-root-user startup procedure
-
add Sakuli Images based on IceWM UI
-
add non-root java DSL based Docker images
-
add correct JVM heap sizing on startup due to Docker cgroups constraints
-
move to startup scripts to a more generic path:
/dockerstartup -
fix some Firefox startup issues
-
Use OpenJDK for docker images
-
Kubernetes support with examples under
docker/kubernetes(#239) -
skip vnc startup on docker containers on sakuli commands:
-help,-version,encrypt(#198) -
first step to improve exception message output (#37)
-
fix description of properties loading mechanism (#211)
-
fix some problems of the Gearman caching (#225):
-
add error handling for RuntimeExceptions to Gearman client
-
print out Exception class if no message is provided
-
add support for checkMK monitoring system, based on twig template based file output (#176)
-
Improved Sakuli event handler: hide screenshots after 30 days, delete after 60; adapted Thruk SSI (#236)
-
fix wrong exit code of go-starter
sakuli -version -
clean up ordering of gearman and icinga2 properties in
sakuli-default.propertiesand documentation (#188) -
fix Sahi startup errors with retry mechanism (#219)
-
merge pull request #220 from martku/patch-1
-
change dependency
sakuli-go-wrapperto fixed version -
smaller bugfixes and documentation update
-
issue #210: upgrade Sahi to version
5.1due to Sahi compatibility issue with Chrome 53+ andregion._click() -
fix docker images
-
Chrome don’t startup under CentOS Docker image, see also https://github.com/ConSol/docker-headless-vnc-container/issues/2
-
XFCE window manager don’t startup under CentOS Docker image, see also https://github.com/ConSol/docker-headless-vnc-container/issues/4
-
use
SAKULI_VERSIONARG in Dockerfiles, to have more flexible to build images
-
-
issue #215 add java-based Sakuli Docker images
-
issue #91: add AES encryption option for Gearman forwarder module
-
add Java JCE extension to Docker images
-
-
fix #216: set
dom.storage.enabledto true in firefox pref.js -
add Sakuli-Example page https://github.com/ConSol/sakuli-examples
-
fix #177 add description for the javaDSL and update the documentation
-
issue #205: use maven-jgitflow for releases and branching
-
fix #190: fix Docker centos image: use tagged version
consol/centos-xfce-vnc:1.0.1 -
Use consistent file naming and fix broken links in docs
-
fix example_xfce for new centos 7 version
-
First step tutorial and https documentation. Fixes #161, fixes #53 partially.
-
fix #32 highlight function on linux does not work (in underlying SikuliX library)
-
close #102 add method
dragAndDropToto theRegionobject -
Changed order of properties.
-
Improve example_xfce:
-
Replaced calculator screenshot by a small one.
-
add mouse move action to example_xfce
-
-
close #139 remove PDF als download content type, to enable to use the browser PDF viewer
-
close #139 add start chrome + firefox maximised (firefox have to hold the file
localstore.rdfin his profile folder) -
close #168 add reboot hint if user install the package
Windows environement changes -
update the installer translation to the recommend one from https://github.com/izpack/izpack/tree/master/izpack-core/src/main/resources/com/izforge/izpack/bin/langpacks/installer
-
fix maven snapshot repository path of the
labs.consol.demaven-repository '''
-
Move to a new binary starter for Windows and Linux (sakuli.exe / sakuli), #150:
-
modify VNC documentation to flag
-preHookandpostHook -
change documentation and docker scripts to new starter syntax
sakuli run TEST_SUITE [OPTION] -
add binaries
sakuliandsakuli.exefrom repo https://github.com/ConSol/sakuli-go-wrapper -
remove
sakuli.sh/sakuli.bat -
Change syntax from the new starter to:
-
Usage: sakuli[.exe] COMMAND ARGUMENT [OPTIONS]

   sakuli -help
   sakuli -version
   sakuli run <sakuli suite path> [OPTIONS]
   sakuli encrypt <secret> [OPTIONS]

Commands:
 run <sakuli suite path>
 encrypt <secret>

Options:
 -loop <seconds> Loop this suite, wait n seconds between
 executions, 0 means no loops (default: 0)
 -javaHome <folder> Java bin dir (overwrites PATH)
 -javaOption <java option> JVM option parameter, e.g. '-agentlib:…'
 -preHook <programpath> A program which will be executed before a
 suite run (can be added multiple times)
 -postHook <programpath> A program which will be executed after a
 suite run (can be added multiple times)
 -D <JVM option> JVM option to set a property at runtime,
 overwrites file based properties
 -browser <browser> Browser for the test execution
 (default: Firefox)
 -interface <interface> Network interface card name, used by
 command 'encrypt' as salt
 -sahiHome <folder> Sahi installation folder
 -version Version info
 -help This help text
-
Add new forwarder module
Icinga2, see #145:-
Rest client to send the results to Icinga2 API
-
new property
sakuli.forwarder.gearman.nagios.template.suite.summary.maxLengthto cut to long output due to error messages -
introduce
sakuli.forwarder.icinga2properties // consolidatesakuli.forwarder.databaseproperties
-
-
Separate examples for Window 7 and Windows 8
-
close #118 improved output of nagios messages
-
close #151 add a bunch of Windows registry settings to the installer, to improve the test stability. Disables graphical effects, screen saver and error reporting.
-
fix #135 Environment similarity:
-
Extract constant Environment#DEFAULT_SIMILARITY to
sakuli-default.propertiesassakuli.environment.similarity.default: -
Set default similarity to
0.99 -
close #163: add clean up method, which release all modifier keys before a test case will startet and at the teardown phase
-
fix #162: release keys didn’t work correctly => update to sikulix version 1.1.998 and add function "run as admin" to dev suites
-
add an Around Aspect to
net.sf.sahi.util.Utils.getCommandTokensto fix parsing errors during calling native commands, see http://community.sahipro.com/forums/discussion/8552/sahi-os-5-0-and-chrome-user-data-dir-containing-spaces-not-working -
Documentation how to solve increasing sahi profile folders. Closes #164.
-
reduce wait times for example test suites
-
fix
firefox_portableexecutable path inbrowser.xml: replace it with $userDir relativ path -
consolidate forwarder properties: adjust
jdbc.properties tosakuli.forwarder.database.properties -
improve logging of database receiver
-
fix #153
sakuli.log.maxAgeerror, is smaller then 1 -
check_sakuli.php: added wrapper for function declarations to fix errors in PNP basket (cannot redefine…)
-
cl: update installer with special cl installer preselected options
-
close #155: add environment variables to –version output
-
fix for #158: linux installer correct firefox var to
MOZ_DISABLE_OOP_PLUGINS -
Added ff_purge_profile.bat to helper scripts (delete sqlite file before each run)
-
close #155: add -version parameter to Sakuli starter (sakuli / sakuli.exe)
-
close #153 log data rotation
-
add a property sakuli.log.maxAge in days (default 14 days)
-
deletes all files that are older than the defined days in the folder
sakuli.log.folder
-
-
add setting some firefox variables (
MOZ_DISABLE_OOP_PLUGINS,MOZ_DISABLE_AUTO_SAFE_MODE,MOZ_DISABLE_SAFE_MODE_KEY) for UI testing to the installer, see #158. -
Executable JAR installer
sakuli-vX.X.X-installer.jar, downloadable via https://labs.consol.de/sakuli/install, see #24. -
The installer contains a complete Sakuli setup and the following options:
-
will set/update the environment variable
SAKULI_HOMEto this version. -
will set/update the environment to a recommend UI testing configuration. In examples disables the Firefox safe.
-
will install one example test suite per OS which will help you to test and understand Sakuli.
-
will install Firefox Portable, which can be used exclusively for Sakuli Tests.
-
will install QRes, a open source screen mode changer (Windows only)
-
-
modify docker images to new headless linux installer
-
custom sahi
browser_types.xmlfor firefox, firefox_portable, chrome -
Property
sikuli.typeDelaynow also set theRobotDesktop.stdAutoDelayto make the delay more effective, default is0.0, #154. -
issue #149 add
Application.kill()to force closeting an app without "save prompts" -
issue #94: disable highlighting in case of an exception
-
docker container: modify test suite permissions after test run in
sakuli_startup.sh -
Improve typing handling #154:
-
typing all special characters via unicode keyboard shortcuts
-
keyboard mapping only contains alphanumeric characters, so region.type now will work with all local keyboards, because of typing special characters via UFT-8
-
Mac’s currently not supports directly typing UFT-8 keys, by default see https://en.wikipedia.org/wiki/Unicode_input#In_Mac_OS . Unicode typing will only be used if correct keyboard is activated.
-
-
improve takeScreenshot: now also can handle with absolute paths
-
rename
Region.takeScreenShottoRegion.takeScreenshot -
fix #107: Fix Sikuli
LinuxUtilImplementation of: -
Focus application
-
Closing application
-
Make output and control of native commands more flexible
-
include Sahi base installation to java DSL, #24
-
modify properties, so that all default values are included
-
add check that
testsuite.idwill be defined at least -
allow to write test without explicit image folder path, to enable java tests
-
-
added docker-container
sakuli-omd-labs-ubuntufor a Sakuli preconfigered OMD -
sakuli.bat: added exitcode, fixes bug #128 (Errors with paths containing spaces) -
fix #142: remove some not valid windows escape chars like
'or"to prevent a InvalidPathException in SakuliStarter arguments -
docker-containers.md: Added hint for boot2docker users.
-
check_sakuli.php: fixed #132 (suite runtime)
-
close #103: make docker-container able to overwrite the running testsuite in
docker runCMDarguments -
make the
sakuli.shcommand line parameters usable indocker runCMDarguments, like for exampledocker run consol/sakuli-centos-xfce '--run $SAKULI_TEST_SUITE --browser chrome' -
Added documentation how to configure HTTPS in Sahi. #53
-
Rename README.md to index.md in case of https://readthedocs.org/projects/sakuli/
-
headless-linux.md: Added crontab documentation.
-
fix #116 wrong comma in gearman output
-
sakuli.bat: added SAKULI_HOME fallback if env var not set #124
-
sakuli.bat: added javahome parameter, added JVM option passing #122
-
update sikuliX version to 1.1.993
-
Merge branch 'dev-v0.4' into dev
-
sakuli.sh: JVM options (-D) allowed. #75
-
Improve Nagios monitoring integration:
-
check_sakuli.json: added first JSON template for grafana
-
check_sakuli.php: logfile destination now contains hostname and service description
-
check_sakuli.php: removed UNIT var. Everything is in seconds.
-
CheckMySQLHealthSakuli.pm: no perfdata on stale result (fixes #120), small output improvements
-
check_sakuli.php: fixed bug, Suite graph did not have correct value.
-
CheckMySQLHealthSakuli.pm: adjust perfdata output as on gearman output (closes #106)
-
Adapted mysql_purge.sh to new table names, added parameter. #10
-
-
Merge pull request #108 from sgbeal/master
-
Add Docker container
consol/sakuli-ubuntu-xfceandconsol/sakuli-centos-xfce, see #103:-
add return value to sakuli_startup.sh and add exit state to sakuli.sh script
-
HTML5-VNC client (noVNC) enabled containers
-
docker-compose.ymlexample for parallel test-execution -
add example_xfce_test for the docker-containers
-
-
fix PrioritizedServiceComparator so now 2 service with the same priority will also accepted
-
close #49 add Environment#runCommand method
-
add
takeScreenshot()method to Region object to get the current region as screenshot -
Merge pull request #99 from c-kr/dev
-
close #46 - add read the docs links and badge
-
improve the way to include additional image folders, #96:
-
add method
addImagePathsto the TestCase functions -
add variable '$testSuiteFolder' as global variable to JavaScript testcase.js for a more strait filepath handling
-
-
add optional parameter 'silent' to Application.close function to suppress exceptions
-
add OS identification functions 'isWindows', 'isLinux', 'getOsIdentifier' to Environment class
-
close #98 add source and javadoc files to maven build artifacts (on release-builds)
-
close #92 exclude Base64 String in log output
-
fix #95 state of suite/case/step is always 'OK', if no error occurs and warning + critical time is 0
-
close #81 Expanded color array in PHP template and change numbering scheme for cases and steps to 3-digits
-
close #74 extract logging functions to separate javascript class Logger
-
close #70 rename sakuli.screenbased.* properties to sikuli.*
-
close #42 rename Application#closeApp to Application#close in javascript
-
close #27 modify 'non screenshot exception handling' // add TestCaseAction#throwException(message,screenshot)
-
add mysql Dockefile for sakuli database forwarder setup, see #10
-
close #10 rename table name from sahi to sakuli
-
rewritten documentation for sahi delay.
-
close #79 rename property
sahi.proxy.requestDelayOnSikuliInput.delayTime->sahi.proxy.onSikuliInput.delayPerKeyandsahi.proxy.requestDelayOnSikuliInput.refreshTime->sahi.proxy.onSikuliInput.delayBeforeInput -
finish JavaDSL to be fully supported of all Sakuli features also in Java
-
fix #11 custom sahi-port handling (use different ports for sahi-proxy)
-
close #7 update sahi-jar verison to sahi 5.0
-
rename sakuli.autoHighlight.seconds to sakuli.highlight.seconds
-
Documentation
-
fix #72 modfy testsuite.suite file writer - just overwrite the file if any blank lines are inside
-
add Environment#resetSimilarity()
-
fix api generation script
-
improve error message for invalid paths in 'testsuite.suite' file
-
add support for more screenshot paterns - .jpg, .JPG, .png, .PNG
-
#52 rename sakuli.receiver properties to sakuli.forwarder
-
fix #71 add the resumeOnException flag to some missing handleException calls
-
refactor exception handling // improve exception handling for javaDSL
-
refactor dependency management // extract bin, config, libs to new common 'module'
-
#13 rename screeshot property to 'sakuli.screenshot.onError'
-
#20 enable testCase.endOfStep("name")
-
#66 add -b, –browser into sakuli.jar/sakuli.sh
-
#64 Added Linux (sakuli.sh) and Windows (sakuli.bat) starter.
-
#55 low-level-mouse functions, add mouseMove(), mouseUp(mouseButton), mouseDown(mouseButton)
-
#60 refactor command line options
-
#62 move log-level settings to sakuli.properties
-
#60 introduce a 'sakuli-default.properties' file to move the sakuli.properties to the test suite root
-
#60 introduce new file system structure
-
add #106 add warn/crit thresholds as perfdata values for the Gearman results
-
Adaption for 3-digit case/step ids
-
PNP template with unknown perfdata support
-
added TICKer for incomplete data, warn/crit states
-
Changed color scheme
-
-
add #77 separate error state to identify the affected TestCaseStep on errors:
-
modify SakuliExceptionHandler to find current Step and enable adding exception to the current step
-
add error message output for exceptions in TestCaseSteps
-
-
add #31 determine all not executed TestCaseSteps, to secure that the nagios performance graphs are displayed correctly:
-
introduce new TestCaseStepState INIT
-
modify nagios RRD performance data output for initialized and not started steps to typ 'unknown'
-
add caching mechanism the step information for not started steps implementation
-
call write cached steps information on every 'not error' result
-
gearman forward: write unknown values to every result line if a suite, case or step entity has finished with errors or have even not been called
-
database forwarder: write NULL instead of '0' at warning and critical times
-
-
add
takeScreenshot()method to Region object to get the current region as screenshot -
add troubleshooting for Nullpointer at
new Application("..").getRegion()to documentation -
fix PrioritizedServiceComparator so now 2 service with the same priority will also accepted
-
add jenkins-build badge
-
add #46 add dev-v0.4 read-the-docs & read-the-docs badge
-
add #96 add variable '$testSuiteFolder' fore more strait forward import handling
-
fix dependency path of javafx for java7
-
close #92 exclude Base64 String in log output
-
modify documentation of warning / critical times
-
add testcase.endOfStep function without warning time
-
add #81 change numbering scheme for cases and steps to always three digits to expanded color array in PHP template
-
fix bug: test suite has stat 'OK' instead of 'RUNNING' during the execution
-
improve logging for more information, see Sakuli - Manual
-
clearify the sakuli encryption functionality - modify documentation and improve the implementation, see #5
-
refactor data structure, see #60
-
extract
sakuli.propertiesto the test suits folder and introduce asakuli-default.propertiesfile.
-
add function
getLastUrl()to theTestCasefunctions, to enable URL based test case handling. -
uncomment some receiver properties in
sakuli.propertiesto make the property overriding more generic. -
fix bug that
new Region("image_pattern.png").click();always clicks on the center of the screen -
introduce experimental JAVA-DSL as new module
-
add
sleep()method to Region -
keyUp(…),keyDown(…)andwrite(…)method to the Region and Environment functions to have more control over the typing.
-
add method to set an delay for the sahi-status-requests, so that no key or click events will be lost by the JavaScript engine of the Browser, see new entry in
sakuli.properties:
 # Specifies the interval in milliseconds, what should be applied when sikuli based input
 # (like typing or clicking) is interacting with a Browser website.
 # This setting only make sense, if your test does NOT use Sahi functions for controlling the
 # testing website. This setting will prevent the test for losing some key or click events
 # in case of blocking, synchronous sahi-interal state requests.
 #
 #sahi.proxy.requestDelayOnSikuliInput.delayTime=500
 #
 ### refresh time for the sahi proxy to set the delay time
 #sahi.proxy.requestDelayOnSikuliInput.refreshTime
-
update release build so that the zipped-release files can be downloaded from http://labs.consol.de/sakuli/install.
-
remove zipped-release files from git repository
-
documentation update
-
build automatic sakuli-api documentation
-
clean up repository
-
introduce some maven-profiles for individual usage
-
change
.incand.sahfile ending to.js -
fixed some typos
-
set up jenkins build
-
centralized the configuration of properties files:
-
include/sakuli.propertiesnow contains all possible configuration options for Sakuli. These are the _default values for all tests -
<test-suite>/testsuite.propertiescontains the test suite specific configuration options. The only mandatory property here is the test suite identifiertestsuite.id. All other properties are optional. -
Options set in
testsuite.propertieswill override the default settings insakuli.properties
-
-
Proxy configuration options can now be set in
sakuli.properties(defaults) ortestsuite.properties(suite specific) -
Re-organized the folder structure of
sakuli-zipped-release-vX.X.X.zipand source code directory. -
Extended logging with more configuration possibilities (SLF4J with underlying logback-Logging)
-
Consolidation of the applicationContext files
-
Remove the program-based setting of system properties.
-
The possibility to disable the "encryption interface" with new property
sakuli.encryption.interface.testmode=true -
Added a separate module for integration testing
-
Bugfixing and extended unit tests
-
documentation update
-
Added a separate module for integration testing.
-
Bugfixing and extended unit tests.
-
Update the documentation
-
Introducing receiver concept: For each receiver the results will be sent. Currently Supported JDBC-Databases and the Gearman receiver.
-
Gearman receiver: sent all data directly to your OMD/Nagios distribution. Currently it is missing that the screenshots will also be transferred. This will be fixed in the next version
-
Bugfixing in maven build, exception handling, testcase ids and added some more unit tests
7. Support
You want to use Sakuli in your project and need on-site help from our Sakuli experts? You’ve got a specific question about Sakuli implementation, or you’re just looking for some guidelines and best practices in writing test cases or setting up your infrastructure? Please feel free to contact us! We will be glad to help you achieve your goals and a stable software application.
The Sakuli developers are the same that deal with high complex enterprise applications and cloud-based technology at our customers every day. So if you need special extensions or new features, do not hesitate to contact us! We would like to help you!
Also if you need Sakuli patches or fast access to special programming from the Sakuli development team contact us!
7.1. Training
Sakuli grew out of multiple software development and monitoring projects at ConSol. The Sakuli team can assist you not only in testing your enterprise applications but also in develop, operate and monitor those. If you looking for expert assistance regardless of which part - talk to us!
More information you also find under our project homepage: www.sakuli.org
7.2. More Resources
-
Project Homepage: www.sakuli.org
-
Blog Entries: labs.consol.de/sakuli
-
Tutorials & Examples: github.com/ConSol/sakuli-examples
7.3. Contact
The Sakuli team members will listen on the following channels:
-
E-mail: sakuli@consol.de
-
GitHub issues: github.com/ConSol/sakuli/issues/new
-
Twitter: sakuli_e2e
The company behind Sakuli:
![]()
ConSol Software GmbH
Franziskanerstr. 38
D-81669 München
Tel. +49-89-45841-100
Fax +49-89-45841-111
E-Mail: info@consol.de
Website: www.consol.de